I spent three hours last Tuesday watching a kid on a gimbal struggle with a high-end cinema camera in direct midday sun, staring at his monitor like it was a magic trick gone wrong. He was trying to fix a blown-out, choppy-looking image by cranking his shutter speed into the stratosphere, completely oblivious to the fact that he was effectively killing the motion blur that makes video look like video. He thought he needed a new sensor or a faster lens, but the truth is much simpler: he didn’t understand how ND filters are used to actually control the physics of the scene. You don’t buy glass to add “features”; you buy it because the sun is currently making it impossible to shoot the depth of field you actually planned for.
I’m not here to sell you on the latest magnetic filter kits or some overpriced brand name that promises “cinematic magic” in a box. My goal is to strip away the gear-lust and talk about the actual mechanics of light, aperture, and shutter angle. I’ll show you how to use these tools to maintain your creative intent when the environment refuses to cooperate, ensuring you spend less time fighting your settings and more time actually capturing the shot.
The Problem of Light Why You Actually Need Nd Filters
The problem isn’t that your sensor is “too sensitive”; the problem is that the sun doesn’t care about your shutter angle. If you’re shooting outdoors in high noon light and you try to keep that natural, cinematic motion blur by locking your shutter speed, you’re going to end up with an image that is blown out and unusable. You can try to stop it down with a tiny aperture, but then you’ve traded your depth of field for a deep-focus mess that looks like a cheap phone video.
At its core, reducing light intensity for video is about reclaiming your creative choices. An ND filter acts like sunglasses for your lens, allowing you to keep your aperture wide and your shutter speed where it needs to be to maintain a sense of motion. It’s the difference between a scene that feels organic and one that feels clinical and jittery. Whether you’re looking at variable ND filters vs fixed ND for different levels of control, the goal remains the same: you aren’t just “dimming the light,” you are protecting the physics of the image so the camera can actually do its job.
Reducing Light Intensity for Video Without Sacrificing the Soul

The mistake I see most often isn’t a lack of gear, but a misunderstanding of physics. People think they’re just “darkening the image,” but what you’re actually doing is reducing light intensity for video to protect your shutter angle. If you’re shooting at 24fps, you want a shutter speed around 1/50th. In bright midday sun, your sensor is screaming for mercy, and if you try to compensate by cranking that shutter speed up to 1/1000th just to keep the exposure sane, you’ll end up with footage that looks jittery, hyper-real, and frankly, broken. It loses that organic, cinematic cadence we’re all chasing.
This is where the distinction between variable ND filters vs fixed ND comes into play. A fixed ND is a predictable, reliable tool—it’s a constant density that doesn’t mess with your color science or introduce weird X-patterns. A variable filter is convenient, sure, but it’s a compromise. If you want to maintain the integrity of the frame, you use the filter to keep your shutter where it belongs, allowing the motion to look natural rather than staccato. You aren’t just managing brightness; you’re preserving the texture of movement.
Decoding the Math Nd Filter Strength Explained Simply
Look, you don’t need a degree in physics to understand stops, but you do need to stop treating these numbers like a suggestion. When we talk about ND filter strength explained in a practical sense, we’re really just talking about how much of the world we’re willing to dim so we can keep our shutter speed where it belongs. If you’re shooting video, you’re likely chasing that 180-degree shutter rule to keep your motion looking natural. If the sun is screaming at you and you don’t have enough density, you’ll end up with that jittery, strobing mess that looks like a cheap soap opera.
Most of the gear you’ll see in shops uses “stops” as the metric. A 2-stop filter is a light breeze; a 10-stop filter is a blackout curtain. You’ll often find yourself debating variable ND filters vs fixed ND when you’re out in the field. Variable filters are convenient—you twist them like a volume knob—but they can get weird and introduce color shifts if you push them too hard. Fixed filters are predictable, which is usually what I want when the light is already being difficult.
The Great Debate Variable Nd Filters vs Fixed Nd
I’ve sat in enough production meetings to know that this is where the gear-talk gets loud and the actual logic gets thin. On one side, you have the proponents of variable ND filters, usually the solo shooters or the run-and-gun documentary crews who need to react to a cloud passing over the sun in half a second. There is no denying the convenience; being able to twist a ring to manage controlling light in bright conditions is a godsend when you’re working a wedding or a fast-moving street shoot. But convenience has a tax. If you’re using a cheap variable, you’re going to see color shifts or, worse, that dreaded X-pattern across your frame when you push the density too far.
Then there are the purists, the ones who swear by fixed NDs. And honestly, I’m usually in their camp. When I’m setting up a controlled scene, I want to know exactly what the light is doing. A fixed filter gives you a predictable, uniform reduction in light across the entire sensor. If you’re serious about variable ND filters vs fixed ND for high-end work, remember that a fixed filter is a tool of precision, while a variable is a tool of speed. One is for when you have time to think; the other is for when the light won’t wait for you to.
Mastering Motion Blur in Landscape Photography and Beyond
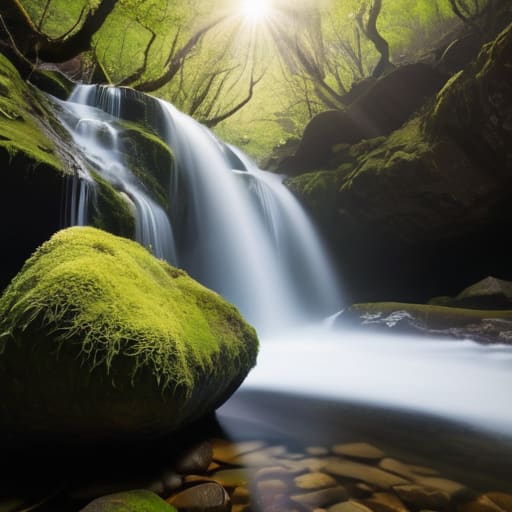
If you’ve spent any time staring at a waterfall that looks like a chaotic, frozen mess of white spray, you’ve felt the frustration. The shutter speed is too fast because the sun is too bright, and you’re stuck with a snapshot when you wanted a painting. This is where we move away from video and into the realm of motion blur in landscape photography. You aren’t just trying to keep the sensor from blowing out; you are intentionally slowing the shutter down to let time bleed into the frame.
To get that silky, ethereal look, you have to be able to keep the shutter open for seconds—sometimes minutes—without turning your image into a white void. Using an ND filter allows you to manage that massive influx of photons, effectively tricking the camera into thinking it’s twilight when it’s actually high noon. Whether you’re using long exposure photography techniques to smooth out a restless ocean or to soften the movement of clouds, the filter is the only thing standing between a professional, moody composition and a ruined, overexposed mess. It’s about control, not just darkness.
Practical Realities of How Nd Filters Are Used in the Field
In the field, you don’t use an ND filter because you read about it in a manual; you use it because the sun is being a bastard and your aperture is wide open. I’ve been on shoots where the light was so aggressive that even at the lowest ISO, the sensor was screaming for mercy. In those moments, you aren’t just “adjusting exposure”—you are controlling light in bright conditions to maintain the depth of field you actually planned for in pre-production. If you’re shooting a handheld documentary piece and the light shifts as you move from shade to sun, that’s when the debate of variable ND filters vs fixed ND becomes a real-world headache rather than a forum argument.
Beyond video, I see people struggle with the same physics when they try to capture water or clouds. If you want that silky, ethereal look, you’re leaning into long exposure photography techniques that require you to choke the light down significantly. It’s not about making the image “darker”; it’s about buying yourself the time necessary to let the shutter stay open long enough to smooth out the chaos.
Five Ways to Stop Fighting the Sun and Start Using Your ND Filters
- Check your glass before you check your settings. If you’re using a variable ND on a wide-angle lens, watch out for that dreaded X-pattern. It’s a cheap way to ruin a beautiful landscape, and no amount of post-production is going to pull that cross out of your image. If the pattern shows up, swap to a fixed ND or find a different lens.
- Don’t treat your ND filter like a magic wand for exposure; treat it like a tool for shutter speed. If you’re shooting video, your goal isn’t just “not being blown out,” it’s maintaining that 180-degree shutter rule so your motion actually looks like motion and not a jittery mess. Use the filter to get your shutter where it needs to be, then find your exposure from there.
- Test your color shift on a neutral surface before you commit to the whole day. I’ve seen too many newcomers buy a “budget” ND set only to realize halfway through a shoot that their shadows are turning a sickly magenta. If the filter shifts the color temperature too much, you’re just creating more work for a colorist who probably isn’t getting paid enough to fix your mistakes.
- Keep your filters clean, or don’t bother bringing them. A single fingerprint on a high-density ND filter will catch the light and create a hazy, low-contrast mess that looks like you shot through a greasy window. In my experience, a dirty filter is the fastest way to make a $5,000 sensor look like a webcam.
- Learn to work with the light, not against it. Sometimes, instead of cranking a variable ND to its limit and losing contrast, it’s better to move your subject into the shade or use a flag. An ND filter is a tool to manage light, but it isn’t a substitute for understanding where the light is coming from and how it’s hitting your subject.
The Bottom Line
An ND filter isn’t a luxury or a specialized tool; it’s the only way to maintain a shallow depth of field and natural motion blur when the sun decides to cooperate with your exposure.
Stop obsessing over the brand name on the glass and start focusing on the stops; a cheap fixed ND used correctly will always beat a high-end variable filter that turns your footage purple or uneven.
Don’t let the gear dictate the shot—use your filters to protect the look you intended, rather than letting the environment force you into a high shutter speed that makes your footage look like a jittery home movie.
The Real Purpose of the Glass
You don’t buy an ND filter because you want to play with settings; you buy it because the sun is currently making it impossible to shoot the motion you actually want. It’s not about managing exposure—it’s about having the freedom to keep your shutter speed where it belongs so the movement actually looks like life instead of a strobe light.
Gethin Moreau
Beyond the Glass
At the end of the day, an ND filter isn’t some magical accessory that fixes a poorly conceived shot; it is a tool for maintaining the physical integrity of your image. We’ve talked about the math of stops, the headache of variable versus fixed glass, and the necessity of controlling light to preserve that natural motion blur we all crave. Whether you are fighting the midday sun in a desert or trying to keep your shutter angle consistent in a bright studio, the goal remains the same: you are using the filter to keep your exposure settings where they belong so the camera can do its job without you having to compromise on depth of field or frame rate.
I see so many people spending their entire budget on the latest sensor, thinking the tech will solve their problems, only to find themselves stuck with images that look clinical and jittery because they couldn’t manage the ambient light. Don’t let your gear dictate your creativity. Buy a decent set of filters, learn how they interact with your specific lenses, and then get back to the business of seeing. A great image isn’t born from a perfect spec sheet; it’s born from knowing exactly how much light you need to let in, and more importantly, knowing when to shut the door.
