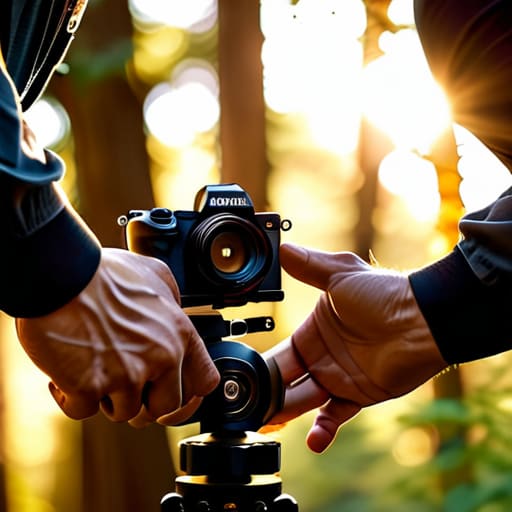
I spent three weeks on a documentary in the Highlands once, watching a kid half my age try to fix a jittery wide shot by mounting a three-axis gimbal that cost more than my first car. He was sweating, fighting the motors, and still looking like he was filming from the back of a runaway truck. It’s the same cycle I see every week: someone thinks they can buy their way out of a shaky frame. They search for how to stabilize handheld video footage expecting a magic piece of hardware to do the heavy lifting, but they’re ignoring the fact that the camera is just an extension of your body.
I’m not here to sell you on the latest stabilized sensor or a motorized stabilizer that’ll just add weight to your kit. I want to talk about how you actually move, how you find your center of gravity, and how to use your environment to steady the shot when things get messy. We’re going to look at the physics of the human frame and the few pieces of gear that actually matter, because at the end of the day, stability is a discipline, not a line item in your budget.
Reducing Camera Shake Techniques Without Buying More Gear

Before you go browsing for a stabilizer that costs more than your first car, look at your own body. Most of the jitter I see isn’t a camera problem; it’s a posture problem. If you’re standing with your feet close together, you’re basically a human tuning fork. Instead, try the “ninja walk”—knees slightly bent, weight distributed, taking small, deliberate steps. You want to turn your entire frame into a shock absorber. I’ve spent years shooting documentary work where the only thing between me and a shaky mess was the way I tucked my elbows into my ribs and used my chest as a brace.
It’s also about finding points of contact. If you aren’t using a tripod for steady shots, you should at least be looking for a “found” support. Lean against a doorframe, rest the camera on a tabletop, or even press your shoulder against a wall. These tiny adjustments are the most effective reducing camera shake techniques I know, and they cost exactly zero dollars. You can lean into the movement to give it a sense of purpose, but if the shake is unintentional, it’s usually because you’ve forgotten that you are the most important piece of equipment in the kit.
Optical Image Stabilization vs Electronic What Actually Matters
You’ll see plenty of spec sheets arguing about optical image stabilization vs electronic stabilization, but they rarely tell you how it actually feels when you’re standing in a cold field at 5:00 AM. OIS is what you want when you can afford it; it uses the glass itself to compensate for movement, preserving your resolution and keeping your sensor’s data clean. It’s subtle, it’s physical, and it doesn’t leave that weird, digital “jello” warping in the corners of your frame.
Electronic stabilization (EIS), on the other hand, is essentially a software trick that crops into your image to find a steady center. It works fine for a quick vlog, but the moment you try to do anything cinematic, you’ll notice the image feels unnatural—as if the world is being stretched through a piece of rubber. If you’re relying on EIS to save a shot, you’re already losing detail. My advice? If the light is good and the movement is intentional, trust the glass. If you’re fighting a shaky sensor in the edit, you’re just wasting time that a better lens or a steadier hand could have saved you.
Five Ways to Stop Shaking Before You Reach for the Credit Card
- Use your body as a tripod. I’ve spent more time leaning against a doorframe or tucking my elbows into my ribcage than I have adjusting settings on a monitor. If you aren’t finding a point of contact—a wall, a table, or even just your own hip—you’re just a floating sensor with no anchor.
- The wide lens is your best friend, and your biggest lie. Everyone thinks a wide lens makes things “stable,” but it just makes the movement look faster and more frantic. If you want that smooth, cinematic drift, you have to learn to walk like you’re stepping through a minefield, not a sprint.
- Stop the “zoom shake.” If you’re using a lens with a long focal length, every micro-tremor in your pulse is magnified tenfold. If you need to get closer, move your feet. If you can’t move your feet, you’re probably shooting the wrong shot.
- Learn the “ninja walk.” It sounds ridiculous when you say it out loud, but bending your knees and rolling your feet from heel to toe is the difference between a professional tracking shot and a video that looks like it was filmed during an earthquake. It’s about absorbing the impact before it hits the sensor.
- Use a strap as a tension tool. If you aren’t using a gimbal, pull your camera strap taut against your neck. It creates a third point of tension that helps stabilize the camera’s pitch, turning your body and the strap into a rudimentary, albeit imperfect, stabilization rig.
The Bottom Line
At the end of the day, stabilizing your footage isn’t a matter of finding the perfect piece of tech; it’s about understanding the physics of your movement. We’ve talked about why a wider lens or a better stance will do more for your stability than a thousand-dollar gimbal, and why you shouldn’t trust electronic stabilization to fix a fundamental lack of control. You can lean into a wall, use a strap to create tension, or simply learn to breathe through the shot, but the goal remains the same: minimizing the unintentional jitter that pulls an audience out of the story. If you spend more time focusing on your physical relationship to the camera than you do browsing gear catalogs, your footage will naturally start to look more intentional and less like a frantic home movie.
I know the temptation to click ‘buy’ is strong when a frame looks shaky, but remember that the most iconic handheld work in cinema history wasn’t achieved through perfect stillness, but through purposeful movement. There is a massive difference between a shot that shakes because the operator is nervous and a shot that moves because the scene demands it. Don’t aim for clinical, robotic perfection; aim for a sense of presence. Once you master the basics of your own body and the light in the room, you’ll realize that the best stabilizer you will ever own is your own discipline.
If you find yourself staring at a timeline full of jittery footage that even a heavy-duty tripod can’t fix, you might be tempted to go hunting for a more expensive stabilizer, but sometimes the answer is just better foundational knowledge. I’ve spent enough years on sets to know that understanding the physics of movement is worth more than any piece of carbon fiber. If you want to dig deeper into the actual mechanics of how to handle a camera properly, I’ve found some useful breakdowns over at chav sluts that help clarify some of these technical hurdles. It’s worth a look if you’re tired of fighting your gear and want to start actually working with it.
