I remember sitting in a dark rental house in South London, staring at a spinning beachball on a screen that cost more than my first car. I was trying to scrub through 8K RAW footage of a documentary subject, and every time I moved the playhead, the computer groaned like it was being asked to lift a house. I spent three hours fighting the machine instead of finding the performance, convinced that if I just bought a faster SSD or a more expensive CPU, the problem would vanish. But the truth is, no amount of hardware can fix a workflow that ignores the reality of file sizes; understanding how proxies speed up editing isn’t about chasing specs, it’s about refusing to let your gear dictate your creativity.
I’m not here to sell you on a fancy plugin or a new workstation upgrade. I want to talk about why you should be working with lightweight, manageable files while you find the rhythm of your story, and how to transition back to the heavy lifting only when it’s time to color. I’ll show you how to set up a proxy workflow that actually works, so you can spend your time focusing on the cut rather than waiting for your timeline to catch up.
The Problem of Distance Why Heavy Files Kill Your Creative Flow
The problem isn’t that your computer is slow; it’s that you’re asking it to do something it wasn’t built for. When you’re staring at a timeline filled with 4K or 6K RAW files, you aren’t actually editing anymore. You’re just watching a progress bar or waiting for a frame to catch up to your playhead. That gap between your brain wanting to make a cut and the machine actually showing it to you is where the art dies. You lose the rhythm, you lose the feeling for the performance, and eventually, you just lose your temper.
This friction is exactly why transcoding for smoother editing isn’t a luxury—it’s a survival tactic. If you’re constantly fighting your system, you aren’t making creative decisions; you’re just managing technical failures. By implementing a low resolution proxy workflow, you move the heavy lifting away from the creative moment. You want to be thinking about the pacing of the scene, not whether your hard drive is about to give up the ghost. Stop letting the weight of your files dictate how fast you can think.
How Proxies Speed Up Editing by Removing the Technical Friction
When you’re sitting in the edit suite, you shouldn’t be thinking about your CPU temperature or why the playhead just stuttered for three seconds. The goal is to find the rhythm of the story, but you can’t find rhythm when you’re constantly fighting the machine. By implementing a low resolution proxy workflow, you essentially strip away the weight of those massive, high-bitrate files that are choking your system. You aren’t changing the quality of the final export; you’re just giving your computer a version of the footage it can actually digest in real-time.
It’s about removing that micro-frustration that builds up every time a clip drops a frame. Instead of obsessing over expensive video editing hardware optimization or praying your RAID array is fast enough, you use these smaller files to handle the heavy lifting during the creative phase. This kind of transcoding for smoother editing allows you to move through a timeline with the same fluidity you’d have if you were cutting on a lightweight 1080p project, leaving the heavy lifting for the final render when the decisions are already made.
Transcoding for Smoother Editing Trading Detail for Immediate Reaction
Look, I’m not telling you to throw away your 8K RAW files. I’m telling you to stop trying to edit them on a laptop that’s currently screaming for mercy. The goal of transcoding for smoother editing isn’t to replace your master files; it’s to create a lightweight stand-in that lets you actually feel the rhythm of the story. When you move from heavy, high-bitrate files to a low resolution proxy workflow, you aren’t losing the soul of the shot—you’re just removing the digital grit that makes your computer stutter every time you try to scrub the timeline.
I’ve sat in edit suites where the editor spent more time waiting for the playhead to catch up than actually looking at the performance. That’s a waste of a life. By setting up a proper proxy media management system early, you’re making a trade: you give up a bit of unnecessary sharpness in the preview window to gain immediate reaction during the cut. It’s about the difference between fighting your software and actually working with it. Once the edit is locked, you relink to the originals for the colorist to do their magic, but until then, let the computer breathe.
A Low Resolution Proxy Workflow for the Impatient Editor
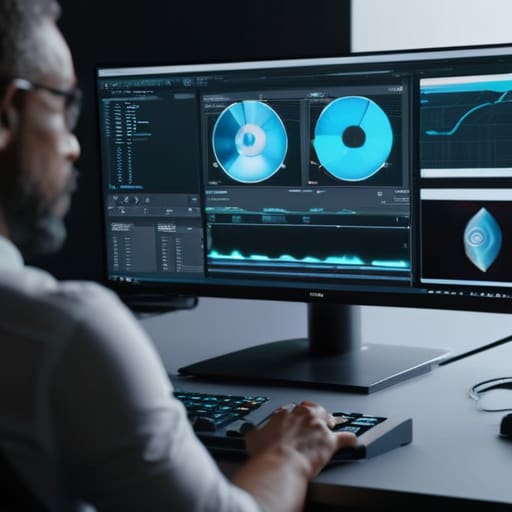
Look, I’ve sat in edit suites where the editor is staring at a spinning rainbow wheel like it’s a piece of modern art. It’s a waste of time. If you’re working with 6K or 8K RAW files, you aren’t editing; you’re babysitting a computer. A low resolution proxy workflow isn’t about being lazy or cutting corners; it’s about clearing the road so you can actually see the performance. You want to be looking at the actor’s eyes, not waiting for your hard drive to stop gasping for air.
The trick is to stop treating your high-bitrate files like they’re meant for the timeline during the first pass. By using a lightweight codec—something like ProRes Proxy or DNxHR—you’re essentially creating a “sketch” of your footage. It’s the difference between trying to sculpt a statue out of granite versus clay. Once you’ve found the rhythm of the story, you simply toggle back to the original media for the final color grade and export. It’s the only way to stay in the creative zone without the hardware constantly pulling you out of it.
Proxy vs Original Media Knowing When to Switch Back
The danger of a low resolution proxy workflow is that it’s easy to get too comfortable in the shallow end. You spend three days finding the rhythm of the cut, feeling like a genius because the timeline is butter-smooth, only to realize you’ve forgotten what the actual texture of the image looks like. You can’t make final aesthetic decisions—like whether a skin tone is too warm or if the grain is swallowing the detail—on a file that’s essentially a glorified thumbnail.
This is where the dance of proxy vs original media becomes critical. Once you’ve locked your structure and the story is actually breathing, you have to marry those edits back to the high-bitrate source files. It’s not just about checking a box; it’s about ensuring that the heavy lifting you did during the assembly phase translates to the final delivery. If you try to grade a proxy, you’re chasing ghosts. You need the original data to see if that shadow detail you thought was there actually exists, or if it was just a trick played by a compressed codec.
Beyond the Rig Proxy Media Management and Reducing Playback Lag
Once you’ve got your proxies generated, the work isn’t finished; you just moved the bottleneck. I’ve sat in edit suites where the editor has a machine that costs more than my first car, yet they’re still staring at a spinning wheel because their proxy media management is a mess. It isn’t always about the CPU or the GPU; it’s about how you’ve organized the files. If your drive architecture is a chaotic sprawl of unindexed folders, even the lightest files will stutter. You need to treat your storage with the same discipline you treat your camera bag—everything in its place, ready to be called upon without a search.
If you’re still struggling with stuttering playback, stop looking for a new plugin and look at your settings. Reducing playback lag in Premiere Pro or Resolve often comes down to ensuring your proxy codecs are actually “edit-friendly,” like ProRes or DNxHR, rather than just being small. A highly compressed H.264 file might save disk space, but it’s a nightmare for your processor to decompress on the fly. Don’t let a lack of organization turn a smooth session into a test of your blood pressure.
Five Ways to Stop Fighting Your Computer and Start Cutting
- Don’t wait for the “perfect” codec to start. Get your proxies generated as soon as the cards are offloaded; if you’re sitting around waiting for a progress bar before you even look at the footage, you’ve already lost the morning.
- Keep your proxy files and your original media on separate drives, but keep them organized in the same folder structure. There is nothing more soul-crushing than a “media offline” red screen because you moved a folder to save space on your SSD.
- Match your proxy resolution to your monitor, not your delivery specs. If you’re editing on a laptop, you don’t need 4K proxies; give yourself something light and snappy like 1080p or even 720p so the playback feels instant.
- Use the “Toggle Proxies” button like it’s your best friend. You should be editing with them on 95% of the time, and only switching back to the heavy originals when you need to do a final check on a specific grain structure or a particularly tricky color grade.
- Automate the headache. Most modern NLEs have a way to link these files automatically during the ingest process—use it. I’ve spent too many years manually relinking files because I thought I was being “thorough,” and it’s a waste of time that could be spent on the story.
The Bottom Line: Don't Let Your Hardware Dictate Your Story
Stop treating your computer like a battlefield; use proxies to strip away the technical lag so you can actually feel the rhythm of the edit.
Remember that a proxy is a tool for speed, not a replacement for quality—always ensure your workflow has a clear path back to the original high-res files for the final grade.
If you’re spending more time watching a spinning loading icon than looking at your footage, you aren’t editing, you’re just managing data. Fix the workflow and get back to the work.
The Real Cost of Lag
You can spend three hours troubleshooting your cache and praying to a more expensive CPU, or you can spend ten minutes making proxies and actually get back to the rhythm of the story. An editor shouldn’t be a technician fighting a spinning beachball; they should be someone finding the moment.
Gethin Moreau
The Bottom Line
At the end of the day, a proxy workflow isn’t about being lazy or cutting corners; it’s about removing the technical friction that stands between your eyes and the story. We’ve covered why those massive, unmanageable files stall your momentum, how transcoding into something lighter lets you actually feel the rhythm of a scene, and the importance of knowing exactly when to swap back to your original high-resolution media for the final grade. If you spend your afternoon fighting a stuttering timeline instead of looking at the performance or the composition, you aren’t editing—you’re just managing a crisis. Use the proxies to do the heavy lifting so you can focus on the work that actually matters.
I’ve seen plenty of young editors think they need a workstation that costs as much as a mid-sized sedan just to get through a rough cut. The truth is, the most expensive computer in the world won’t help you if you’ve lost your creative spark to a spinning loading icon. Don’t let the specs of your sensor or the bitrate of your codec dictate how you tell a story. Whether you’re working on a high-end feature or a wedding video that needs to be out by Monday, remember that the goal is the cut, not the struggle. Get your files light, get your playback smooth, and then get out of your own way.
