I spent three hours last Tuesday watching a kid in a rented studio tear his hair out because his “industry-standard” 8K sensor looked like mud in a low-light corner. He had the specs, he had the resolution, and he had a credit card that could buy a small car, but he didn’t have a single light source that wasn’t fighting him. This is the fundamental trap of the modern era: people think they can buy their way out of a bad setup. If you’re currently scrolling through endless forums trying to figure out how to choose a camera for interviews, stop looking at the dynamic range charts for a second and look at your actual shooting environments.
I’m not here to sell you on a specific brand or a shiny new body that’ll be obsolete by next Christmas. My goal is to strip away the marketing fluff and talk about what actually matters when the talent is sitting in front of you: color science that doesn’t require a week in post, skin tones that don’t look like plastic, and a workflow that won’t break your heart during the edit. I’ll give you the honest truth about where to put your money and, more importantly, where to save it so you can actually afford the lighting you’ll really need.
Stop Reading Spec Sheets How to Choose a Camera for Interviews
You’ll spend hours scrolling through comparison charts, losing sleep over bitrates and dynamic range numbers that look impressive on a marketing slide but mean nothing when you’re sitting in a dimly lit office with a subject who won’t stop fidgeting. Here is the truth: a sensor isn’t a magic wand. If you’re chasing that high-end look, stop obsessing over sensor size for cinematic interviews and start looking at how the camera handles the actual environment. Most of the time, a “pro” image is just a result of knowing how to manage your light source and your distance from the subject to get a natural depth of field that doesn’t look like a cheap digital blur.
If you want to actually survive a shoot, look at the practicalities. I don’t care if a camera can shoot 8K if it doesn’t have reliable audio input options for video cameras or if the menu system is so convoluted you’ll miss the shot while hunting for a setting. You need a tool that stays out of your way. Whether you are running a single camera vs multi camera interview setup, the camera should be the last thing on your mind once the lights are set and the levels are hitting the sweet spot.
The Sensor Size Myth and Finding Real Cinematic Depth of Field
I’ve spent half my life listening to people argue about Full Frame versus Super 35, as if the sensor size itself is some magical talisman that conjures “cinema.” It’s a distraction. People think a larger sensor is the only way to get that creamy, blurred background, but they forget that depth of field for interview subjects is a math problem involving distance, aperture, and focal length. You can shoot a beautiful, shallow-focus shot on a smaller sensor if you know how to work the lens and move your subject away from the wall.
If you’re chasing that look, don’t just buy the biggest sensor you can afford; look for a system that gives you the glass you actually need. A massive sensor is useless if you’re stuck using cheap, wide-aperture lenses that fall apart when you try to focus on an eye. Most of the time, when someone asks me about sensor size for cinematic interviews, what they’re actually asking is how to make the subject pop. My answer is usually the same: get the subject away from the background, use a longer lens, and stop worrying about the millimeters of silicon behind the glass.
Why Low Light Performance for Video Interviews Actually Matters
You’ll see people obsessing over bit depth and dynamic range, but if you’re shooting an interview in a client’s office or a dimly lit living room, none of that matters if your image is swimming in digital noise. Most people think they can just crank the ISO and call it a day, but there is a massive difference between a clean image and one that looks like it was filmed through a screen door. When I’m looking at low light performance for video interviews, I’m not looking at some theoretical laboratory number; I’m looking at how the sensor handles the inevitable reality of a single window or a single, poorly placed LED panel.
If you can’t get a clean signal without pushing your sensor into the red, you’re going to spend more time in color correction trying to fix “mush” than you would have spent just moving a lamp six inches closer to the subject. You can have the most expensive sensor size for cinematic interviews, but if that sensor can’t see in the shadows without falling apart, you’ve bought yourself a very expensive paperweight. It’s better to have a sensor that stays clean at a higher base ISO than a “pro” body that turns to grain the moment the sun goes down.
The Battle of Coverage Single Camera vs Multi Camera Interview Setups
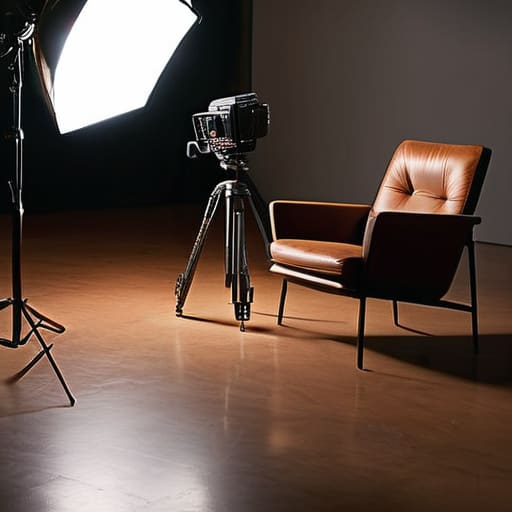
You can have the most expensive sensor in the world, but if you don’t have the shots to tell the story, you’re just left with a very high-resolution mistake. When weighing single camera vs multi camera interview setups, the decision shouldn’t be about your ego or how much gear you can fit in the van; it’s about how much control you have over the rhythm of the edit. A single-camera setup forces you to be disciplined. You have to nail the lighting, the framing, and the subject’s performance in one go. It’s slower, sure, but it often results in a more cohesive look because you aren’t fighting to match different focal lengths or color profiles in post.
However, if you’re working on a tight schedule or a documentary where the subject might wander off at any moment, a multi-cam approach is your insurance policy. The trick here isn’t just having more bodies; it’s about intentional coverage. I’m talking about one wide to establish the space and a tight on the eyes to capture the emotion. If you go this route, make sure your gear has reliable audio input options for video cameras—because even the most beautiful multi-cam sequence falls apart the second the sound gets thin or inconsistent.
Mastering the Best Camera Settings for Talking Heads
Once you’ve actually picked a body and a lens, don’t go hunting for some magic “interview mode.” Most of the time, the best camera settings for talking heads come down to managing your shutter and your aperture without letting the sensor run away with itself. I always start with the shutter angle—set it to 180 degrees if you want that natural motion blur that doesn’t look like a choppy soap opera or a frantic news report. From there, it’s all about your iris. You want enough depth of field for interview subjects so that if they lean forward a few inches during a passionate point, they don’t suddenly vanish into a blur, but you still want enough separation to keep them from looking like they’re pasted onto a flat background.
And for heaven’s sake, stop relying on the internal pre-amps. Regardless of what the manual says about the audio input options for video cameras, if you’re serious about the work, get a dedicated XLR source. A beautiful image with scratchy, thin audio is just a very expensive way to make people turn the video off. Set your white balance manually, lock your exposure, and stop chasing the auto-iris—nothing kills an interview faster than the light shifting every time the subject moves their hands.
Dont Ignore the Basics Reliable Audio Input Options for Video Cameras
I’ve seen more projects ruined by a gust of wind hitting a cheap lavalier than by a grainy sensor or a shallow depth of field. You can have the most beautiful, shallow-focus shot in the world, but if the audio sounds like it was recorded inside a tin can, the audience is going to tune out before you even finish the first question. When you’re looking at gear, stop obsessing over whether the camera has a new autofocus algorithm and start looking at the audio input options for video cameras.
If you’re running a single camera setup, you don’t have the luxury of a second angle to hide a technical glitch; you need a robust, clean XLR input. A camera that relies solely on a 3.5mm jack is asking for trouble in a professional environment. Those jacks are flimsy, prone to interference, and they don’t give you the pre-amp headroom you need when a subject starts getting loud. I’d much rather have a slightly more expensive body with dedicated XLR ports than a “cinema” camera that requires a mountain of adapters just to get a usable signal into the edit.
Five things that actually matter when you’re staring at a gear list
- Prioritize ergonomics and the “weight of the day.” You can have the most beautiful sensor in the world, but if the camera is a heavy, finicky beast that requires a dedicated technician just to change a battery, you’re going to spend more time fighting the kit than watching your subject’s eyes. Choose something that lets you move quickly when the light starts to fail.
- Check the thermal management. There is nothing more soul-crushing than setting up a perfect three-point light scheme, getting your subject into a flow, and then having the camera give you a “temperature warning” halfway through the first question. If you’re shooting long-form interviews, you need a tool that can handle the heat without shutting down.
- Look for robust monitoring options. An interview is won or lost in the details—a stray hair, a slight tilt of the head, or a flicker in the background. If the camera’s built-in screen is a tiny, washed-out piece of junk, you’re flying blind. Make sure the camera has a clean HDMI output or a screen bright enough to actually see what you’re doing when the lights are up.
- Don’t overlook the media workflow. I’ve seen people buy high-end cameras only to realize they’re spending half their production time waiting for massive files to offload or struggling with proprietary cards that cost a month’s rent. Choose a camera with a codec that makes sense for your editing turnaround, not just one that produces the highest bitrates for the sake of it.
- Think about the “fail-safe” factor. In the interview world, you usually get one shot at the truth. Choose a camera with a proven track-record of reliability. I’d much rather use a slightly older, battle-tested body that I know won’t glitch during a crucial monologue than a brand-new, unproven flagship that might decide to corrupt a card right when the subject starts getting honest.
The long view: what actually stays in the edit
Stop chasing the highest resolution; a 4K image with bad lighting and a shallow depth of field you can’t control is just a very clear mistake.
Prioritize a camera that allows for flexible coverage, because your ability to cut between angles is far more important than the specific color science of a single sensor.
Buy gear that solves a problem, not gear that satisfies a spec sheet—if you can’t afford the lights or the audio kit to match the camera, you’ve already lost the interview.
The Gear Trap
You can buy a camera that captures every single pore on a subject’s face in 8K, but if you haven’t mastered the placement of your key light or the distance between your lens and the subject, you’re just documenting a bad image in higher resolution.
Gethin Moreau
The Bottom Line
At the end of the day, choosing an interview camera isn’t about finding the one with the highest bit rate or the most expensive autofocus system. It’s about finding the tool that allows you to focus on the person in the chair rather than the menu settings. You need a sensor that handles your light, enough inputs to keep your audio clean, and a way to capture enough coverage so you aren’t stuck in a jump-cut nightmare during the edit. If you can manage the light, the audio, and the basic coverage, the camera itself becomes invisible. Don’t let the pursuit of the “perfect” spec sheet prevent you from actually getting the job done.
I’ve seen breathtaking footage shot on cameras that were basically glorified webcams, and I’ve seen $50,000 rigs produce work that felt sterile and lifeless. The difference isn’t the glass or the sensor; it’s the intent behind the lens. Stop worrying about whether you have enough megapixels and start worrying about whether you’ve positioned your subject to tell their story. Buy what you can afford, learn its quirks inside and out, and then get out of your own way. The most important piece of gear in your kit isn’t the camera—it’s your ability to see the light before you even hit record.
