
I remember sitting in a dim edit suite fifteen years ago, staring at a monitor while a producer screamed about why the window in the background looked like a blown-out white void. We had shot on a sensor that couldn’t hold a candle to what you can buy today, and no amount of expensive post-production magic could bring that detail back. People today treat technical specs like a holy scripture, obsessing over numbers on a spreadsheet, but they completely miss the point of how dynamic range is used in a real-world environment. You can own a camera with twenty stops of latitude, but if you don’t understand how to shape the light hitting the subject, you’re just recording expensive nothingness.
I’m not here to sell you on a new sensor or walk you through a marketing brochure. Instead, I want to talk about the actual mechanics of a scene—where the light sits, how much shadow you can actually afford to lose, and when you need to stop relying on the gear and start relying on your eyes. We’ll look at how to manage high-contrast environments and, more importantly, how to make decisions on set so your colorist isn’t fighting a losing battle later.
Beyond the Spec Sheet How Dynamic Range Is Used in Practice
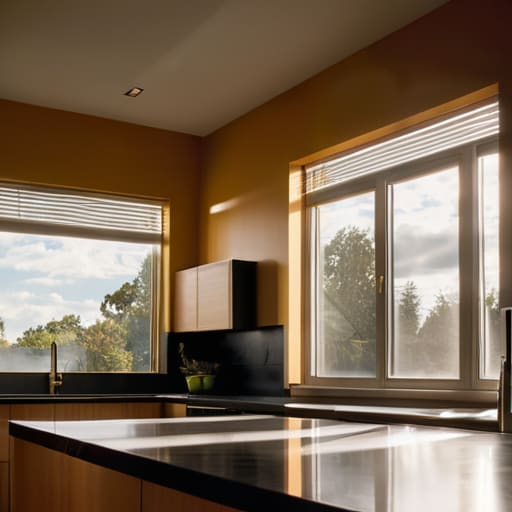
In practice, you aren’t sitting in a dark room staring at a waveform monitor; you’re standing in a kitchen at 4:00 PM trying to stop the window light from blowing out the subject’s forehead while the rest of the room looks like a coal mine. This is where the theoretical exposure latitude in photography meets the messy reality of a production schedule. When I’m looking at a scene, I’m not thinking about stops in a vacuum; I’m thinking about whether I have enough headroom to keep the sky from turning into a white smear. If you nail your exposure but lose the texture in the clouds, no amount of magic in post is going to bring that back.
It’s a balancing act of priorities. Most of the time, I’m more concerned with preserving highlight detail than I am with the shadows. You can always nudge a shadow up in the grade—provided you haven’t pushed the sensor into a noisy, grainy mess—but once a highlight is clipped, it’s gone. It’s dead. You don’t use a high-end sensor just to get a “cleaner” look; you use it so you have the breathing room to make intentional choices about where the light ends and the darkness begins.
Sensor Dynamic Range Explained Where the Light Actually Lives

Look, forget the marketing brochures for a second. When we talk about sensor dynamic range explained, we aren’t talking about a magic number on a spreadsheet; we’re talking about the usable space between the moment a pixel decides it’s seen enough light and the moment it decides it’s completely in the dark. In the old days of film, we had a certain grace in how the emulsion reacted to overexposure. Digital is different. It’s more binary. You have a finite window of light, and once you blow a highlight into a pure, digital white void, that information is gone. There is no amount of post-production magic that can bring back a sky that has turned into a flat, featureless sheet of paper.
That’s why I spend more time obsessing over my exposure latitude in photography than I do looking at resolution. If you want to actually control a scene, you need to understand how much room you have for preserving highlight detail while still recovering shadow information in the grade. It’s about finding that sweet spot where the sensor isn’t choking on the sun or drowning in the noise of a dark corner. You aren’t just capturing light; you’re managing the limits of what the silicon can actually hold.
The Art of Preserving Highlight Detail Before the Sensor Gives Up

Look, you can spend all day talking about the theoretical limits of a sensor, but the reality on set is much more unforgiving. When you’re working with a single window as your primary light source, you aren’t just managing light; you’re managing a fight against clipping. The moment that sky turns into a white, featureless void, you’ve lost the battle. No amount of post-production wizardry or high-end color grading can bring back what isn’t there. Preserving highlight detail isn’t a suggestion; it’s the difference between a professional image and a digital mess.
I’ve seen enough junior shooters try to “fix it in post” by cranking the exposure on a flat log file, only to realize they’ve blown out the skin tones or the highlights in the background. You have to understand the exposure latitude in photography—specifically, where your specific sensor decides to call it quits. I’d much rather walk the crew around to shade a bright spot or move a bounce card than realize halfway through a take that the sensor simply gave up on the highlights. If you don’t protect those bright spots during the exposure, you aren’t making a movie; you’re just documenting a mistake.
Recovering Shadow Information Without Chasing Digital Noise

I’ve spent half my life watching editors try to “save” a shot by pulling the shadows up in post, only to realize they’ve essentially turned their footage into a grainy, muddy mess. It’s a common trap. People think that if they have a decent sensor, they can just underexpose everything and fix it later. But here is the reality: recovering shadow information isn’t a magic trick. Once that signal-to-noise ratio collapses, you aren’t just lifting the darks; you’re lifting the electronic grit that lives underneath them.
The trick isn’t about having a massive sensor dynamic range explained in some glossy brochure; it’s about understanding your exposure latitude in photography and how it interacts with your light source. If you’re working in a low-light environment, you have to give the sensor something to work with. You can’t just pray for a miracle in the color grade. I’d much rather see you move a bounce card or a small LED closer to the subject than watch you try to scrub through digital noise in DaVinci Resolve. Expose for the shadows enough to keep the texture, or you’ll spend more time fighting the image than telling the story.
Managing Exposure Latitude in Photography and the Cost of Mistakes
When you’re out on a set or a street shoot, exposure latitude in photography isn’t some abstract mathematical concept; it’s your margin for error. It is the distance between a shot that works and a shot that is fundamentally broken. In the old days, we had the physical chemistry of film to buffer us, but today, people mistake having a high-end sensor for having a safety net. They think they can light a scene poorly and just “fix it in post.” They can’t. If you blow out your highlights by overexposing a window or a rim light, that information is gone. No amount of magic or expensive software can bring back detail that was never recorded to begin with.
The real cost of a mistake isn’t just a grainy shadow; it’s the loss of intentionality. When you push a sensor to its absolute limit trying to capture a massive contrast ratio in digital sensors, you are playing a high-stakes game. You might successfully manage recovering shadow information, but if you do it by sacrificing the integrity of the midtones, the image feels thin and artificial. Precision beats gear every single time. You have to decide, before you even press record, which part of the scene holds the story and which part you are willing to let fall into darkness.
The Truth About Contrast Ratio in Digital Sensors and Colorists
We need to stop treating the colorist like a magician who can perform miracles on a bad exposure. There’s a massive difference between the theoretical contrast ratio in digital sensors you read about in a brochure and what you can actually manipulate in a grading suite. A sensor might claim a massive range, but that’s a mathematical abstraction. In the real world, once you push a signal too far to reclaim a crushed shadow or a blown highlight, the math breaks. You aren’t just “adjusting levels” anymore; you’re fighting the physics of the silicon.
If you’ve spent your time chasing the highest spec instead of learning how to shape the light, you’re going to find yourself in a fight with digital artifacts. A colorist can stretch a well-exposed image, but they can’t manufacture data that wasn’t captured at the moment of exposure. If you clip your highlights, that information is gone—it isn’t just “bright,” it’s empty. You can’t “recover” a white hole. The goal isn’t to have the most data; it’s to ensure the data you do have is actually useful for the final grade.
Five ways to actually use your latitude (without relying on a computer)
- Stop trying to capture the whole world at once. If you’ve got a window in a dark room, you aren’t going to get a perfect exposure on the subject and the view outside simultaneously, no matter what the brochure says. Pick your hero. Decide if the story is in the shadow or the light, and expose for that. You can’t have both if the physics of the room won’t allow it.
- Watch your highlights like a hawk. In the film days, we could sometimes coax a bit of detail out of a bright sky, but digital is a different beast—once a pixel hits pure white, it’s gone. It’s not “information” that’s missing; it’s a void. I’d rather have a slightly underexposed image I can lift in post than a clipped sky that looks like a hole punched in the screen.
- Use your lighting to create “fake” dynamic range. If you’re shooting a scene with a massive difference between the foreground and the background, don’t just pray the sensor handles it. Bring in a bounce or a small LED to fill those shadows. It’s much easier to manipulate light on set than it is to try and stretch a flat, noisy shadow during a grading session.
- Learn the “middle grey” trap. People see a high dynamic range number and think they can just shoot everything flat and “fix it” later. You can’t. If you expose everything to the middle of the meter, you’re often wasting the very latitude you paid for. Use the range to create depth, not to compensate for lazy exposure.
- Don’t trust the monitor blindly. Your LCD might look like it’s holding detail in the clouds, but the sensor might already be screaming. Use zebras or a waveform monitor. They don’t care about how “pretty” the image looks to your eye; they tell you exactly where the sensor is about to stop being a camera and start being a white wall.
The bottom line
Stop treating dynamic range like a magic shield; it won’t fix a scene where the light is fundamentally broken or the contrast is physically impossible to manage.
Protect your highlights first, because while you can often coax a bit of life out of a shadow with a little patience and a clean sensor, once those highlights clip, that data is gone forever.
Buy the lens and the light before you buy the sensor with the extra stops, because a better-lit scene on a cheaper camera will always beat a high-spec sensor shooting in a pitch-black room.
The real math of the sensor
“We spend all this time arguing over stops on a spec sheet, but dynamic range isn’t a number you buy; it’s the amount of breathing room you have left when the sun hits a window or the shadows turn to ink. It’s the difference between a scene you can actually edit and a scene where you’re just praying the colorist can perform a miracle.”
Gethin Moreau
The bottom line
At the end of the day, dynamic range isn’t a trophy you collect by buying the most expensive sensor on the market. It’s a tool for managing the reality of light, and a reality that usually involves more of it than you actually want. We’ve talked about why you can’t just rely on a colorist to fix a blown-out sky, why chasing shadows in the grade will eventually lead you straight into a wall of digital noise, and why the spec sheet is often a polite fiction compared to how the sensor actually behaves in a real room. If you understand how to protect your highlights and respect the limits of your shadows, you’re already doing better work than half the people currently chasing the latest high-bitrate hype.
If you take anything away from this, let it be this: stop looking for the camera that can solve every lighting mistake you make. There isn’t one. Instead, focus on learning how to read the light before you even think about hitting the record button. The best images I’ve ever shot didn’t come from a sensor with infinite stops; they came from knowing exactly where the light was going to fail and positioning the frame so that the failure looked intentional. Put down the spec sheets, pick up a light meter, and start looking at the world through the lens of what you can actually control.
