I spent three hours last Tuesday watching a kid in a rented studio stare at his monitor, frantically trying to figure out why his skin tones looked like he’d been dipped in orange juice. He was convinced he needed a more expensive sensor or a better LUT to fix it, but the truth was much simpler: he hadn’t even bothered to ask how white balance should be set for the specific tungsten lamps he’d rigged up. We’ve entered this strange era where people think color science is a substitute for actually looking at the light, as if a $40,000 camera can somehow outsmart a misunderstood Kelvin temperature.
I’m not here to give you a lecture on the physics of light waves or a manual on which buttons to press in your menu. Instead, I want to talk about the practical reality of matching your sources so you don’t end up fighting a losing battle in the grade. I’ll show you when to trust your eyes, when to use a grey card, and—most importantly—when to stop worrying about the gear and start paying attention to the source.
Understanding How White Balance Should Be Set
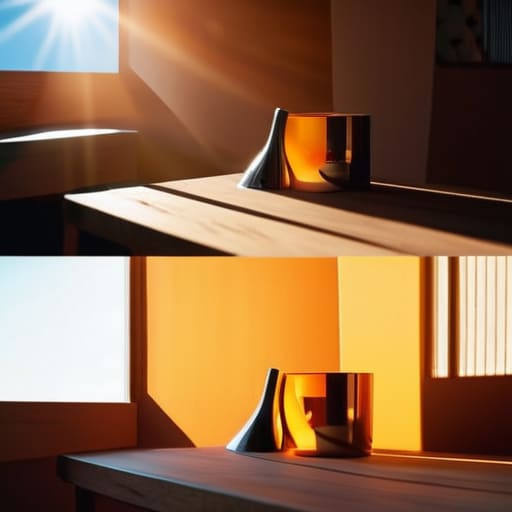
Before you even touch the menu settings, you have to look at the light. If you’re shooting under tungsten, you’re dealing with a heavy orange cast; if you’re outside at noon, it’s a harsh, blue-leaning daylight. Most people think they can just fix this later, but they’re mistaken. Understanding the Kelvin scale for cameras isn’t about memorizing a math textbook; it’s about knowing that a light source has a specific “personality” in terms of warmth or coolness. If you don’t respect that temperature at the source, you’re just asking for trouble.
I’ve seen enough footage ruined by a lazy auto-white balance setting to last a lifetime. The camera sees a patch of skin or a white shirt and makes a decision that might work for a second, but then the subject moves, and suddenly your entire scene is shifting from amber to teal. That’s why I always lean toward manual white balance techniques. Whether you’re using a grey card or just eyeballing it based on the light coming through the window, you need to lock that setting in. You want a consistent baseline so that when you get to the edit, you’re actually telling a story rather than fighting a losing battle against a color cast.
Key Things to Know
First, stop treating your camera like it’s smarter than you. Auto white balance is fine for a family wedding where you’re too busy sweating to look at a monitor, but if you’re trying to tell a story, it’s a liability. The camera sees a change in the room—maybe a lamp gets turned on or a cloud passes the window—and it tries to “correct” it, shifting your entire palette mid-scene. You’ll end up with jumpy, inconsistent skin tones that make the edit a nightmare. If you want stability, you need to embrace manual white balance techniques and commit to a look before you hit record.
This starts with a basic grasp of daylight vs tungsten lighting. You aren’t just picking numbers; you’re deciding how the light feels. If you’re shooting under warm tungsten bulbs, you’re looking at those lower Kelvin numbers; if you’re out in the sun, you’re much higher. Don’t get bogged down in the math, but understand that consistency is more important than perfection. I’ve seen shots that were slightly “off” work beautifully because they stayed consistent, while “perfectly” balanced shots looked clinical and dead.
Practical Tips and Steps
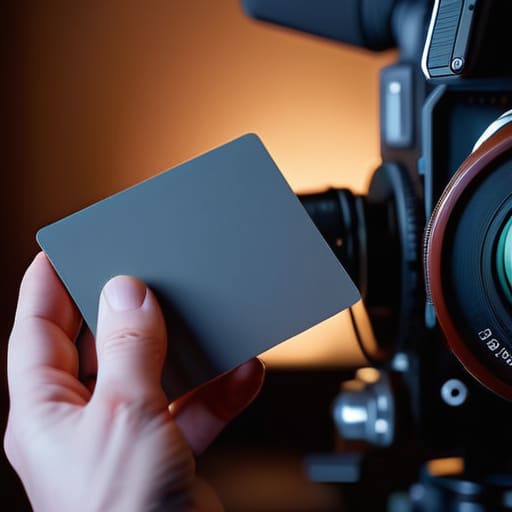
Start by grabbing a gray card or a piece of neutral white paper. Don’t just eyeball it from across the room; get it right into the light you’re actually filming with. Hold it where the subject will be, hit your manual white balance setting, and lock it in. If you’re jumping between daylight vs tungsten lighting in the same setup, you need to make those decisions before you even think about hitting record. Relying on auto-white balance is a quick way to ensure your footage is unusable once you get to the edit, as the camera will constantly hunt and shift the skin tones every time someone walks through the frame.
Once you’ve got your base, keep an eye on your monitor. If you’re working with mixed sources—say, a window’s natural light fighting a warm LED—you have to choose a side. You can’t satisfy both. I usually lean toward the primary light source and accept a slight tint elsewhere, because correcting a massive color cast in post is a headache no one needs. If you’re getting serious about achieving color accuracy in video, stop chasing the perfect number on the Kelvin scale and start looking at how the light actually sits on your subject’s face.
Common Mistakes to Avoid
The biggest mistake I see—and it kills me every time—is the reliance on Auto White Balance. People treat their cameras like they’re taking snapshots at a wedding, letting the sensor make the decisions. The problem is that if a subject moves, or if a light shifts slightly, the camera panics and shifts the entire color palette of your scene. You end up with a shot that starts warm and ends up looking like a sterile hospital wing. If you want any hope of achieving color accuracy in video, you have to take the wheel. Stop letting the machine guess and start using manual white balance techniques to lock in your look.
Another trap is ignoring the reality of your lighting environment. I’ve seen shooters try to mix daylight from a window with tungsten lamps inside a room, thinking they can just “fix it in post.” That’s a lie. You can’t magically pull a clean image out of a mess of conflicting color temperatures. You need to decide which light is your master and commit to it. If you don’t respect the daylight vs tungsten lighting divide on set, you’re just handing a massive, expensive headache to your colorist.
Final Thoughts
At the end of the day, stop looking for a magic button on your camera menu. Whether you are navigating the nuances of daylight vs tungsten lighting or trying to manage a tricky mixed-light interior, the solution isn’t a more expensive sensor or a better LUT. It’s about being intentional with where you stand and what you’re looking at. If you take the time to master a few manual white balance techniques, you’ll find that you aren’t just “fixing” an image; you’re actually controlling the mood of the scene before you even hit record.
I’ve seen more ruined shots from a lazy Auto White Balance setting than from a lack of high-end glass. You can spend all day adjusting color casts in images during the color grade, but you’re essentially just trying to perform surgery on a patient that should have been healthy to begin with. My advice? Get comfortable with the Kelvin scale, trust your eyes over your meter, and remember that the light is the story. Everything else is just logistics.
Five ways to stop fighting your sensor and start trusting your light
- Stop relying on “Auto” like it’s a safety net. Auto white balance is great for a wedding video where you don’t care if the skin tones shift slightly every time someone walks past a window, but for anything you intend to actually cut together, it’s a nightmare. If your camera is hunting for a baseline while the sun is dipping behind a cloud, you’re going to spend three hours in color correction trying to fix a problem that should have taken five seconds on set.
- Lock it to the source, not the mood. If you’re shooting under tungsten, set it to tungsten. If you’re outside at noon, set it to daylight. I don’t care if you think the “warmth” of a tungsten light looks more cinematic; if you’re shooting a scene that needs to look natural, you need to neutralize the light source first. You can always add warmth in post, but you can’t easily strip away a heavy orange cast without turning your shadows into a muddy mess.
- Use a grey card, and use it properly. I’ve seen people wave a card in front of the lens for half a second and call it a day. That isn’t a calibration; it’s a suggestion. Hold that card steady in the actual light where your subject is standing, get a clean, well-exposed shot of it, and use that as your reference. It’s the only way to ensure the camera actually understands what “neutral” looks like in that specific room.
- Watch out for mixed lighting. This is where the amateurs get tripped up. If you’ve got a window providing cool daylight on one side of the talent and a warm practical lamp on the other, you’ve already lost the battle of the single white balance setting. You have to decide which light is your “anchor” and accept that the other side is going to need a heavy lift in the grade. You can’t satisfy both settings at once; pick your priority and move on.
- Check your skin tones before you move the tripod. Once you think you’ve nailed the white balance, look at the person, not the background. If the highlights on their forehead look sickly or the shadows under their chin look like they’re underwater, your white balance is lying to you. A beautiful landscape with perfect color temperature means nothing if the human being in the frame looks like they’ve been dead for three days.
The Bottom Line
Stop looking for a magic sensor to fix a color mess; white balance is about understanding your light source before you even touch the record button.
Consistency is your best friend in the edit—if your light changes, your settings have to change with it, or you’re just making more work for a colorist who can’t fix everything.
Use a real grey card or a white bounce when you can, because your eyes will lie to you in a dark room, but a calibrated reference won’t.
The Myth of the Post-Production Fix
Stop looking at your spec sheet and start looking at your light sources; you can buy the most expensive sensor on the market, but if you haven’t mastered the relationship between your Kelvin numbers and the actual temperature of the room, you’re just filming expensive mistakes that no colorist in the world can actually fix.
Gethin Moreau
The Bottom Line
At the end of the day, setting your white balance isn’t some complex mathematical equation you solve in post; it’s about respecting the light you’ve worked so hard to place. We’ve talked about why you can’t rely on auto-settings when the sun is dipping behind a cloud, why a grey card is your best friend, and why trying to “fix it in color” is a recipe for disaster that wastes time and money. If you get the temperature right at the source—or at least at the sensor—you’re giving your editor a foundation to actually build something instead of just fighting a losing battle against a muddy, orange mess.
Look, you can spend your entire career chasing the newest sensor with the widest dynamic range, but that gear won’t teach you how to see. A camera is just a box that records what you show it, and if you don’t understand the color of the light hitting your subject, you’re just spinning your wheels. Stop obsessing over the spec sheets for a moment and start looking at the light. Once you master the basics of how color temperature dictates the mood and the truth of a frame, you’ll realize that the best tool you have isn’t in your gear bag—it’s your own eyes.
