I spent most of the nineties watching light meters dance and praying the film stock wouldn’t run out before we caught the magic, back when every frame cost more than a decent dinner. These days, I see kids scrolling through spec sheets, convinced that a $5,000 LED panel with a high CRI rating is the secret sauce to a cinematic look. They spend weeks researching how to choose lighting equipment based on lumens and color temperature charts, but they haven’t spent a single hour trying to wrap a heavy-duty silk around a window in a drafty studio. The truth is, a sensor can handle a lot of noise, but it can’t fix a scene that has no soul because you were too busy looking at a spreadsheet to look at the shadows.
I’m not here to sell you a dream or a gear list that requires a second mortgage. What I want to do is strip away the marketing fluff and talk about the practical reality of shaping a scene. I’ll show you how to think about source size, distance, and control before you ever touch a power switch. By the time we’re done, you’ll understand that knowing how to position a single, cheap work light is worth more than owning a warehouse full of gear you don’t know how to use.
Stop Buying Gear and Start Solving Problems of Light
I see it every week: a kid walks onto a set with a brand-new, high-spec LED panel and a look of pure confidence, only to realize they have no idea how to actually shape the light they’re throwing. They think the gear is the solution, but the gear is just a tool for a problem you haven’t identified yet. Before you look at a spec sheet, ask yourself what you’re actually fighting. Is the room too cavernous? Is the subject’s skin looking muddy because the light is too hard? Or are you just trying to hide a terrible location?
If you’re staring at a catalog, stop obsessing over the price tag and start looking at the physics. You don’t need a five-figure kit; you need to understand how a softbox vs umbrella modifier will change the way shadows fall across a face. You need to know if you’re fighting the window light or leaning into it. Most of the time, the difference between a professional look and a home movie isn’t the sensor—it’s whether you had the patience to move the light six inches to the left instead of buying a second lamp.
The Real Way to Decide How to Choose Lighting Equipment
Before you open a browser tab to start adding things to a cart, look at your location. If you’re shooting in a cramped corner of a living room, a massive heavy-duty stand is just something for you to trip over. If you’re in a warehouse, you need punch. The real way to decide isn’t by looking at a spec sheet, but by asking: how much control do I need over the shadows?
Most people get lost in the weeds of technical jargon, arguing over CRI vs TLCI explained in some forum, thinking a higher number is a magic wand. It matters, sure, but it won’t fix a poorly placed key light. You need to decide if you need the precision of a COB LED with a dedicated softbox vs umbrella modifiers for a more forgiving, washed-out look.
Stop trying to build a perfect “studio lighting setup for video” in your head before you’ve even seen the room. Decide if you need to fight the sun or complement it. If you can’t control the light, the most expensive kit in the world is just a very heavy way to make a bad image look slightly more expensive.
Cri vs Tlci Explained What the Colorist Actually Needs
You’ll see these acronyms thrown around in every spec sheet, usually as a way to justify a price hike. Here is the reality: CRI (Color Rendering Index) is an older, more generalized metric that tells you how accurately a light source renders colors compared to a natural reference. It’s fine for a general sense of quality, but it’s a bit of a blunt instrument. TLCI (Television Lighting Consistency Index) is what actually matters for us. It was designed specifically for digital sensors, measuring how a light source behaves when it hits a camera. If you’re building studio lighting setups for video, a high CRI is nice, but a high TLCI is what keeps your skin tones from looking like bruised fruit when you get into the edit.
Don’t expect a colorist to perform miracles on a cheap LED that has a massive spike or a massive gap in its spectrum. When we sit down to grade, we aren’t just fighting shadows; we are fighting the mathematical errors baked into the footage because the light source was fundamentally “unfaithful” to the subject. Focus on the TLCI score if you want to save yourself three hours of tedious color correction later. It’s the difference between a clean, professional image and a digital mess that looks like it was shot through a filter.
Kelvin and Lux Mastering the Science of the Scene
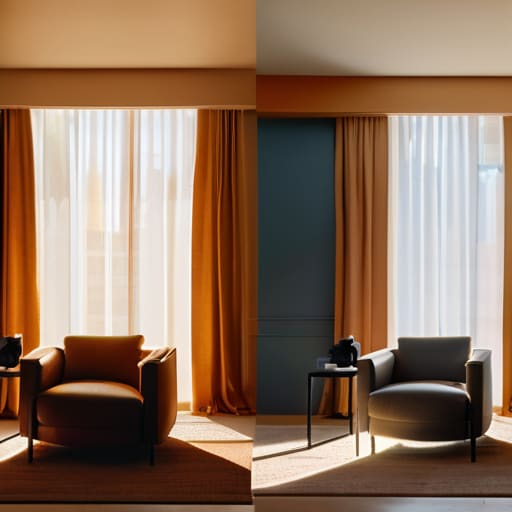
You’ll hear people throw around terms like “lux” and “Kelvin” to sound like they’ve spent time on a real set, but let’s strip the pretension away. Kelvin isn’t just a number on a chart; it’s the difference between a scene feeling like a warm, late-afternoon living room and a cold, clinical interrogation room. When you’re looking at the color temperature Kelvin scale, don’t just aim for “daylight.” Think about the emotion of the space. If you’re shooting a wedding, you’re chasing warmth; if you’re shooting a corporate thriller, you might want that biting, blue-ish edge.
Then there’s the intensity. People get obsessed with lumens, which is fine if you’re lighting a stadium, but for what we do, you need to care about lux. While lumens tell you the total light output of a source, lux tells you how much of that light is actually hitting your subject at a specific distance. It’s the difference between knowing a lamp is bright and knowing if it’s bright enough to overpower the sun coming through a window. Stop reading spec sheets and start measuring how much light you actually have to work with.
Continuous Lighting vs Strobe Choosing Your Battleground

If you’re shooting stills, you’ve likely been taught to live and die by the flash. But if you’re moving into video, that mindset will get you into trouble fast. The debate of continuous lighting vs strobe usually boils down to one thing: what are you actually trying to capture? If it’s a single, frozen moment of high-speed action, a strobe gives you a power and precision that continuous sources can’t touch. But for almost everything else in the world of motion, you need to see what you’re getting while you’re getting it.
In most studio lighting setups for video, I rely almost exclusively on continuous sources. There is a massive, practical advantage to seeing exactly how a shadow falls across a cheekbone or how a rim light catches a shoulder before I ever hit record. When you’re working with continuous light, you aren’t guessing about the exposure or the placement; you’re sculpting the scene in real-time. If you can’t see the light, you’re just playing a very expensive game of hide-and-seek with your frame.
Softbox vs Umbrella Modifiers Shaping Your Distance and Mood
If you’re staring at a choice between a softbox and an umbrella, stop thinking about which one looks better in a gear catalog and start thinking about the size of the room and the direction of the light. A softbox is a directional tool; it gives you control, allowing you to wrap light around a face while keeping the spill off the background. It’s my go-to for interviews where I need a clean, intentional look that doesn’t bleed into the shadows. It’s predictable, which is a luxury when you’re working on a tight schedule.
Umbrellas, on the other hand, are the “spray and pray” method of the lighting world. They throw light everywhere. If you’re working in a cramped space or trying to simulate a general ambient glow for a quick corporate setup, an umbrella is fine. But don’t complain to me when your background is washed out or your subject looks like they’re standing in a fog. When debating softbox vs umbrella modifiers, remember that one is for shaping the mood, and the other is for filling the space. Choose based on how much control you actually need to maintain.
Five Rules for Not Wasting Your Budget
- Prioritize power and control over features. I’ve seen more shoots stalled by a “smart” light that won’t connect to an app than by a dumb, heavy tungsten lamp that just works. If you can’t dim it, shape it, or move it quickly, the fancy interface is just digital clutter.
- Buy for the hardest scenario, not the easiest. Don’t buy a light because it looks great in your studio; buy it because it can punch through a window on a high-noon shoot or because it’s small enough to fit into a corner when you’re working in a cramped apartment.
- Think about the footprint, not just the output. A massive light with a giant softbox is useless if you’re shooting in a space where you can’t put a stand more than three feet from the subject. Always measure your room before you commit to a kit.
- Invest in the modifiers that actually change the light. You can buy a dozen cheap LED panels, but if you don’t have the ability to soften, flag, or diffuse that light, you’re just filming high-contrast garbage. A good set of gels and diffusion frames will do more for your image than a sensor upgrade ever will.
- Consider the weight and the “one-man” factor. If you’re a freelancer, you are the grip, the electric, and the camera op. If your lighting kit requires a three-man crew just to move it from the van to the set, you aren’t buying a tool—you’re buying a liability.
The Bottom Line
Stop looking at the spec sheet to solve a creative problem; if you can’t control where the light falls or how much of it you have, the most expensive LED on the market is just a very bright paperweight.
Prioritize color consistency and light quality over raw brightness, because you can always add more light, but you can’t fix a sensor that’s struggling to make sense of garbage color data.
Buy gear that expands your ability to shape a scene, not gear that just makes it brighter—the best kit is the one that helps you achieve the coverage you need to actually tell the story in the edit.
The Sensor Trap
I’ve seen more money wasted on high-end LED panels that sit unused in a kit bag than I have on actual talent. You can buy the most expensive light on the market, but if you don’t understand how to shape it or where to place it in relation to your subject, you’re just paying a premium to broadcast a bad image in high definition. Stop looking at the spec sheet and start looking at the shadows.
Gethin Moreau
The Bottom Line
At the end of the day, choosing lighting equipment isn’t about building a catalog of every shiny new LED panel on the market. It’s about understanding the physics of your specific room and the demands of your story. We’ve talked about the science—the Kelvin, the CRI, the way a softbox behaves compared to an umbrella—but none of those numbers mean a damn thing if you don’t know how to control the spill or where to place your key light to create depth. Don’t get lost in the spec sheets trying to find the “perfect” kit. Instead, look at your scene and ask yourself if you have enough light to see the emotion, enough control to keep it from washing out, and enough flexibility to actually move when the director changes their mind mid-take.
I’ve seen more beautiful images shot with a single bounced light and a prayer than I have with ten thousand dollars of unmotivated gear sitting in a dark corner. The gear is just a tool to help you manage distance and intention. If you find yourself staring at a shopping cart full of equipment, stop. Go back to the basics. Learn how to shape what you already have, because once you master the way light hits a face, you’ll realize that the best camera or the most expensive light is never going to do the heavy lifting for you. That job belongs to your eyes, your brain, and your willingness to get your hands dirty on set.
