
I remember a documentary shoot in a cramped kitchen in South Wales, ten years ago. The subject had a nasty, angry laceration right across his cheekbone, and the producer was spiraling, convinced we needed to buy a specific brand of theatrical concealer or spend three hours under a heavy makeup tent. I just looked at the window, saw where the soft afternoon light was hitting the far wall, and told them to sit two inches to the left. People spend far too much time looking for expensive, magical solutions when they should be looking at the light. If you’re staring at a mirror wondering how to hide a cut in an interview, you don’t need a pharmacy full of cosmetics; you need to understand shadow and placement.
I’m not going to sell you on some miracle cream or a high-end beauty filter that makes your skin look like polished plastic. Instead, I’m going to show you how to use what you already have—the angle of the lamp, the distance from the lens, and the simple physics of depth and shadow—to make that distraction disappear. We’ll focus on how to position yourself so the light does the heavy lifting, ensuring the viewer stays locked on your eyes rather than the wound.
The Lie of the Perfect Take Why We Edit Mistakes Out
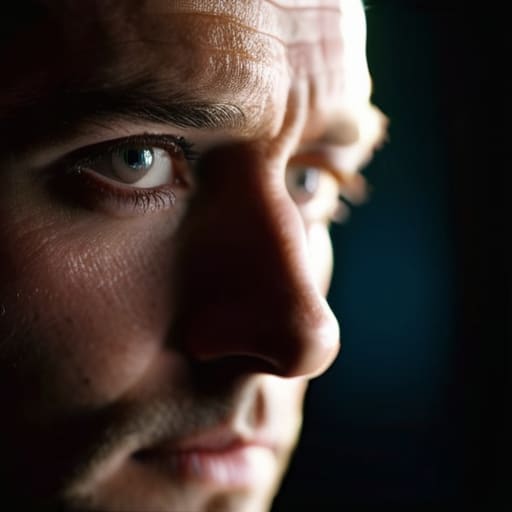
We spend half our lives in the edit suite trying to perform miracles, convincing ourselves that a mistake is just a puzzle waiting to be solved. There’s this pervasive myth that if you just have enough footage, you can fix anything. But the truth is, we aren’t actually “fixing” the shot; we are just performing a high-stakes sleight of hand. When we talk about editing out mistakes in interviews, we’re really talking about the art of redirection. We use a quick cut to a different angle or a splash of b-roll to mask the fact that the subject just stumbled over a word or, more physically, that a stray scratch on their cheek caught the light too harshly.
The problem is that the more you rely on masking cuts in post-production, the more you realize how much you’ve compromised the integrity of the moment. You can use a tight shot to hide a blemish, but if you don’t have the coverage to jump to a wide or a profile, you’re stuck. You end up fighting the frame instead of capturing the truth. Real coverage isn’t about having a dozen cameras; it’s about having enough perspectives so that when a mistake happens, you have a way out that doesn’t feel like a cheat.
The Physics of the Jump Smooth Jump Cut Removal Strategies

When you’re stuck with a jump cut because the subject stumbled over a sentence or a physical mark was too distracting, you have two real choices: you either lean into the edit or you bury it. If you try to force a cut that doesn’t land, the audience feels that hiccup in their gut. The most effective way to achieve smooth jump cut removal isn’t through some fancy plugin; it’s through the strategic use of coverage. I’ve spent half my life shooting extra angles just for this reason. If you have a second camera—even if it’s just a locked-off wide—you can cut to that frame to hide the jump. It’s the oldest trick in the book because it actually works.
If you’re stuck with a single camera and no extra angles, you’re looking at b-roll for interview editing. This is where your production value is truly tested. You don’t just slap a random clip over the error; you find a visual that reinforces the narrative. By layering relevant footage or even a tight close-up shot over the transition, you create a mental bridge for the viewer. It’s about managing the eye, not just the timeline.
Using B Roll for Interview Editing to Bury the Evidence
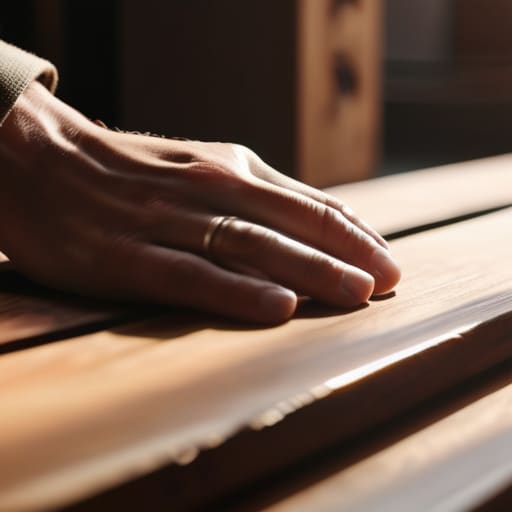
If you’ve done your job on set, you didn’t just shoot the talking head; you shot the world around them. This is where b-roll for interview editing stops being a luxury and becomes your primary tool for survival. When a subject trips over a word or a sudden movement creates a jarring jump, you don’t try to fight the footage with fancy digital tricks. Instead, you lean on the cutaway. You drop in a shot of their hands, a close-up of the subject matter they’re discussing, or even a wide shot of the environment. The goal is to let the eyes wander elsewhere while the ears stay anchored to the story.
The real trick to successful masking cuts in post-production isn’t about the visual alone; it’s about the handoff. You need to ensure that the moment you switch from the primary shot to the B-roll, the rhythm of the speech remains unbroken. If the audio stutters or the pacing shifts, the illusion breaks. You aren’t just hiding a mistake; you are reconstructing the narrative so the viewer never realizes a correction even took place.
How to Hide a Cut in an Interview With Light and Distance

Look, if you’re staring at a jump cut on your monitor and thinking you need a plugin to fix it, you’ve already lost the battle. Most of the time, the fix happened before you even hit record. If you’ve got a subject with a facial laceration or a distracting blemish that’s making the footage feel “off,” stop looking at the timeline and start looking at your key light. If the light is too hard, it’s going to catch every ridge and shadow of that cut, making it a focal point. I always try to soften the source—use a larger silk or a bounce—to wrap the light around the face. This fills in the micro-shadows that define a wound, making it much less noticeable to the viewer.
Distance is your other best friend here. If you’re shooting a tight, intimate close-up, every imperfection is magnified. By backing the camera up just a foot or two and tightening your focal length, you gain a bit of breathing room. This extra space allows you to use a shallower depth of field to soften the skin texture naturally. It’s not about masking cuts in post-production; it’s about setting the scene so the eye doesn’t have a reason to linger on the mistake in the first place.
Masking Cuts in Post Production Without Losing the Human Element
Once you’ve moved the lights and found the right angle, you eventually end up at the computer, staring at a timeline full of jagged jumps. This is where most people lose the soul of the piece. They get so obsessed with masking cuts in post-production that they end up creating something that feels surgical and sterile. If you trim a sentence too aggressively to hide a stumble, you often strip away the natural cadence of human speech. You might achieve a technically perfect jump cut removal, but if the subject’s eyes blink or their shoulders shift mid-sentence, the audience feels the lie.
The trick isn’t just about the visual; it’s about maintaining the rhythm. You have to treat the edit like a conversation, not a math problem. If you can’t use B-roll to bridge a gap, look at the micro-expressions. Sometimes, letting a tiny, imperfect breath linger actually makes the transition feel more organic. You’re looking for seamless video transitions that respect the subject’s energy. If the edit feels too fast, you haven’t fixed the mistake; you’ve just hidden it behind a wall of artificial pacing.
The Invisible Thread Audio Continuity in Video Editing
You can fix a jumpy frame with a well-timed piece of B-roll, but you can’t hide a hiccup in the sound. I’ve sat in edit suites where the visual cut was surgically clean, yet the viewer still felt a sense of unease. That’s because the ear is far more sensitive to disruption than the eye. If you’re editing out mistakes in interviews, a sudden shift in room tone or a momentary drop in the subject’s vocal resonance will scream “error” louder than any visual glitch. It breaks the spell.
To maintain that invisible thread, you have to treat the audio as a single, continuous landscape rather than a collection of clips. I always look for a consistent “room bed”—that low-level hum of the space—to layer underneath your cuts. When you’re performing audio continuity in video editing, you aren’t just matching volume; you’re matching the texture of the silence. If the subject moves or the air shifts, you need to crossfade those frequencies so the transition feels like a natural breath rather than a mechanical snap. If the sound stays steady, the audience will forgive almost anything you do with the picture.
Five Ways to Keep the Edit Seamless Without Losing the Subject
- Watch your eyeline. If you’re cutting between two different camera angles, make sure the subject isn’t suddenly looking at a different part of the room; a shift in the gaze is often more distracting than a jump in the footage itself.
- Use the “L-cut” and “J-cut” method. Don’t just cut the video and audio at the same time like a butcher; let the audio from the next clip start a second before the picture changes, or let the previous audio linger. It smooths the transition so the brain doesn’t trip over the seam.
- Scale your shots. If you have to jump cut within the same angle, don’t try to pretend it didn’t happen. Punch in about 10% or 15% on the second shot. It makes the cut look like an intentional change in perspective rather than a technical glitch.
- Mind the background movement. If there’s a clock ticking or a person walking behind your subject, a cut will be obvious because the background “jumps.” Try to time your cuts during moments of relative stillness in the environment.
- Lean on the B-roll, but don’t be lazy with it. Don’t just slap a random shot over a cut to hide a mistake; use footage that actually reinforces what they are saying. If the B-roll is just a visual band-aid, the audience will feel the disconnect.
The DP’s Cheat Sheet for Staying Under the Radar
Stop looking for a new lens and start looking at your light; most visual distractions, including physical marks or skin imperfections, are solved by softening the source and controlling the shadows before you ever hit record.
Treat your B-roll as a structural necessity rather than an afterthought; if you know you’re going to have to cut a sentence or hide a jump, you need the coverage to bridge those gaps without the viewer feeling the edit.
Respect the continuity of the room, not just the person; whether it’s the light hitting their shoulder or the hum of the air conditioner, the moment you break the physical or auditory logic of the space, the “hide” fails.
The Gear Trap
People spend weeks obsessing over whether they need a new sensor to fix a jumpy edit, when the real solution is usually just moving a key light three inches to the left or finding a better angle to hide the seam. You can’t buy your way out of poor coverage; you can only light your way through it.
Gethin Moreau
The Final Cut
At the end of the day, hiding a cut isn’t about some magical software plugin or a high-end sensor that magically erases mistakes. It’s about the groundwork you laid before you even hit record. We talked about using B-roll to mask the jump, leveraging the physics of light and distance to soften the transition, and ensuring your audio doesn’t snap like a broken rubber band. If you’ve done your job right, the viewer won’t notice the edit; they’ll only notice the story being told. You use the tools—the coverage, the depth of field, the seamless audio—to bridge the gaps that human speech inevitably creates. It’s about managing the continuity so the audience stays inside the moment rather than being pulled out by a jarring visual hiccup.
I know there’s a constant temptation to chase the next piece of gear that promises a “perfect” workflow, but the truth is that perfection is a myth we tell clients to justify our day rates. Real filmmaking is about graceful recovery. It’s about knowing when a jump cut can actually serve the rhythm of a thought and when it’s a mistake that needs burying. Don’t let the fear of a messy take paralyze your creativity. Focus on the light, watch your coverage, and remember that the best edit is the one no one sees. Get back out there and just keep rolling.
