
I spent a good decade watching people walk into a rental house, stare at a spec sheet, and convince themselves that a new sensor would magically fix their lighting problems. There’s this persistent, expensive myth circulating that if you just shoot in a flat, grey profile, you’ve somehow “captured” the scene. But let’s be clear: understanding how log profiles work isn’t about unlocking some secret high-definition dimension; it’s about managing the math of light so you don’t end up with crushed blacks or blown-out skies that no amount of magic can fix. Most people treat Log like a safety net, when in reality, it’s just a way to preserve the data you actually need for the grade.
I’m not here to give you a lecture on bit-depth or a math lesson on gamma curves that you’ll forget by next Tuesday. My goal is to strip away the marketing jargon and tell you what this actually means when you’re sitting in a dark edit suite at 2:00 AM. I’ll show you where the real flexibility lies, how much latitude you actually need to make a shot usable, and why your choice of lighting matters infinitely more than the profile you select.
The Illusion of Flatness How Log Profiles Work

When you look at a monitor while shooting in Log, it looks like garbage. It’s grey, washed out, and lacks any semblance of contrast. It’s easy to look at that flat image and think the camera is broken, but what you’re actually seeing is a mathematical trick designed to cheat the limits of your sensor. Instead of a standard linear way of mapping light—where every stop of brightness is treated with equal weight—a logarithmic gamma curve explained simply is a way of squeezing more information into the file by prioritizing the details that the human eye actually cares about.
By compressing the data this way, we achieve dynamic range maximization in video that a standard profile just can’t touch. We aren’t “losing” color; we are just tucking the highlights and shadows into a much tighter, more efficient container. It’s like packing a suitcase for a long trip—you might have to compress the clothes to make them fit, but once you get to your destination and unpack (or, in our case, sit down to grade), everything is still there, ready to be expanded back to its full, natural shape.
The Math of Light a Logarithmic Gamma Curve Explained
Look, I’m not going to sit here and walk you through a calculus lecture. If you wanted a math degree, you wouldn’t be reading a filmmaking blog. But if you want to understand why your footage looks like gray sludge straight out of the camera, you need to grasp the concept of the logarithmic gamma curve explained in terms of how it handles light.
In a standard profile, the camera tries to be “smart” by making the image look pretty immediately. It stretches the data to fit what our eyes expect, which usually means it sacrifices the extremes to make the midtones look decent. Log does the opposite. It uses a mathematical curve to compress the massive amount of information hitting the sensor into a manageable file. It’s essentially a way of squeezing the light so that the data from the brightest highlights and the deepest shadows is distributed more evenly across the file.
This isn’t about making a “good” image; it’s about preserving highlight and shadow detail so you have something to work with later. When you’re in the edit, you aren’t just fixing colors; you’re unfolding that compressed data. You’re reclaiming the information that a standard profile would have simply thrown in the bin to make the screen look “correct” in the moment.
Dynamic Range Maximization Chasing Distance in Your Exposure
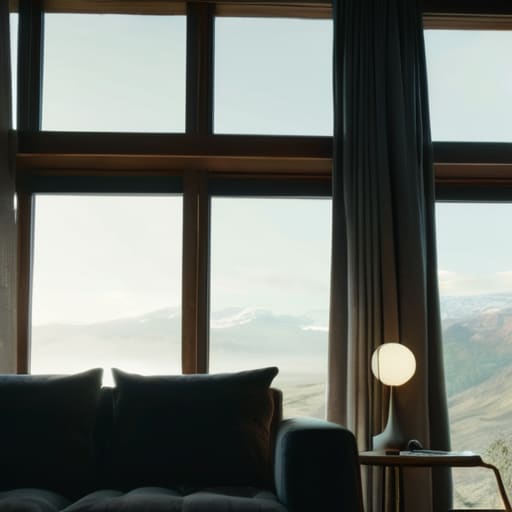
When we talk about dynamic range maximization in video, we aren’t just chasing a number on a spec sheet; we are chasing the ability to see into the corners of a room without losing the sky outside the window. In a standard profile, the camera makes a decision for you—it tries to make the image look “correct” right there in the monitor. The problem is that the camera’s idea of “correct” is often a compromise that clips your highlights into white nothingness or crushes your shadows into a muddy black soup. By shooting in log, you’re essentially telling the sensor to stop making assumptions and instead hold onto as much information as possible.
This isn’t a magic trick, though. If you aren’t mindful of your exposure, you’re just capturing a flat, grey mess that will fall apart the moment you try to fix it. You have to understand that preserving highlight and shadow detail requires a different kind of discipline. You aren’t just aiming for a “pretty” picture on set; you are building a buffer of information that allows you to actually make choices later. It’s about creating distance between the brightest point and the darkest, giving your future self enough room to breathe during the grade.
The Bit Depth Trap Why Sampling Matters More Than Gear

Here is the problem with the way people talk about cameras today: they see a high dynamic range number on a spec sheet and assume they’ve bought insurance. They haven’t. You can shoot with the most advanced logarithmic gamma curve explained in a textbook, but if you’re doing it in 8-bit, you’re essentially building a house on sand. When you’re shooting in log vs standard profiles, the camera is compressing a massive amount of information into a very thin, flat-looking file. If you don’t have the bit depth to back it up, that “information” isn’t actually there to be used.
This is where the math hits the reality of the sensor. Bit depth and color sampling are what actually allow you to stretch that image in post. When you start a color grading workflow for log footage, you are pulling and pushing those pixels to reconstruct a natural look. In 8-bit, if you try to lift the shadows or pull down the highlights, the math breaks. You get banding, those ugly, digital steps in a sunset or a grey sky that no amount of cleverness can fix. You aren’t just losing color; you’re losing the ability to move the image without it falling apart.
Shooting in Log vs Standard Profiles When to Stop Overcomplicating
Look, I’ve seen more people ruin a beautiful sunset by trying to “save it in post” than I care to count. There is this pervasive idea that if you aren’t shooting in Log, you’re somehow failing the craft. That’s nonsense. If you’re shooting a quick corporate interview in a controlled room with a single softbox, a standard profile might actually serve you better. It gives you a finished look immediately, and frankly, if you don’t have the time or the inclination to build a proper color grading workflow for log footage, why bother making your life harder?
The real choice comes down to what you’re actually trying to capture. If you’re working with high-contrast scenes—say, a subject standing in front of a bright window—then shooting in log vs standard profiles becomes a matter of survival. You need that extra latitude to ensure you aren’t left with nothing but digital noise in the shadows or a white hole where the sky used to be. But if the light is consistent and your sensor isn’t being pushed to its limits, sometimes the “simpler” way is the smarter way. Don’t let the gear dictate the difficulty; let the light dictate the profile.
The Color Grading Workflow for Log Footage and Preserving Detail
Once you’ve finished the shoot and you’re sitting in front of a monitor, the reality of your choice sets in. You aren’t looking at a finished image; you’re looking at a grey, desaturated mess that looks like it was filmed through a fog bank. This is where the color grading workflow for log footage actually begins, and it’s where most people trip up. They see that flat image and immediately try to slap a heavy-handed LUT on it to make it look “normal.” If you do that without understanding the underlying data, you aren’t grading; you’re just crushing your image into a corner.
The goal isn’t to make it look pretty immediately, but to manage the information you fought so hard to capture. You want to use your primary tools to balance the exposure and recover the nuances in the skin tones before you ever touch the creative saturation. It’s about preserving highlight and shadow detail during the transform. If you treat a LUT like a magic wand rather than a starting point, you’ll find that your shadows turn to digital sludge and your highlights clip into white nothingness. Work from the bottom up, and respect the math you baked into the sensor.
Five Ways to Stop Fighting Your Footage
- Expose for the highlights, not the shadows. When you’re shooting Log, your sensor is playing a game of preservation. If you blow out the sky or a window, no amount of expensive post-production magic is going to bring that detail back. I’d rather have a slightly dark image that I can lift in the grade than a bright one that’s clipped into a white void.
- Get a way better monitor or a calibrated LUT. Looking at a grey, washed-out Log image on a cheap, uncalibrated screen is a recipe for disaster. You’ll think you’ve got a beautiful exposure, only to realize in the edit that you’ve crushed the blacks. Use a monitoring LUT so you can see what the image is actually doing, even if you aren’t baking that look into the file.
- Stop obsessing over the “Log” label and start looking at your bit depth. A 10-bit Log file is a tool; an 8-bit Log file is a headache. If you try to push 8-bit footage too hard in the grade, you’re going to see banding in the skies and artifacts in the shadows that look like digital rot. Know what your camera can actually handle before you start stretching it.
- Trust your light meter, not your eyes. Log footage is designed to be deceptive; it looks “wrong” to the naked eye because it’s compressing information in a way that doesn’t mimic how we see the world. If you rely on your gut feeling, you’ll likely underexpose. Use a waveform monitor or a light meter to ensure you’re actually capturing the latitude you paid for.
- Don’t treat the grade like a fix-it shop. I see people shooting Log thinking it’s a license to be lazy with their lighting. It isn’t. A colorist can help you balance a scene or shift a mood, but they can’t create light where there was none. Use the extra dynamic range to capture the nuance of the scene, not to compensate for a poorly lit room.
The Bottom Line
Log isn’t a magic filter that makes a cheap sensor act like film; it’s just a way to squeeze more information into the file so you have more room to move when you’re grading.
You can’t fix a bad exposure in post, no matter how much latitude you think you have. If you clip your highlights or bury your shadows in noise, all that extra data is just a high-resolution record of a mistake.
Stop chasing the highest numbers on a spec sheet and start focusing on bit depth and exposure accuracy. A well-exposed 8-bit clip with decent lighting will always look more professional than a messy 10-bit log file that you’re trying to force into submission.
## The Safety Net That Isn't Free
“People treat Log like it’s a magic button that fixes bad lighting, but it isn’t. It’s just a way of mapping the light so you don’t lose the highlights to a white void or the shadows to a muddy mess. It gives you more room to move in the grade, sure, but if you don’t understand where the light is actually coming from when you hit record, all you’re doing is making a much more expensive-looking mistake.”
Gethin Moreau
The Bottom Line
At the end of the day, Log isn’t some magic wand that fixes a poorly lit set; it’s just a way to map out the information you’ve already captured. We’ve talked about the math, the bit depth, and the necessity of preserving those highlights and shadows, but the takeaway is simple: Log gives you latitude, not perfection. If you don’t understand how the gamma curve handles your exposure, or if you try to push 8-bit footage as if it were 10-bit, you’re just going to end up with digital noise and broken pixels. It’s about managing the data you have so that when you finally sit down in the edit, you aren’t fighting the image, but rather shaping it.
Don’t let the spec sheets and the endless debates over dynamic range numbers paralyze you. I’ve seen incredible stories told on cameras that wouldn’t even know what a Log profile is, and I’ve seen high-end cinema rigs produce garbage because the person behind the lens didn’t respect the light. Use the tools available to you, learn the limits of your sensor, and remember that the most important part of the signal chain is still your eye. The gear is just the container; the light is the story.
