I spent a decade watching people walk into rental houses and ask for the most expensive shotgun mic on the shelf, thinking a higher price tag would somehow compensate for a talent standing ten feet too far from the subject. They treat audio like it’s a magic trick, assuming that if they just buy the right kit, the sound will magically fix itself in post. But if you’re looking for a complete guide to microphones that’s just a list of spec sheets and marketing fluff, you’re in the wrong place. Most of your audio problems aren’t actually about the diaphragm or the frequency response; they are about placement, proximity, and the environment you’re too stubborn to respect.
I’m not here to sell you on a gear list that requires a second mortgage. Instead, I want to talk about how you actually capture a performance without fighting the room every step of the way. I’ll show you which tools actually change the work and, more importantly, when a piece of equipment is just a distraction from the craft. This isn’t about the shiny new tech; it’s about understanding the physics of sound so you can stop guessing and start recording.
Understanding Complete Guide to Microphones
Before you start looking at spec sheets and frequency response graphs, you need to understand that a microphone is just a transducer. It’s a device that turns air pressure into electricity, and how it does that depends entirely on the physics of the capsule inside. Most people jump straight into the condenser vs dynamic microphones debate without realizing they’re actually arguing about how much energy the mic needs to wake up and how much “room” it’s going to let in. A dynamic mic is a workhorse; it’s rugged, it ignores a noisy air conditioner, and it doesn’t care if you drop it. A condenser is a precision instrument that demands phantom power requirements be met just to function, but it captures the texture that makes a performance feel intimate.
The real trick, though, isn’t the capsule—it’s the geometry of the sound. You have to wrap your head around microphone polar patterns explained in a way that actually matters for your set. If you don’t understand whether you’re using a cardioid to reject a loud generator or an omni to capture the natural reverb of a cathedral, you aren’t choosing gear; you’re just guessing. You don’t need a more expensive mic; you need to know which way the pickup pattern is facing.
Key Things to Know
Before you start looking at spec sheets, you need to understand that a microphone is just a transducer—it’s a tool that converts movement into electricity, and it’s only as good as the environment you put it in. Most people get caught up in the condenser vs dynamic microphones debate without realizing that a high-end condenser in a room with bad acoustics is just a very expensive way to record a disaster. If you’re working in a noisy street or a drafty warehouse, you want something that ignores the world around it, not something that tries to capture every vibration in the floorboards.
You also need to get your head around microphone polar patterns explained in a practical sense, rather than just memorizing a diagram. It’s not about what the mic can do; it’s about where you are standing in relation to it. If you don’t understand how a cardioid pattern behaves, you’ll spend three hours in post-production trying to fix a bleed that should have been avoided by simply moving the stand six inches to the left. It’s about distance and discipline, not just the gear.
Practical Tips and Steps
Before you start clicking buttons, look at the room. You can buy the most expensive condenser microphone on the market, but if you’re standing in a tiled kitchen or a room with floor-to-ceiling glass, you’re just recording a very expensive echo. I’ve seen more ruined takes because of bad acoustics than because of bad gear. If you’re working in a noisy environment, stop obsessing over the spec sheet and start looking at directional microphone types. A shotgun mic or a tight cardioid pattern will do more to save your production than a thousand dollars worth of post-production noise reduction ever could.
Once you’ve picked your tool, check your power. It sounds elementary, but I’ve seen enough beginners stare blankly at a silent meter because they didn’t realize their setup had specific phantom power requirements. If you’re choosing between condenser vs dynamic microphones, remember the trade-off: one is a sensitive instrument that demands a quiet space, while the other is a workhorse that can handle a bit of chaos. Respect the physics of the space first, and the gear will actually do its job.
Common Mistakes to Avoid
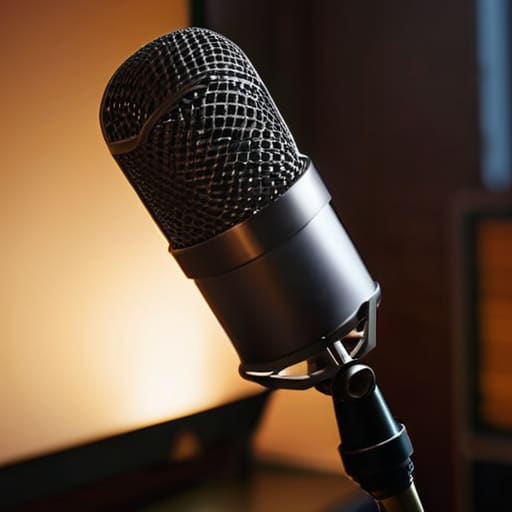
The biggest mistake I see isn’t a lack of gear, but a fundamental misunderstanding of the space you’re working in. People spend thousands on a high-end condenser, only to realize they’ve essentially turned their room into a giant echo chamber. If you aren’t paying attention to microphone polar patterns explained in your manual, you’re just capturing more of the air conditioner and the neighbor’s lawnmower than the person speaking. A condenser is a beautiful tool, but it’s an honest one—it will tell you exactly how bad your acoustics are, and it won’t lie to you.
Then there’s the technical oversight that kills a shoot before it even starts: ignoring phantom power requirements. I’ve sat on sets where the talent is ready, the lighting is perfect, but the audio is dead because someone forgot that certain mics need that extra juice to even wake up. Don’t get caught in the trap of thinking a more expensive sensor or a fancier mic solves a bad environment. If you haven’t mastered the basics of distance and placement, you’re just documenting your own mistakes in higher resolution.
Final Thoughts
At the end of the day, you can own every piece of high-end kit on the market, but if you don’t understand how sound moves through a space, you’re just making expensive noise. Most people get bogged down in the endless debate of condenser vs dynamic microphones before they’ve even bothered to check the acoustics of the room they’re standing in. It’s a distraction. You don’t need a solution for every possible scenario; you just need to understand the physics of where the person is standing in relation to the capsule.
Stop looking for a magic bullet in a spec sheet. Whether you are hunting for the best microphones for podcasting or trying to capture clean dialogue on a documentary set, the principle remains the same: proximity and placement will always trump gear. Learn your microphone polar patterns explained in practice—not just on a diagram—and you’ll realize that most “bad audio” is actually just bad positioning. Buy what you need to get the job done, then spend the rest of your time learning how to actually use it.
Five Ways to Stop Fighting Your Audio
- Mind the gap. You can buy a shotgun mic that costs more than my first car, but if you’re standing six feet away from the subject in a room with hard walls, you’re just recording a very expensive version of an echo. Get the mic closer to the source; distance is the one variable that actually matters more than the diaphragm.
- Stop chasing the “pro” sound and start listening to the room. A high-end condenser mic is a beautiful tool, but in a small, untreated office, it’s just a way to capture every hum from the air conditioner and every reflection off the ceiling. Learn to hear the room before you decide which mic to plug in.
- Respect the signal chain. I’ve seen people spend thousands on a wireless lavalier set only to plug it into a cheap interface that introduces a floor of hiss. If your preamp is noisy, your expensive microphone is just a very sophisticated way to record static.
- Use what the scene demands, not what the spec sheet says. A lavalier is great for an interview where you need to hide the gear, but it’ll never have the natural warmth or the “air” of a well-placed boom. Don’t try to force one tool to do the job of another just because you’re too lazy to swap them out.
- Redundancy is cheaper than a reshoot. If you’re doing something that matters—a client interview or a live performance—always have a backup. If the primary lavalier fails because of a battery hiccup or a wireless interference, having a boom mic running in the background is the only thing that will save your edit.
The Bottom Line
Stop looking for the “perfect” microphone and start looking at your environment; a cheap lavalier placed correctly will always beat a $1,000 shotgun mic fighting a room’s natural echo.
Distance is your most important variable, so prioritize getting the capsule as close to the source as the production allows before you start worrying about bit rates or frequency responses.
Gear is just a tool for capturing what’s already there, so invest your time in learning how to control your space and your talent’s movement rather than just upgrading your kit.
The Physics of the Sound
You can buy a microphone that costs more than my first car, but if you’re standing ten feet away from the subject in a room with bare walls, you’re just recording expensive-sounding garbage. A great mic doesn’t fix a bad location; it just documents the failure more clearly.
Gethin Moreau
The Last Word
At the end of the day, you can own every high-end shotgun and lavalier on the market, but they won’t save a performance if the room is a cavernous echo chamber or if your subject is standing ten feet too far from the capsule. We’ve talked about polar patterns, signal-to-noise ratios, and the necessity of monitoring, but none of that technical jargon matters if you haven’t mastered the physicality of the sound. Remember that a microphone is just a tool to capture a moment, and that moment is shaped by where you stand, how you hide the wires, and how much you respect the acoustics of the space you’re working in.
If you’re sitting there staring at a shopping cart full of gear, hoping the next purchase will finally make your work sound professional, stop. Professionalism comes from the discipline of listening before you hit record. I’ve sat in freezing rain with a single, battered handheld mic and captured more truth than most people do with a million-dollar mobile studio. Focus on the intent of the scene and the proximity of the source. Once you stop chasing the perfect spec sheet and start chasing the actual sound, you’ll realize that the most important piece of equipment you own isn’t in your kit—it’s your ears.
