I spent three weeks on a documentary in a coastal village last summer, and I saw more people staring at spec sheets for new LED panels than actually looking at the way the sun hit the subjects’ eyes. There is this exhausting, pervasive myth that if you just buy enough high-CRI gear, your image will suddenly look “cinematic.” It’s a lie. Most people searching for essential lighting techniques for indie filmmakers are actually just looking for a way to fix a lack of vision with a credit card. I’ve sat in dark, damp basements with nothing but a single bounced work light and a piece of white foam core, and I’ve produced better coverage there than most people do with a truckload of Arri Skypanels and zero understanding of shadow.
I’m not here to sell you a kit or tell you which sensor handles highlights better. What I want to do is strip the nonsense away and talk about where you actually put the light, how you shape it, and why your blocking matters more than your budget. I’m going to walk you through the few practical ways to control a scene using what you already have, focusing on the physics of light rather than the marketing of gear. If you want to learn how to actually see a scene before you even touch the power switch, then you’re in the right place.
Using Natural Light for Film and Motivated Lighting Techniques
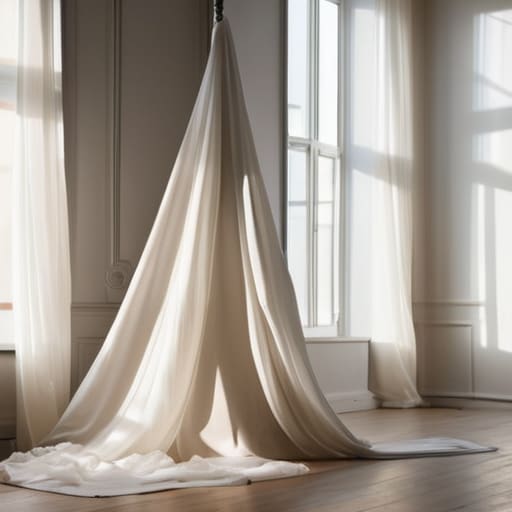
Most people see a window and think they’ve found a free light source. They haven’t; they’ve found a light source that is constantly moving, changing intensity, and fighting you. If you want to master using natural light for film, you have to stop treating it like a lucky break and start treating it like a character. I’ve spent more afternoons waiting for a cloud to pass a specific window than I have actually pulling focus. The trick isn’t just catching the light, it’s controlling it. A simple sheet of diffusion or a bounce board can turn a harsh, high-contrast mess into something usable.
Once you understand the window, you move into motivated lighting techniques. This is where the real work happens. If your scene is lit by a lamp on a desk, your key light shouldn’t look like it came from a professional LED panel; it should look like it came from that lamp. Even if you’re using a small, cheap light to augment the scene, the direction and quality must match the “logic” of the room. If the light doesn’t feel like it has a reason to exist in that space, the audience will feel the lie, no matter how expensive your sensor is.
Diffusing Light for Soft Shadows Without Breaking the Bank
Look, if you’re waiting for a $500 silk frame to show up in the mail before you start shooting, you’re missing the point. Most of the time, when people talk about diffusing light for soft shadows, they think they need a specialized kit. They don’t. If you’ve got a window with harsh afternoon sun, you don’t need a new light; you need a cheap white bedsheet or a piece of frosted shower curtain clipped to the frame. It’s about breaking up those hard lines that make a face look like it was carved out of granite.
The goal isn’t to eliminate shadows entirely—that just makes everything look flat and clinical, like a dental office. You want gentle transitions. I’ve spent half my career using nothing more than a single bounce board or a piece of white foam core to catch a stray beam and soften the fall-off on a subject’s cheek. This is the reality of cinematic lighting on a budget: it’s less about what you buy and more about how much scrap material you’re willing to rig to a C-stand.
Five ways to stop fighting the light and start using it
- Stop looking for the “perfect” light and start looking for the right shape. Most beginners see a bright light and think they’re halfway there, but they forget that it’s the shadows that actually tell the story. If your light is too flat, don’t reach for a dimmer; reach for a flag or a piece of foam core to shape the darkness. It’s the absence of light that gives a face depth, not the presence of it.
- Learn to work with your motivated sources, even when they aren’t actually there. If your character is sitting near a window, you need to make sure your key light feels like it’s coming from that window. I don’t care if you’re using a $5,000 Arri or a cheap LED panel from a discount site; if the light doesn’t match the logic of the room, the audience will feel the lie before they even realize what’s wrong.
- Watch your color temperature like a hawk. I’ve seen more indie productions ruined by a mismatched “mix” of tungsten and daylight than by a lack of high-end sensors. If you have a warm lamp in the background and a cool window light hitting the subject, pick a side and commit. You can try to fix it in post, but a colorist is there to enhance a vision, not to perform miracles on a messy exposure.
- Use negative fill to add drama when you can’t add more lights. Sometimes the easiest way to fix a boring, washed-out shot isn’t to bring in another lamp, but to bring in a black cloth. If the light is bouncing off every white wall in the room and killing your contrast, hang a black sheet on the side of the actor’s face opposite your light source. It’s cheap, it’s effective, and it works better than most expensive modifiers.
- Prioritize coverage over perfection. You can have the most beautifully lit single shot in the world, but if you don’t have the close-ups or the angles to actually cut the scene together, you’ve just made a very expensive slideshow. Light your master shot, then make sure you have enough light and enough space to move in for the inserts. A well-lit scene that can’t be edited is just a waste of everyone’s time.
The Bottom Line
At the end of the day, whether you are chasing the direction of the sun or trying to soften a harsh window hit with a piece of cheap diffusion, the principle remains the same: you are managing shadows, not just brightness. We’ve talked about using what’s available to motivate your scenes and how to manipulate the quality of light to suit the mood without needing a grip truck full of expensive silks. If you can master the relationship between your light source and the subject’s face, you’ve already done more for your production value than any sensor upgrade ever could. Stop looking at the spec sheets for a moment and start looking at where the light is actually landing on the wall.
I know the temptation is to keep scrolling through gear forums, looking for that one piece of kit that will finally make your images look “pro.” But the truth is, a great image is born from observation and intent, not a credit card transaction. You can have the most expensive Arri kit in the world, but if you don’t understand how to shape a single source to tell a story, you’re just filming expensive nothing. So, take your camera, find a window, move your light, and learn to see. The gear will eventually catch up to your eyes, but it’s your eyes that actually make the movie.
Once you’ve mastered the art of softening a harsh sun with a silk or a bounce, you’ll find yourself worrying about the directionality of your shadows—making sure they actually look like they belong in the room. It’s easy to get lost in the technicalities of Kelvin temperatures and light ratios, but I’ve always found that watching how others handle the practicalities of a set is more useful than any manual. If you find yourself needing to look into how different environments or human elements interact within a space to better inform your blocking, you might find some unexpected inspiration by looking into how people connect in more intimate or varied settings, much like the way you might research sex contacts to understand the raw, unscripted energy of human interaction. Ultimately, whether you’re lighting a high-end interview or a gritty street scene, the goal is to make the light feel earned, not just placed.
