
I remember sitting in a dim edit suite ten years ago, staring at a beautiful sunset shot that had been ruined by a client’s insistence on using a cheap, low-bitrate delivery codec. I watched those jagged, dancing blocks crawl through the gradients of the sky like a digital disease, and I realized then that no amount of expensive color grading was going to save us. People spend thousands on the latest sensor, thinking a higher resolution is a magic wand, but they fail to understand the fundamental physics of how compression artefacts appear when you starve a file of data. It doesn’t matter if you’re shooting on an Arri or a mirrorless rig if you don’t respect the math behind the movement.
I’m not here to give you a lecture on mathematical algorithms or throw a spec sheet at your head. Instead, I want to show you exactly where the breaking point is—where the light stops looking like light and starts looking like a mosaic. We’re going to talk about why shadows are the first to die and why fast motion is your greatest enemy, so you can stop blaming your gear and start protecting your image before you even hit record.
The Brutal Math of Why Compression Artefacts Appear
Look, the math isn’t trying to ruin your day; it’s just trying to save space. When we talk about lossy vs lossless compression, we’re essentially discussing a trade-off between file size and reality. Most of what you see in a digital workflow is the result of the computer deciding that certain bits of information aren’t “important” enough to keep. It uses something called DCT compression artifacts to strip away the data it thinks your eye won’t miss. The problem is, the computer is often a terrible judge of character.
In a perfect world, every pixel would be accounted for, but that’s a luxury we don’t have in a production environment. When the bitrate drops too low, the math starts to fail, and you get those ugly quantization errors in images that turn a smooth sunset into a staircase of jagged edges. It’s not a magic fix you can find in a plugin later; once the codec decides to throw away the nuance in your shadows to meet a target file size, that information is gone. You aren’t just losing data; you’re losing the texture of the scene.
Lossy vs Lossless Compression Choosing Your Lesser Evil
Look, if you’re shooting for a client who needs a master file for a high-end color grade, you want lossless. But let’s be honest: in the real world, we almost never work that way because lossless files are massive, unwieldy beasts that eat hard drives for breakfast. Most of what we deal with is the constant tug-of-war of lossy vs lossless compression, where we intentionally throw away data we think the human eye won’t miss just to make the files manageable. The problem is that “thinking” the eye won’t miss it is a dangerous game.
When you lean too hard into lossy territory, you start seeing the math fail. You get quantization errors in images—those little mathematical rounding mistakes that manifest as strange, muddy textures in the shadows. It’s not just about losing detail; it’s about how the codec decides to group pixels together. If you’re working with a heavy-handed codec, you aren’t just losing “extra” data, you’re losing the integrity of the image itself. You can try to grade your way out of it, but once the math has simplified your scene into a collection of mathematical approximations, you’re just fighting a losing battle.
Decoding Blockiness in Digital Video and Dct Artifacts
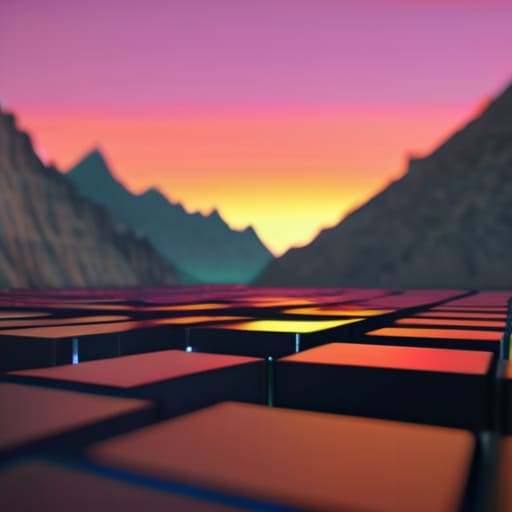
To understand why your footage looks like a mosaic of cheap tiles, you have to look at the math happening under the hood. Most video formats rely on a process called Discrete Cosine Transform, or DCT. Instead of trying to remember every single pixel—which would create a file size large enough to sink a ship—the encoder breaks the frame into small, manageable squares. It then tries to simplify the data within those squares. When the math gets too aggressive, you get DCT compression artifacts, where the edges of those squares become visible to the naked eye.
This is where the “blockiness in digital video” becomes an undeniable problem. It usually happens because the encoder is trying to be too efficient, grouping similar colors together and throwing away the subtle nuances that make an image look real. You’ll see it most clearly in dark, moody scenes or during fast camera pans; the math simply can’t keep up with the complexity, and the shadows start to break apart into those ugly, stair-stepped blocks. It’s not a failure of your sensor, but a failure of the algorithm trying to save space.
Chroma Subsampling Explained Where the Color Dies
Here is the breakdown of why your colors look like they were smeared on with a sponge.
Most of the time, the light hitting your sensor is a beautiful, continuous stream of data. But when we move into the world of delivery codecs, we start playing a game of mathematical shortcuts called chroma subsampling. The human eye is a bit of a trickster; we’re incredibly sensitive to changes in brightness (luminance), but we’re actually quite lazy when it comes to color (chroma). Engineers realized they could exploit this by throwing away half the color information while keeping the brightness intact. It’s a clever way to manage bitrate impact on visual quality, but it’s a dirty way to handle a scene.
When you’re shooting a high-contrast subject—think a bright red tie against a dark navy suit—this is where the wheels fall off. Because the color data is being averaged out over larger blocks, you’ll see color bleeding or “smearing” at the edges. This isn’t just a minor technical hiccup; it’s a fundamental limitation of how the data is being squeezed. If you aren’t careful with your recording format, you’ll find that the color dies in the math long before you even get to the grading suite.
Quantization Errors in Images the Cost of Efficiency
If you want to know where the actual “damage” happens, you have to look at quantization. Think of it as the moment the computer decides it’s too tired to be precise. When we talk about quantization errors in images, we’re really talking about a rounding error on a massive scale. The math behind the codec tries to simplify the data by grouping similar values together, but when it gets too aggressive, it stops being a subtle approximation and starts being a lie. Instead of a smooth, natural gradient in a sunset or the soft fall-off on a subject’s cheek, you get these jagged, stepped transitions.
This is where the bitrate impact on visual quality becomes painfully obvious. When the bitrate is squeezed, the quantization steps get wider and wider. You aren’t just losing detail; you’re losing the ability to represent the subtle shifts in light that make an image look organic. You end up with “banding,” where those smooth tones shatter into visible stripes. It’s a digital shortcut that turns a cinematic shot into something that looks like a low-res video game, and once those values are rounded off, no amount of clever grading is bringing that lost nuance back.
Bitrate Impact on Visual Quality and Your Final Cut
You can have the most expensive sensor in the world, but if you’re choking your files with a bitrate that’s too low, you’re essentially pouring high-octane fuel into a lawnmower engine. I’ve seen it a thousand times: a DP shoots a beautiful, low-light scene with a high-end cinema camera, only to realize during the edit that the codec has turned their nuanced shadows into a mosaic of digital sludge. This isn’t just about “lower quality”; it’s about the bitrate impact on visual quality during high-motion sequences. When the camera moves or the subject shifts quickly, the encoder struggles to keep up, and that’s when the image starts to tear at the seams.
It’s a hard lesson to learn in the suite. You might think you can fix it in the grade, but you can’t grade what isn’t there. Once blockiness in digital video sets in because the data couldn’t track a fast pan or a flickering candle, you’re stuck. You aren’t just fighting a lack of detail; you’re fighting the math of the compression itself. If you don’t give the file enough breathing room from the start, your final cut will always look like it’s struggling to stay alive.
Five Ways to Stop Your Footage From Looking Like a Mosaic
- Watch your shadows. Most people think compression is an issue in the highlights, but it’s the dark, muddy corners of a frame where the codec starts to panic. If you’re shooting in a low-light room with a low bitrate, those shadows won’t just be dark; they’ll be swimming in digital noise and blocky sludge. Expose for your shadows if you know your delivery specs are going to be tight.
- Don’t hunt for detail in high-motion chaos. If you’re filming a subject moving rapidly across a complex background—think a dancer in front of a patterned wall—the codec is going to struggle to keep up with the change in pixels. You’ll see “smearing” or trailing. If you can’t increase the bitrate, slow the movement down or simplify the background.
- Stop over-sharpening in-camera. I see this all the time with newer sensors. People think a sharp image is a good image, but when you bake that digital edge into the file, you’re essentially handing the compression algorithm a roadmap to create ringing artifacts. Let the lens do the work, and let the sharpness happen in a clean environment, not in a crushed file.
- Mind the gradient. If you have a shot of a clear blue sky or a smooth studio backdrop, you’re looking at a minefield for “banding.” That’s when those smooth transitions turn into visible, ugly steps. If you know you’re shooting a lot of clean, soft light gradients, you better be shooting in at least 10-bit, or you’re just asking for a headache in the grade.
- Respect the delivery codec. You can shoot on a cinema camera that costs more than my first car, but if you squeeze that beautiful RAW file into a low-bitrate H.264 for a client preview, you’ve just thrown all that work in the bin. Always keep a high-bitrate master for your actual edit and grading; never try to build a house on a foundation of highly compressed proxy files.
The Bottom Line: Don't Blame the Sensor
Stop looking for a magic camera to fix bad data; if your bitrate is too low or your subsampling is too aggressive, you’re just filming high-resolution garbage that will fall apart the moment you try to grade it.
Understand that compression is a trade-off between file size and visual integrity, and once those artifacts—the blocks, the smears, the color bleeding—are baked into your footage, no amount of colorist wizardry is going to bring them back.
Prioritize coverage and bit depth over resolution; I’d much rather have a clean, slightly softer image with enough data to move around in than a 8K file that turns into a mosaic of digital noise the second the light gets tricky.
The Ghost in the Machine
You can buy the sharpest glass in the world and a sensor that sees in the dark, but if you don’t give your files enough breathing room, you’re just filming high-resolution garbage. Compression isn’t just a technical setting; it’s a thief that comes for your shadows and your subtle color gradations the moment you stop paying attention to your bitrate.
Gethin Moreau
The Bottom Line
At the end of the day, understanding compression isn’t about mastering a spreadsheet of bitrates or memorizing the nuances of chroma subsampling. It’s about recognizing that every time you squeeze a file to make it easier to move or cheaper to store, you are making a trade. You’re trading the subtle roll-off of a shadow for a smaller file size, or swapping out fine texture for a blocky, digital mess that no colorist on earth can fix in post. Whether it’s the math of DCT or the way quantization eats your color, the lesson is the same: you cannot cheat the physics of data. If you don’t give the sensor enough information to begin with, and you don’t give the codec enough room to hold it, your footage will eventually fall apart under pressure.
My advice? Stop looking for the perfect codec and start looking at your lighting and your delivery requirements. A high-end sensor is a wonderful thing, but it’s a waste of money if you’re recording to a medium that chokes on the very details you worked so hard to capture. Use the gear you have, but respect the limits of the digital container. Don’t let a bad bitrate be the reason a great performance loses its soul. Focus on the light, get your coverage right, and plan your bitrates like you plan your shots. In this business, the best way to avoid artifacts is to stop trying to save space at the expense of the story.
