
I spent twenty years waiting for the “right” sensor to arrive, thinking that once I had enough dynamic range, the image would finally stop fighting me. Now, I see kids scrolling through feeds, convinced that the secret to how to shoot for social media is a $4,000 mirrorless body and a specialized gimbal that makes them look like a professional stabilizer. It’s a lie. I’ve seen more ruined shots caused by a lack of basic shadow control than by a subpar sensor, and frankly, most of the “content creators” out there are just buying their way out of learning how to see.
I’m not here to sell you a gear list or tell you which subscription service will fix your muddy footage. If you want to actually improve, we need to talk about where you stand in relation to the window, how much space you’re leaving for the edit, and why your lighting is probably working against you. I’m going to show you how to master the fundamentals of light and composition so that your work looks intentional, regardless of whether you’re using a cinema rig or the phone currently sitting in your pocket.
Understanding How to Shoot for Social Media

The first thing you have to accept is that the rules of the frame have shifted. We spent decades obsessing over the rule of thirds in a 16:9 landscape, but now, the world lives in a vertical column. Optimizing video for vertical viewing isn’t just about turning your phone sideways; it’s about understanding how much visual information you can actually cram into that narrow strip without it looking cluttered. If you keep framing like you’re shooting a feature film, you’re going to lose the viewer before they even realize they’ve scrolled past you.
It’s also a matter of scale. When you’re working on mobile cinematography for creators, you don’t have the luxury of a massive lighting rig or a five-person grip crew. You’re often working with whatever window is nearby or whatever lamp is sitting on a desk. You have to learn to read that light. If the light is coming from directly above, you’re going to get nasty shadows under the eyes that no filter can fix. Stop looking for a better sensor and start looking for a better angle.
Key Things to Know

First, stop thinking about “content” and start thinking about the frame. If you’re shooting for a phone, you aren’t just changing the orientation; you’re changing the entire geometry of the shot. Optimizing video for vertical viewing isn’t just about turning the camera 90 degrees; it’s about understanding that your headroom is gone and your lateral space is non-existent. You have to compose for a narrow corridor. If you keep trying to frame like you’re on a 2.39:1 anamorphic widescreen, you’re going to end up with a subject that looks like a postage stamp in a sea of nothing.
Second, let’s talk about the light. I see people buying expensive gimbal stabilizers when their subject is being lit by a single, harsh overhead fluorescent bulb. No amount of smooth movement will fix a muddy, unflattering face. You need to master basic short-form video lighting techniques—even if that just means standing near a window or bouncing a cheap LED off a white wall. A well-lit shot on an old iPhone will always beat a grainy, underexposed mess on a RED Komodo. Focus on the direction of the light before you worry about your resolution.
Practical Tips and Steps

Start by looking at your light source before you even touch your phone. If you’re working with a window, face it; if you’re under a kitchen fluorescent, move the subject. Most people think they need a ring light to look professional, but they actually just need to stop fighting the shadows. When you’re practicing mobile cinematography for creators, the goal isn’t to mimic a Hollywood set, but to find a direction of light that gives the face some shape. If the light is coming from directly above, you’re going to get those nasty raccoon eyes that no filter can fix.
Next, think about your frame. Since we’re optimizing video for vertical viewing, you have much less real estate to work with. Don’t just center everything like a static portrait; use the vertical space to create depth. Place something in the foreground to give the shot a sense of scale, or use the height to lead the eye from the bottom to the top. It’s about intentional blocking, not just pointing a lens at a person and hitting record. If you don’t plan the movement within that narrow frame, you’re just making a talking head, not a film.
Common Mistakes to Avoid
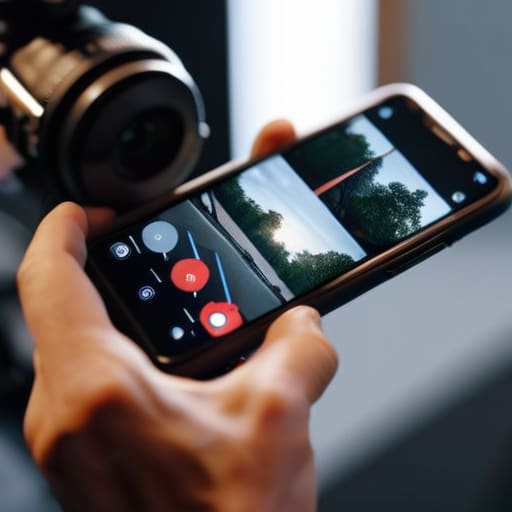
The biggest mistake I see isn’t a lack of resolution; it’s a lack of intent. People treat their phones like toys rather than tools, forgetting that optimizing video for vertical viewing requires a completely different sense of composition. You can’t just shoot a wide landscape and hope a crop saves you in post. If you don’t account for that narrow frame while you’re standing on set, you’ll end up with a mess of empty space or a subject that’s been chopped in half.
Then there’s the obsession with “digital” fixes. I see creators trying to mask terrible shadows with heavy-handed filters or digital sharpening, thinking they can outrun bad exposure. They should be looking at short-form video lighting techniques instead—like finding a window or bouncing a cheap LED—rather than praying their sensor can see in the dark. A colorist can fix a tint, but they can’t manufacture detail that was never captured. Stop looking for a better app and start looking for a better light source.
Final Thoughts
At the end of the day, you’re going to spend a lot of time looking at spec sheets and wondering if a new sensor or a faster prime will finally make your work look “professional.” It won’t. I’ve spent twenty years watching people chase the latest kit only to realize they still haven’t mastered the basics of engaging video storytelling. Whether you are working with a cinema rig or practicing mobile cinematography for creators, the principles remain the same: find the light, respect the frame, and make sure you actually have something worth looking at once the camera is rolling.
Stop overthinking the tech and start focusing on the intent. If you can manage your social media content production workflow so that you aren’t fighting your equipment in the middle of a shoot, you’re already ahead of most people. It’s about the way the light hits a subject’s eyes and how you position yourself to capture the moment before it disappears. The gear is just a tool; the craft is everything else. Now, go out and shoot something.
Five ways to stop worrying about your sensor and start looking at the scene
- Stop framing for a cinema screen when the world is looking at a vertical rectangle. If you aren’t thinking about your composition in 9:16 from the moment you set the tripod, you’re fighting an uphill battle you’ll never win in the edit. Leave enough room in the center so you don’t chop off heads when the platform overlays its UI.
- Find the window before you find the tripod. I’ve seen kids buy three-point lighting kits for their phones only to shoot in a dark corner with terrible shadows. If you have a single, large source of soft light—a window, a doorway, a cloudy sky—use it. Light is free; a better sensor is just a way to compensate for being lazy with your placement.
- Move your feet, not just your zoom. Social media thrives on a sense of presence, which means you need to be close to the action. Don’t stand ten feet back and try to “punch in” later; you’ll lose the intimacy and the resolution. Get in the frame, find a new angle, and use the physical space to create depth.
- Plan your coverage so it actually cuts. A common mistake is filming one long, continuous shot because it’s easy. That’s a death sentence for engagement. Shoot your wide, shoot your medium, and get your close-ups. You need variety to keep someone from scrolling past, and you can’t manufacture that variety in post-production if you didn’t capture it on set.
- Audio is half the image, even if you don’t think it is. You can have a shot that looks like a Hollywood feature, but if the wind is clipping your built-in mic or the room echoes like a cathedral, people are going to swipe away in three seconds. Get the mic closer to the source than you think you need to. If you can’t get clean sound, you don’t have a video; you have a headache.
The bottom line
Stop looking at spec sheets and start looking at your light source; a cheap sensor with good placement will always beat a cinema camera in a dark room.
Plan your coverage for the edit, not just the shot, because if you don’t have the right angles and proximity, no amount of post-production magic can fix a boring sequence.
Discipline beats gear every single time—learn to master the distance between your lens and your subject before you go out and buy a new prime.
The Sensor Trap
Stop looking at spec sheets for the next big sensor upgrade; if you can’t make a decent image with a window and a bit of distance, a sixty-thousand-dollar camera is just going to give you a much more expensive version of a bad shot.
Gethin Moreau
The Bottom Line
At the end of the day, social media video isn’t about having the latest sensor or a gimbal that tracks your every move. It’s about the basics we’ve been talking about: finding a decent light source, understanding your framing, and making sure you actually have enough coverage to tell a story that doesn’t feel disjointed. If you can manage your distance from the subject and keep your eye on the composition rather than the settings menu, you’re already ahead of ninety percent of the people scrolling through their feeds. Stop worrying about the spec sheet and start worrying about where the light is hitting the subject’s eyes.
I’ve spent twenty years looking through viewfinders, and the lesson is always the same: the gear is just a tool, not the talent. You can own a cinema camera that costs more than my first house, but if you don’t have the patience to wait for the right moment or the sense to move a lamp two inches to the left, you’re just making expensive garbage. Don’t let the pursuit of the perfect kit keep you from actually pressing the record button. The best camera you have is the one in your hand right now, provided you actually know how to use it.
