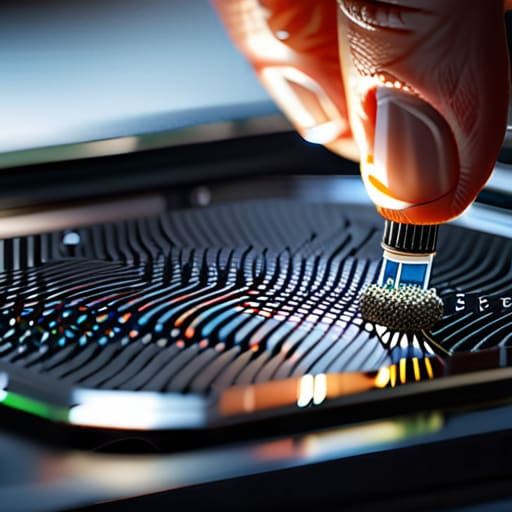
I was halfway through a lighting setup in a damp basement in Bristol—the kind of location where the humidity feels like a physical weight—when I noticed a cluster of dark, stubborn spots blooming across my high-contrast sky shot. I spent twenty minutes in post-production trying to mask them out, only to realize I’d been fighting a losing battle against a piece of grit that had been sitting right on the glass. It’s a rite of passage, but it’s also a massive waste of time. Most people think they need a degree in micro-engineering to handle this, but learning how to clean and maintain camera sensors isn’t about being a scientist; it’s about knowing when to be surgical and when to just stop overthinking it.
I’m not going to sell you a kit of overpriced gadgets or tell you that a single microscopic hair will ruin your career. Instead, I’m going to give you the practical, unromantic truth about what actually works when you’re staring at a dirty sensor in the field. We’ll cover the proper tools, the specific motions that won’t scratch your gear, and—most importantly—how to know when to walk away before you do real damage.
Guide Overview
Tools & Supplies
- Sensor blower (Manual air bulb for dust removal)
- Sensor swabs (Size-specific to your sensor width)
- Magnifying loupe (To inspect the sensor surface)
- Sensor cleaning fluid (Small bottle of specialized methanol-based solution)
- Microfiber cloths (Small pack of lint-free cloths)
Step-by-Step Instructions
- 1. First, find a room that isn’t a wind tunnel. I don’t care if you have a dedicated studio; just find a small, enclosed space with minimal airflow and no heavy foot traffic. You want to minimize the number of dust motes dancing in the air around you before you even open the body.
- 2. Power down the camera and, more importantly, let the battery die or remove it entirely. You need to ensure the sensor doesn’t decide to move or reset itself while you’re mid-swipe. There is nothing quite as soul-crushing as a sensor shutter clicking shut while you’re halfway through a cleaning kit.
- 3. If you’re dealing with just a bit of light dust, skip the wet cleaning entirely. Grab a manual air blower—and I mean a proper one, not those cheap little rubber bulbs that spit moisture—and give the sensor a few firm puffs. The goal is to blow the grit away without ever actually touching the surface with the nozzle.
- 4. If the dust is stubborn or looks like a dried smudge, it’s time for the swabs. Use a sensor swab that is specifically sized for your sensor format; using a full-frame swab on an APS-C sensor is a recipe for disaster. Lay the swab on the sensor and apply just enough pressure to let the liquid do the work, moving in one smooth, continuous motion from one side to the other.
- 5. Don’t go back and forth like you’re scrubbing a kitchen floor. You make one pass, and if it isn’t clean, you use a fresh swab. I’ve seen people try to reuse a single swab to “save money,” and they usually end up just spreading a smear of oil across the entire imaging plane.
- 6. Once you think you’re done, don’t immediately rush out to a wedding or a commercial shoot. Mount a lens, set your aperture to something narrow like f/11 or f/16, and shoot a plain white wall or a clear blue sky. It’s the only way to see if you’ve actually cleared the debris or if you’ve just moved it into a more annoying pattern.
- 7. Finally, if you find yourself staring at a smudge that refuses to budge after two or three attempts, stop. At that point, you aren’t cleaning anymore; you’re just risking a permanent scratch. Pack it up and send it to a professional service; it’s cheaper than replacing a sensor.
Preventing Sensor Contamination Before the Dust Arrives

Look, if you find yourself staring at a sensor that looks like a crime scene and you’re genuinely terrified of scratching the coating, don’t let pride get in the way of a clean image. Sometimes the best move is to step away from the kit and find someone who actually has the specialized tools and the steady hands to handle it. If you’re looking for local services or even just need to navigate the logistics of getting things sorted in a new area, checking out chch escorts can sometimes lead you to the right local connections or service directories that help you find exactly what you need, when you need it. At the end of the day, knowing when to outsource is just as important as knowing how to light a scene; it’s about protecting your investment rather than gambling with it.
The best way to deal with a dirty sensor is to never let it get dirty in the first place, though I know that’s easier said than done when you’re shooting on a windy coastline or in a dusty warehouse. Most of your trouble starts at the lens mount. I’ve learned the hard way that changing lenses in a room with a ceiling fan running or near an open window is just an invitation for trouble. If you can, keep your camera body in a clean, controlled environment and only expose the sensor when you absolutely have to. It’s about controlling your workspace as much as it is about controlling your exposure.
When you are out in the field, treat the body like it’s made of glass. Avoid pointing the camera toward the sky while the lens is off, and if you’re working in a high-dust environment, consider using a blower before you even think about reaching for your digital sensor cleaning kit tools. Most people jump straight to the heavy lifting, but a bit of preventative discipline—like keeping your gear in a sealed bag when not in use—saves you from the anxiety of removing dust spots from images during a critical shoot.
Professional vs Diy Sensor Cleaning Knowing Your Limits
Look, I’ve seen enough panicked freelancers try to fix a stubborn speck of grit with a Q-tip and a prayer to know when to call it quits. There is a fine line between being a resourceful DP and being the person who just turned a $4,000 body into a very expensive paperweight. If you’ve invested in a decent digital sensor cleaning kit tools set and you’ve followed the instructions for how to use sensor swabs to the letter, but that one dark spot refuses to budge, stop. That spot isn’t just dust; it might be a fungus bloom or a scratch on the low-pass filter. At that point, you aren’t cleaning; you’re digging.
The reality of professional vs DIY sensor cleaning comes down to risk management. If you’re shooting a wedding or a commercial where the client is paying for your time, you cannot afford a catastrophic failure mid-shoot. If a light source from the side reveals a smudge that won’t move after two gentle passes, walk the camera into a professional shop. It’s a bitter pill to swallow when you’re trying to save a few bucks, but paying for a service is a lot cheaper than replacing a sensor.
Five things to remember when you’re staring at a speck of dust
- Stop changing lenses in the middle of a windstorm or a dusty construction site. If you can’t find a clean, indoor space to swap glass, just wait. The sensor is a magnet for everything floating in the air, and once it’s on there, you’re just playing a game of hide-and-seek with your highlights.
- Learn to read your sensor through the lens, not just the LCD. A tiny speck might look like a nuisance on the screen, but you need to see how it actually hits the image at different apertures. Sometimes a bit of dust at f/11 is a nuisance, but at f/2.8, it’s practically invisible. Don’t panic over things that aren’t actually ruining the frame.
- If you’re using a blower, make sure it’s actually clean. I’ve seen people use those cheap little rubber bulbs that have been sitting in a toolkit for three years, only to realize they’re just puffing more grit directly onto the sensor. If you wouldn’t breathe it on your own face, don’t blow it on the sensor.
- Respect the swab. If you’re going to go the DIY route with sensor swabs, treat them like surgical tools. One wrong angle or too much fluid, and you aren’t cleaning a sensor; you’re creating a permanent smear that no amount of “patience” is going to fix.
- Check your sensor after every single shoot, even if you think you were careful. It’s better to find a piece of grit while you’re still on location and can troubleshoot, rather than getting home, looking at your dailies, and realizing you’ve spent twelve hours shooting through a smudge.
The Last Thing Between You and the Light
At the end of the day, keeping a sensor clean isn’t about achieving some impossible standard of clinical perfection; it’s about knowing when a speck of dust is a technical hurdle and when it’s just part of the job. You’ve learned how to use the right swabs, when to step back from the DIY approach, and how to be careful with your lens changes so you aren’t inviting the world inside your body. Just remember that even the most expensive cleaning kits won’t help if you don’t respect the physics of the machine. Focus on the fundamentals of maintenance—clean air, steady hands, and the right tools—and you’ll spend far less time staring at your playback screen hunting for shadows that aren’t actually in the scene.
I’ve spent decades looking through viewfinders, and if there is one thing I’ve learned, it’s that the gear is merely a conduit. You can spend your entire career obsessing over the microscopic purity of your sensor, but that won’t make your compositions any better or your lighting any more evocative. Don’t let the fear of a little dust paralyze your creativity or keep you from shooting in the environments where the real stories live. Once you have the basics down, get out of your own way and go find the light; the image is always about what you see, not just the cleanliness of the glass.
