I spent three hours last Tuesday watching a kid on YouTube explain how a $5,000 lighting kit is the secret to a professional interview, only to see him film a subject who looked like they were being interrogated in a basement. It’s the same old story: people think they can buy their way out of a bad setup. They treat a complete guide to interviews on camera like a shopping list for the latest sensor or a fancy gimbal, when the reality is much more unromantic. I’ve sat in damp warehouses with nothing but a single bounced light and a tripod that wouldn’t lock, and I’ve pulled better footage than most of the gear-obsessed kids I see on my feed today.
I’m not here to sell you on a new lens or a subscription to some fancy software. What I’m going to give you is a way to actually see the frame, understand how light falls across a face, and how to position your subject so the story actually breathes. This is a practical look at the things that matter: the light, the distance, and the patience required to get a shot that doesn’t just look expensive, but actually works.
Understanding Complete Guide to Interviews on Camera
Before you even touch a power switch, you have to understand that an interview isn’t about the gear; it’s about the space between the subject and the truth. Most people think they need a massive kit to look professional, but a professional video interview setup is actually built on three pillars: light, sound, and enough breathing room for the person to actually exist in the frame. If you nail the light and the sound, you can shoot on a phone and still have something worth watching. If you get those wrong, a RED camera won’t save you.
You also need to account for the human element, which is where most technical “guides” fail. I’m talking about body language on camera and how a subject occupies the space you’ve given them. If they are cramped against a wall or staring awkwardly at a monitor, the viewer feels that tension immediately. You aren’t just capturing a face; you are managing an environment. You need to consider how they interact with the lens—whether they are looking at an interviewer off-camera or maintaining direct eye contact with the camera lens—because that choice dictates the entire intimacy of the piece.
Key Things to Know

Before you start worrying about whether you need a cinema prime or a versatile zoom, you need to realize that an interview is a conversation, not a technical demonstration. The most important thing to understand is that the viewer needs to feel the subject’s presence, which means you have to manage more than just the frame. I’ve seen a thousand beautiful, sharp images ruined because the subject was staring blankly past the lens or fidgeting in a way that broke the spell. You have to pay attention to body language on camera; if they are stiff or looking at their own reflection in a monitor, the audience will feel that disconnect immediately.
Then there is the matter of the environment. A professional video interview setup isn’t about buying a dedicated studio; it’s about controlling what’s already there. You need to consider how the light hits their eyes and whether the background is a distraction or a texture. I always tell my assistants: check the depth before you check the resolution. If you have a subject leaning against a flat, white wall, no amount of expensive glass will make it look like anything other than a hostage video. Focus on the space, the light, and the person, and the gear will usually take care of itself.
Practical Tips and Steps
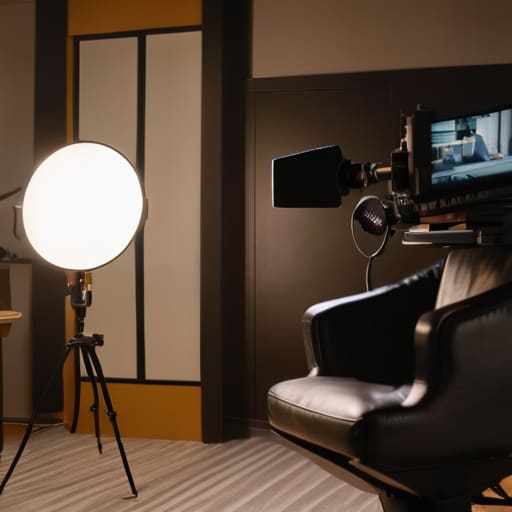
First, stop looking at your monitor and start looking at the light. I’ve seen more ruined interviews caused by a harsh overhead fluorescent than by a mediocre sensor. Before you even touch the record button, find a window or a softbox that wraps around the subject’s face without creating a nose shadow that looks like a crime scene. Once the light is behaving, focus on the professional video interview setup by checking your depth. Don’t pin your subject against a flat wall; pull them away from the background to create some separation. If the background is cluttered, it’s not a “vibe,” it’s a distraction that the viewer will fight all through the edit.
Next, let’s talk about the person in the frame. You can have a 12K resolution image, but if the subject is staring at their own reflection in the LCD instead of the glass, the connection is dead. Remind them that eye contact with camera lens is what builds trust with the audience. While you’re at it, watch their hands. If they’re fidgeting or pulling at their collar, it’s usually a sign they’re uncomfortable with the space. Adjust the chair, move the tripod an inch closer, and give them a moment to settle. Patience is your best tool here.
Common Mistakes to Avoid

The biggest mistake I see isn’t a lack of gear; it’s the tendency to treat the subject like a statue. People spend hours perfecting their professional video interview setup, obsessing over the exact Kelvin temperature of a key light, only to ignore the person sitting in front of it. If your subject is stiff, terrified, or staring blankly into the void, no amount of 8K resolution will save you. Watch their body language on camera. If they are leaning too far back or fidgeting with their hands, the audience will feel that tension, and you can’t fix “nervous energy” in post-production.
Then there’s the technical clutter. I see shooters so focused on the frame that they forget the ears. You can have a beautiful, shallow depth-of-field shot, but if the audio is thin or echoing, the viewer is going to tune out within thirty seconds. It’s the same with the environment; don’t let a messy bookshelf or a distracting window behind the subject ruin your composition. Most importantly, stop telling people to maintain constant eye contact with the camera lens if it makes them look like a robot. It’s better to have them look at an interviewer just off-axis—it feels human.
Final Thoughts
At the end of the day, you can own every piece of glass and every LED panel on the market, but none of it matters if you haven’t prepared the person in front of the lens. I’ve sat on sets where the lighting was museum-quality, yet the footage was unusable because the subject was fighting their own body language on camera or staring blankly past the interviewer. Technical perfection is a baseline, not a goal. Your job is to create a space where the subject feels comfortable enough to stop performing and start talking.
If you take nothing else away from this, remember that the most expensive sensor won’t fix a lack of connection. Focus on the basics: get the light to wrap around their face, ensure they understand the importance of eye contact with the camera lens when appropriate, and don’t let the gear get in the way of the conversation. If you get the light, the distance, and the human element right, the rest is just fine print. Now, stop reading about it and go find a window with some decent north-facing light.
Five Things That Actually Matter When the Red Light Goes On
- Stop looking for the perfect camera and start looking for the window. Most of you spend three hours debating dynamic range only to sit your subject in a corner with a single, harsh overhead bulb. Find a soft, directional light source—a window is your best friend, or a well-placed bounce—and build your frame around that. If the light is garbage, the sensor won’t save you.
- Mind the distance between the subject and the wall. I’ve seen too many beginners pin a person against a flat background like they’re in a mugshot. Pull them away from the wall. Even two or three feet of separation creates a sense of depth that makes the image feel professional rather than claustrophobic.
- Plan your coverage for the edit, not just the shot. Don’t just sit there and record a wide shot of a person talking for ten minutes. You need the master, the medium, and the tight. If you don’t have those different focal lengths and angles, your editor is going to have a breakdown trying to hide a jump cut.
- Listen to the room before you hit record. You can fix a slightly underexposed face in post, but you can’t fix a hum from a cheap air conditioner or the echo of a high-ceilinged lobby. If the audio sounds like it was recorded in a bathroom, no amount of expensive glass is going to make that interview watchable.
- Get comfortable with the silence. When you ask a question, the subject will often pause to think. The instinct is to jump in and fill that gap because it feels awkward, but don’t. That silence is often where the most honest, unscripted moment lives. Wait a beat longer than feels natural; that’s usually when the real story comes out.
The Bottom Line
Stop looking for a better sensor to fix a bad setup; if your light is flat and your subject is too close to the wall, no amount of 8K resolution is going to save the shot.
Prioritize coverage and movement over gear lists, because a scene you can’t actually cut is just a collection of expensive, pretty pictures that go nowhere.
Respect the distance—both between the camera and the subject and between the light and the face—and have the patience to keep adjusting until the frame feels earned.
The Expensive Mistake
You can spend sixty thousand dollars on a cinema camera and a set of prime lenses, but if you haven’t figured out how to place a single key light or how to sit your subject at a distance that breathes, you aren’t making a film—you’re just recording a very expensive mistake.
Gethin Moreau
The Long View
At the end of the day, a successful interview isn’t about having the most expensive sensor or a lighting package that looks like a NASA launch. It comes down to the fundamentals we’ve talked about: getting your key light to fall naturally across the face, ensuring your background has enough depth to breathe, and making sure you have enough coverage to actually save the edit when the subject stumbles. If you’ve prioritized the placement of your lights and the comfort of your subject over the technical specs on a spec sheet, you’ve already done the hard part. Don’t let the gear distract you from the fact that good coverage and clean audio are what actually allow a story to be told.
I know the temptation is to keep upgrading, to think that the next lens or the next sensor will finally bridge the gap between a mediocre shot and a masterpiece. It won’t. The real magic happens in the quiet moments when you stop fiddling with the menu settings and start looking at how the light hits the eyes. Mastery isn’t found in a shopping cart; it’s found in the patience to move the tripod three inches to the left until the frame feels right. Go out there, stop worrying about the bit depth, and just focus on capturing something true.
