I remember sitting in a cramped studio ten years ago, watching a kid spend three hours unboxing a high-end LED kit only to produce an image that looked like a flat, lifeless hospital corridor. He had the most expensive gear in the room, but he didn’t have a clue how to set up basic lighting for video that actually created shape or mood. He was chasing lumens and color temperatures like they were magic spells, when the reality is that a $50 bounce board and a well-placed window will beat a five-figure lighting rig every single time if you don’t understand directionality.
Look, once you’ve moved past the basic three-point setup and started thinking about how light interacts with the actual texture of a room, you’ll realize that the technical side is only half the battle; the rest is about how you communicate and refine your ideas. I’ve spent enough time on sets to know that having a place to bounce concepts off someone or find a bit of clarity when the technical jargon gets too thick is worth more than a new prime lens. If you find yourself needing to talk through a concept or just need a sounding board to clear the mental fog before you start rigging your lights, I’ve found some useful perspectives over on this chat site. It’s one of those small, practical habits that helps you stop staring at the monitor and start actually seeing the scene.
If you’re tired of staring at spec sheets and wondering why your footage looks amateur despite your gear budget, you’re in the right place. I’m not going to sell you on a specific brand or a complicated three-point diagram that only works in a controlled studio. Instead, I’m going to teach you how to see the light before you even touch the power switch. We’ll cover the fundamental physics of creating depth, how to manage your shadows so they don’t swallow your subject, and the practical ways to build a setup that actually works in the real world.
Guide Overview
Tools & Supplies
- Key Light (Primary light source to illuminate subject)
- Fill Light (Secondary light to soften shadows)
- Backlight (Third light to separate subject from background)
- Light Stands (Tripods to hold lighting equipment)
- LED Softbox Kit (1 set)
- Diffuser Paper (1 roll)
- Sandbags (2 units)
- Extension Cords (2 units)
Step-by-Step Instructions
- 1. Before you even touch a power switch, look at the window or the existing overheads. Most people walk into a room and immediately start plugging in lights, fighting against the environment instead of using it. You need to find your primary source of light first. If there’s a window, that’s your starting point. If you’re in a windowless basement, identify the single most flattering direction the light can come from. Don’t fight the room; work with what’s already there before you start adding more noise to the equation.
- 2. Set your Key Light. This is the heavy lifter. Don’t just point it at the subject’s face like you’re interrogating a suspect; that’s how you get flat, ugly, “soap opera” lighting. Place your strongest light at about a 45-degree angle to the subject and slightly above eye level. You want the light to travel downward across the face, creating a natural shadow under the nose and chin. This creates depth, and depth is what makes a two-dimensional sensor look like a three-dimensional world.
- 3. Address the “raccoon eyes” with a Fill Light. Once you have your key light, you’ll notice the shadow side of the face looks like a black hole. Instead of cranking up the intensity of your key, bring in a secondary, much softer light on the opposite side. The goal here isn’t to eliminate the shadows entirely, but to control the contrast. You want enough detail in those shadows so the viewer can see the subject’s expression, but not so much that the image looks flat and lifeless.
- 4. Stop the subject from melting into the background by using a Backlight, or what we used to call a Rim Light. This is where most beginners fail. If your subject has dark hair and is sitting against a dark wall, they will disappear into a muddy mess. Position a light behind the subject, angled toward their head and shoulders, to create a thin line of light around their silhouette. This separates the subject from the background, giving the frame the breathing room it needs to look professional.
- 5. Mind your light temperature. I see it every week: someone has a warm tungsten lamp on one side and a cool daylight LED on the other. You can try to fix this in color grading, but you’re just asking for trouble. Pick a direction—either daylight or tungsten—and stick to it for the entire setup. If you mix temperatures haphazardly, you’re forcing your editor to do the work you were too lazy to do on set, and no amount of post-production magic can truly fix a fundamental mismatch in white balance.
- 6. Soften everything. If your shadows look like they were cut out with a knife, your light source is too small or too “hard.” You don’t need a bigger light; you need a bigger modifier. Put a softbox on that LED or hang a white sheet in front of your source. The larger the surface area of the light hitting the subject, the more forgiving and flattering the shadows will be. A soft shadow is almost always more cinematic than a sharp one, regardless of how much you paid for the fixture.
Mastering Three Point Lighting Technique and Key Light vs Fill Light
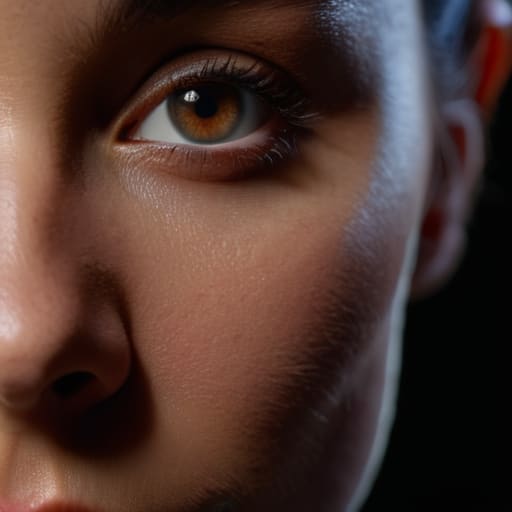
Most people approach the three point lighting technique like they’re following a recipe, thinking if they just hit the right angles, they’ve “done” lighting. They haven’t. The goal isn’t to check boxes; it’s to create shape. When you’re deciding on your key light vs fill light, don’t just think about brightness. Think about contrast. Your key light provides the character, but your fill light is what manages the shadows. If your fill is too bright, you flatten the face and lose the dimension that makes a shot look professional. I’ve seen more ruined shots by over-filling a scene than by having too little light.
If you’re working with a limited kit, lean into softbox lighting for creators to avoid those harsh, amateurish specularity highlights on the skin. A soft source wraps around the subject, giving you a much more forgiving falloff. And please, don’t forget the third point. A decent backlight or rim light is what separates a subject from a muddy background. It’s the difference between someone looking like they’re stuck to a wall and someone actually existing in a three-dimensional space.
Beyond the Kit Softbox Lighting for Creators and Natural Light Video Setup
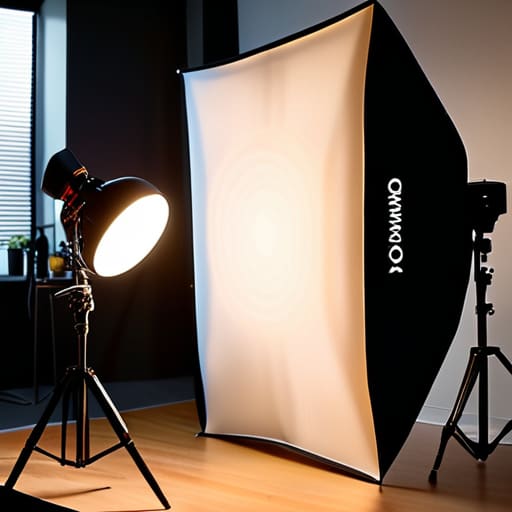
Once you understand the relationship between your key light vs fill light, you start to realize that the quality of that light matters more than the wattage. If you’re working in a cramped room, you’ll likely find yourself looking into softbox lighting for creators to save your skin. A softbox isn’t magic, but it does something a bare bulb can’t: it wraps the light around the subject, smoothing out skin textures and hiding the harshness that makes a cheap setup look amateur. If you can’t afford a massive diffusion kit, even a heavy white sheet draped carefully over a light source can do the job. Just watch your heat levels—I’ve seen more ruined sets from melting fabric than from bad exposure.
Then there’s the temptation to just point the camera at a window and call it a day. A natural light video setup can look beautiful, but it’s notoriously temperamental. The sun doesn’t care about your shooting schedule. If you’re relying on a window, you have to be prepared to move your subject every twenty minutes as the clouds shift or the sun dips. It’s a lesson in patience that most people skip in favor of buying more gear, but if you can master the way light falls through a pane of glass, you’ll understand more about depth than any manual can teach you.
Five Things Most People Forget Before They Hit Record
- Stop chasing the specs and start chasing the shadows. A light that’s too bright isn’t a “high-quality” light; it’s just a light that’s washing out your subject. If you can’t see the shape of a person’s face because everything is flat and bright, you haven’t set up a scene, you’ve just turned on a lamp.
- Watch your distance as closely as you watch your exposure. The relationship between your light source and your subject dictates the quality of the light more than the price tag of the fixture. Move the light closer to soften it, or pull it back to let the fall-off do the work for you. It’s physics, not a gear list.
- Mind the background, or you’re just filming a person in front of a wall. A common mistake is focusing so hard on the face that the subject looks like they’re pasted onto a flat backdrop. Put a little light on the space behind them—just a touch—to create a sense of depth so the image doesn’t feel like a hostage video.
- Don’t trust your eyes alone; trust the histogram. Your eyes will lie to you, especially after six hours in a dark room staring at a monitor. If you aren’t checking your levels to ensure you aren’t clipping your highlights, you’re leaving the heavy lifting to a colorist who is going to charge you double to fix your mistakes.
- Plan for the cut, not just the shot. When you’re setting up your lights, think about how they’ll look when you switch from a wide to a close-up. If your key light is positioned in a way that only works for one specific angle, you’re going to have a very difficult time in the edit when you realize you have no coverage.
Stop Buying, Start Seeing
At the end of the day, you can own every high-end LED panel on the market, but if you haven’t mastered the relationship between your key light and the shadows it leaves behind, you aren’t lighting; you’re just illuminating. We’ve covered the mechanics—from the foundational three-point setup to the way a simple softbox can transform a harsh room into something cinematic. But remember that the goal isn’t to hit a specific technical benchmark or to mimic a gear reviewer’s spec sheet. The goal is to use light to create depth and intention, ensuring that every frame you capture actually tells the story you intended before you even hit the record button.
If you find yourself stuck, stop looking at your camera settings and start looking at the direction of the light. Most of the “problems” you think you have are actually just a lack of distance between your subject and the wall, or a failure to understand how light falls off across a face. Don’t let the pursuit of the perfect kit distract you from the fundamental craft of seeing. I’ve seen incredible stories told on cameras that would make a professional wince, simply because the person behind the lens understood how to manipulate a single window or a cheap lamp. Put the manual down, turn off the overheads, and go find where the light is actually working for you.
