I spent three weeks on a documentary in a damp basement in Wales, working with a camera that had more scratches on the sensor than a used car, yet the footage looked better than half the stuff I see coming out of high-end rental houses today. People spend thousands of dollars chasing a “perfect” look, thinking a complete guide to camera settings will magically fix a lack of vision, but they’re usually just hiding behind menus. You can dial in every bit of data the manufacturer promises, but if you haven’t considered where the light is hitting the subject’s eyes, those settings are just expensive math applied to a bad image.
I’m not here to give you a manual on which buttons to press to satisfy an algorithm; I’ve seen enough spec sheets to know they don’t tell the whole story. Instead, I’m going to show you how to use those settings to actually serve the scene. We’ll talk about how exposure, shutter angle, and ISO interact with the light you’ve actually been given, rather than the light you wish you had. This isn’t about technical perfection—it’s about intentionality and coverage so that when you finally get to the edit, you actually have something worth cutting.
The Complete Guide to Camera Settings Beyond the Gear You Crave
Look, if you’re waiting for a magic button on your new mirrorless body to make your footage look like a feature film, you’re going to be waiting a long time. Most people treat their settings like a grocery list, checking off boxes without understanding how they actually interact. You need to stop looking at the menus and start looking at the scene. When I talk about the exposure triangle explained, I’m not talking about a textbook definition; I’m talking about how a change in your aperture dictates the depth of your world, or how your shutter speed determines if a movement feels visceral or blurry.
It’s easy to get lost in the math of aperture vs shutter speed, especially when you’re staring at a monitor in a dark room. But the settings aren’t there to fix a bad environment; they are there to capture what’s already there. If you don’t understand how your digital sensor sensitivity reacts to the light you’ve actually managed to pull into the room, all the high-bitrate codecs in the world won’t save you from a noisy, muddy mess. Get the light right first, then let the settings follow.
Mastering the Exposure Triangle Explained Through Light and Patience
Look, you can memorize the math, but if you don’t understand the physics of the room, the math won’t save you. When we talk about the exposure triangle explained, most people treat it like a calculator problem. They sit there tweaking numbers while the light is changing or the subject is moving. I see it all the time: a kid tries to fix a dark scene by cranking the ISO, only to realize they’ve traded a beautiful, moody shadow for a noisy, digital mess. They forget that digital sensor sensitivity isn’t a magic wand; it’s a compromise.
The real trick is deciding which element of the triangle you’re willing to sacrifice to get the look you actually want. If you need that shallow depth of field for a close-up, you’re playing with your aperture. If you need to capture the motion of a car passing by, you’re locked into your shutter speed. It’s a constant negotiation between aperture vs shutter speed and the available light. Stop trying to find the “perfect” setting and start asking yourself what the light is actually doing to the scene. Sometimes, the best setting is the one that requires you to move the light stand three feet to the left.
Aperture vs Shutter Speed Controlling Motion and Depth
I’ve spent half my career watching people panic because their footage looks “jittery” or “blurry,” only to realize they were treating their shutter speed like a suggestion rather than a rule. When you’re looking at aperture vs shutter speed, you aren’t just balancing light; you’re deciding how much time the viewer gets to spend in the motion of a scene. If you’re shooting video, you generally want to stick to the 180-degree rule to keep motion looking natural to the human eye. If you ignore that and try to fix a shutter issue in post, you’re just fighting a losing battle against physics.
Then there’s the aperture, which is where most beginners get tripped up by the “bokeh” obsession. Yes, a wide opening can isolate a subject, but if you’re shooting a documentary interview and the subject moves six inches to the left, you might find their nose is in focus while their eyes are a wash of cream. Depth of field is a storytelling tool, not a filter. Use it to direct the eye, but don’t let a shallow depth of field ruin your coverage just because you wanted a “cinematic” look.
Manual Mode Photography Tips for Capturing Scenes That Actually Cut
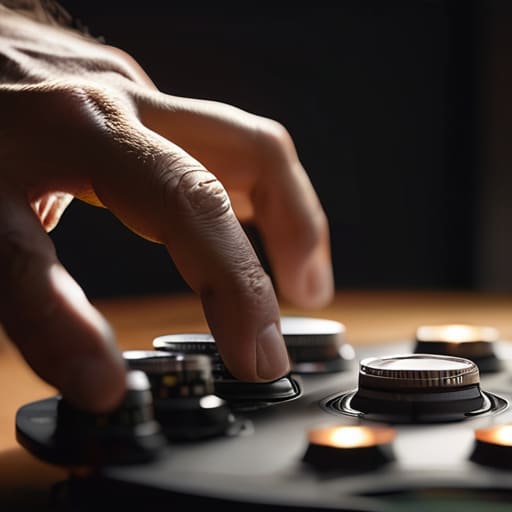
If you’re still letting the camera decide your exposure, you aren’t directing; you’re just witnessing. When I’m on a set, I don’t care if the meter says it’s fine—I care if the shadows are holding enough detail to be useful in the grade. My first rule for manual mode photography tips is to stop treating the camera like a magic box and start treating it like a tool that responds to the light you’ve actually placed. If you’re shooting a scene with a moving subject, don’t let the auto-shutter drag you into a blurry mess just because the sensor wants more light. You set your shutter, you set your aperture to control your depth, and you commit to that look.
Consistency is what makes a sequence editable. If your exposure jumps three stops because a character walked past a window, you’ve just handed your editor a nightmare. I’ve seen more footage ruined by erratic auto-settings than by bad lenses. Use your manual control to lock in your relationship between aperture vs shutter speed before you even think about hitting record. It’s about creating a stable environment where the light behaves the way you intended, rather than praying the camera understands the mood you’re trying to build.
White Balance Settings Guide What a Colourist Cannot Rescue
I’ve spent enough nights in dark suites watching a colorist struggle to fix a mess that should have been handled on set. People think that if they shoot in a high-bitrate RAW format, they can just “fix it in post.” That’s a lie. While a professional can nudge the tint, they cannot recreate the soul of a scene if your white balance is fighting the actual temperature of the light. If you’re shooting under tungsten and your camera thinks it’s midday, you aren’t just fighting color; you’re fighting the way the digital sensor sensitivity interprets the entire spectrum.
Stop relying on Auto White Balance like it’s a safety net. Auto is a coward; it tries to make everything neutral, which often means it strips away the intentional warmth of a sunset or the cool mood of a basement. Use a grey card, set your Kelvin, and stick to it. When you treat white balance as a creative choice rather than a technical error, you stop being a person recording data and start being someone capturing a feeling. If the color is fundamentally broken at the source, no amount of expensive software will make it look intentional.
Digital Sensor Sensitivity Focal Length and Image Quality vs File Size
You’ll hear people talk about ISO like it’s a magic dial that makes darkness disappear, but they forget that every stop you climb is a trade you’re making with your shadows. Digital sensor sensitivity isn’t free; you aren’t creating light, you’re just asking the sensor to guess more aggressively. I’ve seen more ruined shots from over-cranking the ISO to hide a bad lighting setup than I have from almost anything else. If you can’t move the light closer or find a window, no amount of digital gain is going to save that footage from looking like a muddy, noisy mess.
Then there’s the argument over glass. People obsess over the optimal focal length settings to get a specific “look,” but they forget that the lens dictates how much of the world you’re actually managing. A wide lens on a cheap sensor might give you scale, but it won’t hide a lack of depth. Similarly, don’t get paralyzed by the image quality vs file size debate. I’ve shot beautiful, usable sequences on compressed formats that would make a spec-chaser weep, simply because the light was hitting the subject correctly and the coverage was there. Focus on the image, not the bitrate.
Five things your manual won't tell you about getting the shot
- Stop obsessing over the ISO number and start looking at your light source. A high ISO on a cheap sensor is a disaster, but even on a cinema camera, if you’re pushing the sensor to do the work the lamp should be doing, you’re just filming noise. Use your light to find your base, not your settings.
- Learn your shutter angle, not just your shutter speed. If you’re shooting video, stop treating it like a series of stills. If the motion looks jittery or “staccato,” it’s usually because you’ve ignored the relationship between your frame rate and your shutter. Get that motion cadence right first; you can fix a bit of grain later, but you can’t fix unnatural motion.
- Don’t let the autofocus fool you into laziness. It’s a tool, not a cinematographer. I’ve seen more productions ruined by a drifting focus pull than by a bad exposure. If the scene requires emotion, you need to know exactly where that focus sits—and if you can’t hit it manually, you shouldn’t be shooting the scene yet.
- Shoot for the highlights, even if you think you’re being “safe.” Digital sensors are much better at recovering shadows than they are at recovering a clipped, blown-out sky or a face lost in a bright window. If the light is hitting a subject, dial it back. You can always add light in the edit, but you can’t manufacture detail that isn’t there.
- Check your histogram more than your screen. The LCD on your camera is a liar; it’s usually too bright and too colorful to give you the truth of the sensor. Look at the graph to see where your data is actually sitting. If your graph is slammed against the right side, you’re losing the image, no matter how “good” it looks on that little plastic screen.
The Bottom Line
Stop looking for a “magic” setting in your menu; if the light in the room is garbage, no combination of ISO or shutter angle is going to save the shot.
Prioritize coverage and consistency over technical perfection, because a slightly noisy image that tells a story is better than a clean, sterile shot that lacks soul or context.
Learn the limitations of your sensor and your colorist before you start shooting, so you aren’t left staring at a ruined file that no amount of post-production can fix.
## The gear trap
A complete guide to settings isn’t a list of numbers to memorize; it’s knowing that if you don’t respect the light coming through the window, no amount of ISO tweaking or sensor resolution is going to save the shot from looking like amateur hour.
Gethin Moreau
Beyond the Spec Sheet
At the end of the day, these settings aren’t just numbers on a digital display; they are your tools for managing the physics of a room. We’ve talked about the exposure triangle, the hard limits of white balance, and how shutter speed dictates the soul of your motion, but none of that matters if you aren’t looking at the light first. You can dial in the perfect ISO and the most expensive bit-depth, but if you haven’t considered how the light falls across a subject or how much coverage you need to actually make a scene work in the edit, you’re just collecting data rather than capturing images. Remember: a sensor is just a bucket, and your settings are simply how you choose to catch the rain.
If you leave this page feeling a bit overwhelmed by the technicalities, good. That means you’re starting to realize that the camera is the least interesting part of the process. Stop obsessing over the latest sensor specs and start obsessing over the distance between you and the moment. The best images I’ve ever shot didn’t come from a perfect manual setup; they came from having the patience to wait for the light to shift and the sense to move the lamp instead of buying a new lens. Go out, find some decent light, and actually look at what you’re filming. The rest is just math.
