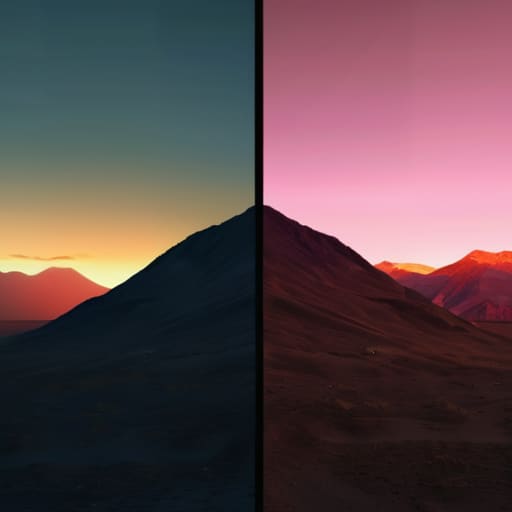
I spent three hours last Tuesday watching a kid on YouTube explain how to use a $3,000 plugin to “fix” a shot that was clearly underexposed by four stops. It’s the same old song: buy more bits, more dynamic range, more expensive sensors, and somehow you’ll stop making mistakes. But here is the reality that the gear reviewers won’t tell you: if you’ve clipped your highlights into a white void, there is no magic software on earth that will bring that detail back. People spend half their lives looking for a tutorial on how to fix exposure problems in post, when they should have spent that time moving a bounce card or adjusting their ND filter before the talent even walked on set.
I’m not here to sell you a new workflow or a subscription to a grading suite. What I want to do is show you exactly where the line is between a recoverable mistake and a total loss. We’re going to talk about what a colorist can actually salvage in the shadows and where you’ve officially crossed the point of no return. I’ll give you the honest, unromantic truth about what you can fix in the grade and, more importantly, why you shouldn’t rely on it.
The Limit of the Grade What a Colourist Cant Rescue

Look, I’ve sat in grading suites where the client thinks a professional colourist is some kind of digital magician. They aren’t. There is a hard ceiling to what software can do, and it usually starts when you hit the sensor’s limit. If you’ve clipped your whites—meaning you’ve actually lost the data in those bright spots—you aren’t recovering blown out highlights; you’re just painting white blobs on a screen. Once that information is gone, it’s gone. No amount of expensive LUTs or high-end color science is going to bring back the texture of a lace curtain or the detail in a sky that’s nothing but a flat, digital void.
The same goes for the shadows. You can try correcting underexposed images by cranking the lift, but you’re playing a dangerous game with your signal-to-noise ratio. If you didn’t have enough light to begin with, you’re just asking the software to amplify the garbage. You’ll end up with ugly, dancing luminance noise in the dark areas that looks less like film and more like a bad satellite feed. If the image is crushed, stop trying to find the detail in the grade and start paying more attention to your exposure on set.
How to Fix Exposure Problems in Post Without Losing Soul
If you’ve managed to avoid the catastrophic mistakes I just mentioned, you’re likely looking at footage that isn’t perfect, but isn’t dead either. This is where the real work happens—not just moving sliders, but making choices. When you start correcting underexposed images, the temptation is to just crank the midtones and hope for the best. Don’t. If you push the exposure too hard in the grade, you’re going to end up fighting the sensor rather than working with it. You’ll see it immediately in the shadows: that muddy, dancing grit that no amount of software can truly smooth out.
The trick is to focus on dynamic range optimization through subtle, layered adjustments rather than a sledgehammer approach. Instead of a global exposure lift, try using masks or power windows to target specific areas. If you’re recovering blown out highlights, do it incrementally. You want to pull back the intensity without turning your skin tones into a flat, grey mess. It’s about finding the texture that was hiding in the wrong exposure, not trying to manufacture detail that simply isn’t there.
The Battle for Detail Recovering Blown Out Highlights
When you’re looking at a waveform and see that signal slammed against the ceiling, you aren’t just looking at a bright spot; you’re looking at a hole in your image. Recovering blown out highlights is a bit of a misnomer, really. You aren’t actually “recovering” anything that was lost to pure white; you are simply trying to find whatever scrap of data might still be clinging to the edges of that clipping point. If you’ve shot in a logarithmic profile and managed your dynamic range optimization correctly, you might pull a little texture back into a sky or a window frame. But if that sensor was overwhelmed, you’re just dragging digital artifacts into the light.
The danger here is the “plastic” look. As you pull those sliders down to save the highlights, the transition between the light and the dark starts to feel unnatural, like a bad Photoshop job rather than a shot of real life. I’ve seen too many editors try to fix a poorly lit scene by aggressively adjusting highlights and shadows in a desperate bid to find balance, only to end up with a flat, lifeless image that lacks any sense of depth. If the light wasn’t there to begin with, you’re just fighting a losing battle against the math of the sensor.
Correcting Underexposed Images and the Cost of Darkness

If you’ve spent your time underexposing because you were chasing a “moody” look, you’ve likely learned the hard way that there is a massive difference between shadows and nothingness. When you start correcting underexposed images by cranking the gain or the offset in your NLE, you aren’t just bringing up the light; you’re pulling everything up from the basement. This includes the filth.
The real tax you pay for darkness isn’t just the loss of texture, but the sudden appearance of digital grit. As you push those midtones and shadows to find your subject, you’ll find yourself fighting a losing battle with reducing luminance noise in dark areas. You can throw a heavy denoiser at it, sure, but you’ll end up with a shot that looks like it was smeared with Vaseline. I’ve seen plenty of editors try to save a botched exposure by brute-forcing the shadows, only to realize they’ve traded a dark, clean image for a bright, muddy mess. If the sensor didn’t catch the information, no amount of slider-pushing will conjure it out of thin air.
Dynamic Range Optimization Adjusting Highlights and Shadows
When you’re sitting in the suite trying to balance a scene, you’re essentially performing a tug-of-war between the brightest and darkest parts of your frame. This is where dynamic range optimization actually happens in the real world. It isn’t about making the whole image “bright”; it’s about finding the middle ground where the skin tones don’t look like plastic and the sky doesn’t look like a white hole in the canvas. If you’ve managed to capture a decent log signal, you have some breathing room, but you have to be surgical.
The trick to adjusting highlights and shadows without making the footage look like a cheap HDR phone video is to move in small, incremental steps. If you push the shadows too hard to find detail in a dark corner, you’re going to invite the grain to the party, and reducing luminance noise in dark areas later is a much more expensive headache than just getting the exposure right on set. You want to find the balance where the roll-off feels natural, not like you’re fighting a losing battle against a sensor that wasn’t up to the task.
The Final Compromise Reducing Luminance Noise in Dark Areas
So, you’ve pushed the exposure up in the grade to find the detail you missed on set. You’ve successfully corrected the underexposed images, and for a second, it looks like magic. Then you look closer at the shadows, and the magic disappears. Instead of a clean, moody black, you’re staring at a dancing, colorful mess of digital grain. That’s the tax you pay for not having enough light in the room.
When you’re reducing luminance noise in dark areas, you’re playing a dangerous game of tug-of-war. If you crank the noise reduction too hard, you’ll turn your actors’ skin into plastic, stripping away every ounce of texture until they look like wax figures in a bad CGI film. If you don’t go far enough, the image looks like it was shot through a screen door.
The trick isn’t finding a “fix” in the software; it’s about selective application. Don’t smear a global noise reduction across the entire frame. Target the specific shadows where the noise is most offensive, and leave the textures in the midtones alone. It’s a compromise, and it’s never as clean as getting the light right the first time.
Five Ways to Stop Digging Yourself Out of a Hole
- Stop chasing the shadows. If you’ve underexposed a shot to the point where the noise floor is rising to meet the subject, stop trying to “lift” it. You’ll just end up with a muddy, dancing mess of digital artifacts. Sometimes the professional choice is to accept the darkness and lean into it as a stylistic choice rather than a technical failure.
- Watch your skin tones, not just your scopes. You can balance a waveform until it looks pretty on a monitor, but if the exposure shift has turned your actor’s face into a sallow, grey mess, you’ve lost the performance. If the light didn’t land right on the skin, the grade is just applying makeup to a corpse.
- Use secondary corrections instead of global shifts. If your whole image is off, fine, adjust the master exposure. But if you’ve only blown out the window behind your subject, don’t drag the whole image down to save that one highlight. Use a mask or a qualifier. Target the problem area so you aren’t punishing the rest of the frame for one mistake.
- Don’t mistake a LUT for a fix. I see people throwing heavy, stylized LUTs on top of broken exposures thinking it’ll hide the lack of data. It won’t. A LUT is a creative layer, not a repair kit. Fix the exposure in the primary stage before you even think about adding a “look.”
- Know when to call it. If you’re spending forty minutes trying to recover detail from a clipped highlight that’s nothing but pure white pixels, you’re wasting time that should be spent on the next shot. If the data isn’t there, it isn’t there. Move on, or find a different angle in the next setup.
The Bottom Line
You can massage an image in the grade, but you can’t manufacture data that wasn’t captured; if the highlight is clipped or the shadows are pure noise, you’re just rearranging deck chairs on a sinking ship.
Exposure is a decision about where you want the detail to live, so stop trying to fix a “flat” look in post and start deciding where the light belongs before you hit record.
Software is a tool for refinement, not a miracle worker; the best way to “fix” exposure in post is to get the lighting right on set so the editor actually has something usable to work with.
The Post-Production Myth
You can spend ten hours in a color suite trying to pull detail out of a crushed shadow or claw back a blown highlight, but you’re just negotiating with a ghost. A grade can polish a performance, but it can’t manufacture the data that wasn’t there when you hit record. If the light wasn’t right on set, you aren’t color grading—you’re just making a compromise.
Gethin Moreau
The Bottom Line
At the end of the day, we’ve walked through the technical wreckage of a bad exposure—from the digital grit of lifting shadows to the irreversible death of a blown-out highlight. You can nudge the midtones, you can fight the noise, and you can try to balance the dynamic range through a clever grade, but you are always working against the physics of the sensor. Post-production is a place for refinement, not for miracles. If you find yourself spending three hours trying to coax detail out of a muddy, underexposed mess, you aren’t making art; you’re just performing an expensive autopsy on a shot that should have been scrapped or re-lit.
My advice is simpler, though harder to follow when you’re staring at a monitor: stop looking for the perfect sensor and start looking for the light. A cheap camera in a well-lit room will outshine a cinema rig in a dark corner every single time. Don’t let the pursuit of the latest high-dynamic-range spec distract you from the fundamentals of blocking, distance, and light placement. The best way to fix exposure problems in post is to solve them before you even hit the record button. Get the light right, get the exposure right, and then—and only then—let the software do the work it was actually meant to do.
