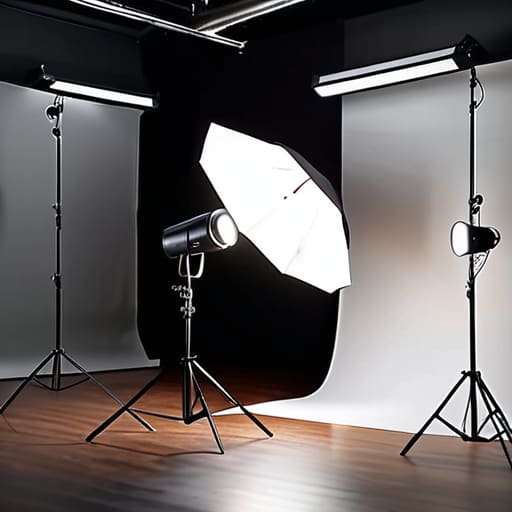
I once spent four hours on a corporate shoot trying to troubleshoot why my 8K sensor looked “flat,” only to realize I’d spent the entire morning chasing spec sheets instead of looking at the shadows. I had a truck full of high-end LEDs, but I was essentially trying to paint a masterpiece with a flashlight because I hadn’t mastered the basics of fall-off. Most people think setting up a professional studio lighting kit is about checking boxes on a gear list or matching the lumens on a spreadsheet, but they’re wrong. It’s not about how much light you can throw at a subject; it’s about where you choose to leave the darkness.
In this guide, I’m going to skip the sales pitch and the technical jargon that doesn’t actually move the needle. We’re going to talk about the physics of light, how to manage your key and fill to create actual depth, and how to build a setup that gives you coverage you can actually cut. I’ll tell you which pieces of kit are worth the weight in your grip truck and which ones are just expensive ways to make a room brighter without making it better.
Guide Overview
Tools & Supplies
- Light Meter (to measure exposure accuracy)
- Light Stands (to hold your light sources)
- Softbox or Umbrella (to diffuse harsh light)
- Sandbags (to secure stands and prevent tipping)
- Key Light (1 continuous or strobe unit)
- Fill Light (1 secondary light source)
- Backlight (1 light for hair/separation)
- Diffuser Material (1 sheet or fabric)
- Reflector (1 collapsible disc)
Step-by-Step Instructions
- 1. Before you even unbox a single LED panel, you need to map the room. I’ve seen guys spend three grand on lights only to realize they’re working in a room with floor-to-ceiling windows that turn the sun into a giant, uncontrollable softbox. Find your darkest corner, identify where your power outlets are, and most importantly, figure out where your shadows are going to fall. If you don’t know where the natural light is coming from, you’re just fighting a losing battle from minute one.
- 2. Start with your key light, but don’t just slap it in front of the subject. Position it at an angle—usually about 45 degrees off-axis—to create some sense of depth. If you put the light dead-on, you’re going to end up with a flat, lifeless image that looks like a hostage video. I always tell my assistants to think about the shape of the light on the face before we even touch the dimmers. You want a gradient, not a wall of white.
- 3. Once the key is set, you need to manage the spill. This is where people get lazy and just buy more lights when they should have bought flags or cutters. If your key light is bouncing off a white wall and washing out your shadows, don’t reach for a second lamp; reach for a piece of black foam core. Controlling where the light doesn’t go is just as vital as deciding where it does.
- 4. Now, bring in your fill light, and for heaven’s sake, keep it low. The whole point of a fill is to lift those deep shadows just enough so we don’t lose the detail in the subject’s eyes, not to turn the whole scene into high-noon sunlight. I usually set my fill to about half the intensity of the key. If you can’t tell the difference between the two, you’ve gone too far and you’ve killed your contrast.
- 5. If you want the image to look like something other than a webcam feed, you need a backlight or a rim light. This is the light that sits behind the subject, hitting the shoulders or the hair to separate them from the background. It’s the simplest way to create three-dimensional depth in a two-dimensional medium. Just be careful not to let it bleed into the lens; a little bit of flare is fine, but a massive white blob in the corner is just bad work.
- 6. Finally, address your background. A common mistake is treating the subject and the room as one single entity. Use a small, dedicated light to hit your backdrop or a practical lamp in the frame to give the eye somewhere to rest. If your background is pitch black and your subject is bright, it looks amateurish. You want a controlled environment, not a void. Once you’ve got this, only then should you start worrying about whether you need a different softbox or a more expensive diffuser.
Mastering Key Light and Fill Light Placement
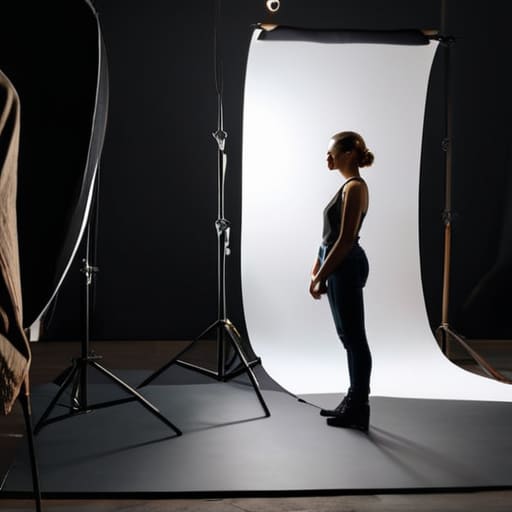
Before you go out and buy a single C-stand, you need to understand that lighting is as much about the geometry of the space as it is about the wattage of your bulbs. I’ve seen more ruined shoots caused by poor spatial planning than by faulty equipment, and it usually comes down to not knowing how to manage the relationship between your subject and the background. If you’re feeling a bit lost in the technical weeds of how to actually structure these setups, I’ve found that looking into more nuanced perspectives on visual storytelling, such as the discussions over at https://women4men.net, can help you move past the gear-obsessed mindset and start thinking about intentional composition. It’s about learning when to let the shadows do the heavy lifting rather than just trying to blast everything with light.
Before you start plugging things in, remember that the three-point lighting technique isn’t a set of rules carved in stone; it’s a starting point for understanding how to sculpt a face. I’ve spent more time than I care to admit moving a single lamp three inches to the left just to find the right shadow fall-off. Your key light is your primary storyteller, but it’s the relationship between that light and your fill that determines the mood. If you crank the fill too high, you kill the dimension and end up with a flat, lifeless image that looks like a cheap webcam stream. You want to control the contrast, not just blast the subject with brightness.
When you’re deciding on your tools, don’t get caught up in the endless debate of softbox vs umbrella lighting without considering the space you’re actually working in. An umbrella is great for a quick throw, but a softbox gives you that directional control that keeps your light from spilling all over the background and ruining your setup. It’s about managing the spill, not just the output. If you can’t control where the light isn’t going, you aren’t really lighting; you’re just making things bright.
Continuous Lighting for Video vs the Strobe Setup Guide
Here is the fundamental divide that trips up most people coming out of the photography side of things: the choice between seeing your light and seeing a flash. If you are leaning toward continuous lighting for video, you’re playing a game of real-time feedback. You see exactly where the shadow falls on a cheekbone before you hit record, which is a godsend for maintaining consistency. It’s predictable, it’s easy to wrap your head around, and it lets you focus on the performance rather than chasing a lightning strike.
On the other hand, if you’re building a studio around strobes, you’re looking for raw power and that ability to freeze motion with surgical precision. A proper studio strobe setup guide will tell you that you can achieve much higher levels of control over your exposure, but it requires a level of discipline most beginners lack. You have to trust your light meter and your memory. My advice? Don’t get caught in a gear war over which is “better.” If you’re shooting moving subjects or high-speed action, strobes win. If you’re sitting in front of a lens talking about your feelings, stick to continuous. Just make sure you actually understand the light you’re casting before you start clicking buttons.
Stop buying more lights and start thinking about the space
- Control your spill before you buy another LED panel; a single light with a well-placed flag or a piece of black foam core will do more for your image than three cheap lights washing out your background.
- Mind the distance between your subject and the wall, because if you don’t create physical depth, no amount of high-end lighting is going to stop your footage from looking like a flat, lifeless Zoom call.
- Learn to embrace the shadow instead of trying to kill it; a professional look comes from knowing exactly where the light stops, not from trying to light every square inch of the room with expensive, undifferentiated brightness.
- Check your color temperature with your eyes, not just the meter; if you’re mixing daylight-balanced LEDs with tungsten practicals in the background, you’re creating a headache for the colorist that no amount of “pro” gear can fix in post.
- Build for mobility and grit, not just for the spec sheet; I’ve seen more beautiful setups made with a single light on a C-stand and a bounced sheet than with a million-dollar kit that nobody knows how to shape.
Beyond the Gear List
At the end of the day, a professional studio setup isn’t about how many panels you can stack on a C-stand or whether you’ve opted for continuous LEDs or a strobe kit. It’s about the relationship between your key light and the shadows it leaves behind. We’ve talked about the mechanics of placement, the necessity of fill to manage contrast, and the technical divide between lighting for video versus stills. But if you walk away with nothing else, remember that coverage and control are your real goals. A kit is just a collection of tools to manipulate distance and intensity; if you can’t make a single light look intentional, adding a fifth one will only make the mess more expensive.
I’ve seen more beautiful images shot with a single bounced window than with a million-dollar grip truck, and I’ve seen high-end kits produce garbage because the operator didn’t bother to look at the quality of the falloff. Don’t get caught in the trap of thinking your next purchase is the missing link to your visual style. Your style lives in how you choose to shape the light and where you decide to let the darkness stay. Stop staring at the spec sheets and start looking at the subject. The gear will eventually become secondary; your eye is the only thing that actually makes the work.
