I spent most of the nineties worrying about whether a roll of Kodak would last the afternoon, so watching people today treat a digital sensor like a magic wand is exhausting. There is this pervasive, expensive myth that if you just buy the right $500 LUT or the newest color-grading plugin, you’ve solved your problems. But let me tell you something: no amount of software can fix a shot where you didn’t understand your exposure. If you are searching for a shortcut on how to grade log footage without first understanding the light that hit the sensor, you are just polishing a stone.
I’m not here to sell you a workflow or a subscription to some flashy tool. I want to talk about the actual physics of the image—the relationship between your highlights, your shadows, and the patience required to pull them back into something that looks human. We’re going to look at what a colorist can actually rescue and, more importantly, where the limit lies. I’ll show you how to approach the grade by looking at the light first and the sliders second, so you can stop chasing a look and start making a decision.
The Myth of the Magic File Why You Cant Fix Everything
There’s a dangerous idea floating around social media that shooting in Log is like buying an insurance policy against incompetence. People treat a flat, grey file like a blank canvas that can be anything, forgetting that a canvas still needs paint. You can spend hours inside a DaVinci Resolve log workflow, tweaking curves and sliding wheels, but you cannot manufacture data that wasn’t captured in the first place. If you clipped your highlights to white or let your shadows sink into a muddy, noisy mess, no amount of post-production wizardry is going to bring them back.
I see it all the time: someone tries to force a dramatic look onto a shot where the exposure and white balance in log were fundamentally broken at the source. They think a heavy-handed color space transform LUT will do the heavy lifting, but those are just mathematical translations, not miracles. There is a massive difference between color correction vs color grading; one is about fixing what you broke, and the other is about enhancing what you captured. If you don’t respect the sensor’s limits on set, you aren’t grading—you’re just performing an autopsy.
Exposure and White Balance in Log the Foundation of the Image

Before you even touch a slider, you have to understand that log isn’t a filter; it’s a map of the sensor’s capacity. If you nail your exposure and white balance in log on set, you’ve done eighty percent of the work. If you didn’t, you’re essentially asking a colorist to perform surgery on a ghost. I’ve seen too many shooters treat log like a safety net, thinking they can just “fix it in post,” but you can’t manufacture data that wasn’t captured. You can’t pull detail out of a crushed black or a blown-out sky, no matter how expensive your software is.
When you sit down for your daVinci Resolve log workflow, the first thing you should be doing isn’t “grading”—it’s correction. You need to establish a neutral baseline. This means getting your exposure levels where they belong and ensuring your white balance isn’t fighting the natural light of the scene. It’s about stabilizing the image before you start getting creative. Think of it as the foundation: if the foundation is crooked, the house is going to look wrong, no matter how much beautiful color you paint on the walls later.
The Science of Sight a Proper Rec709 Conversion Workflow
Look, you can throw every plugin you find on the internet at your timeline, but if you don’t have a structured rec.709 conversion workflow, you’re just guessing in the dark. I’ve seen too many kids try to grade by eye on a cheap monitor, wondering why their skin tones look like bruised fruit. The goal isn’t to “make it look good” immediately; it’s to bring that flat, grey data into a predictable space where your tools actually behave. Whether you’re using a DaVinci Resolve log workflow or some other NLE, you need a mathematical bridge between the sensor’s raw math and what your eyes expect to see.
Most professionals I know have moved away from slapping a single, heavy-handed LUT on the clip and calling it a day. Instead, we use color space transform LUTs to map the footage into a standard workspace. This allows you to handle the heavy lifting—adjusting your exposure and white balance in log—before you start the creative heavy lifting of actual grading. Think of it as building a house: you don’t pick the wallpaper until the foundation is level and the walls are straight.
How to Grade Log Footage Without Breaking the Sensors Limits
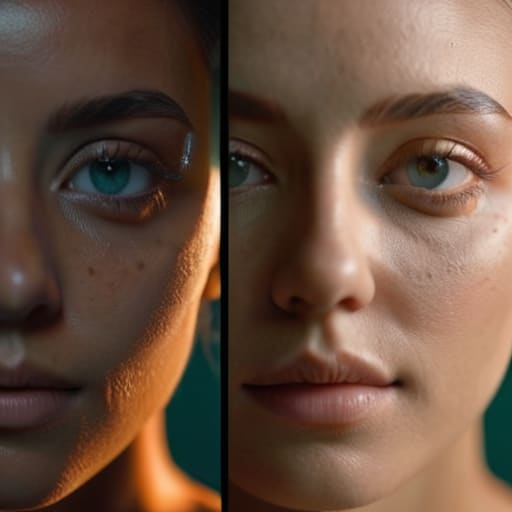
Once you’ve got your conversion set up, the real work begins, and this is where most people start making mistakes they can’t undo. You have to understand the difference between color correction vs color grading. Correction is the boring, necessary part—fixing the exposure, neutralizing the tint, and making sure the skin tones look like actual human beings. Grading is the art, the mood, the “look.” But if you try to grade a shot that was underexposed or clipped in the highlights, you aren’t being an artist; you’re just digging a hole.
In a proper daVinci Resolve log workflow, I always tell my assistants to look at the waveform before touching a single saturation slider. If your shadows are crushed into a black void, no amount of lifting the midtones is going to bring back detail; you’ll just be adding digital noise that looks like colorful sand. You aren’t expanding the sensor’s physical limits; you are merely managing the dynamic range expansion that was captured at the moment of exposure. Work within the math of the file, respect the noise floor, and for God’s sake, don’t try to force a sunset out of a shadow.
Color Space Transform Luts Math vs Artistic Intent
I see people treating color space transform LUTs like a “make pretty” button, and it drives me a bit mad. There is a fundamental difference between a mathematical conversion and an artistic choice. A proper transform is just math—it’s a way to map the wide, flat data from your sensor into a predictable space so your eyes can actually make sense of it. If you’re using a DaVinci Resolve log workflow, the software is essentially doing the heavy lifting of translating those logarithmic curves into something usable. But a LUT that just snaps your image to Rec.709 without respecting the underlying data isn’t a tool; it’s a mask.
The real trap is forgetting the line between color correction vs color grading. The transform is your correction—it’s the foundation that ensures your exposure and white balance in log are being translated accurately. Once that math is settled and the image looks “natural,” that is when you start grading. If you try to bake your artistic intent into the transform itself, you’re just fighting the math, and the math usually wins by creating artifacts and broken skin tones.
Color Correction vs Color Grading the Davinci Resolve Log Workflow
I’ve seen too many editors jump straight into the “look” before they’ve even fixed the image. In a proper DaVinci Resolve log workflow, you have to respect the hierarchy. There is a massive, fundamental difference between color correction vs color grading, though most people use the terms interchangeably while they’re breaking their footage. Correction is the heavy lifting; it’s the unglamorous work of normalizing your exposure and fixing the white balance so the image actually looks like what your eyes saw on set. If you try to grade a clip that hasn’t been corrected, you aren’t being creative—you’re just fighting a losing battle against math.
Once the image is stable and your Rec.709 conversion is sitting in a predictable place, then—and only then—do you move into grading. This is where you apply intent, mood, and style. Think of correction as building a level, solid foundation, and grading as the architecture and paint. If you skip the foundation because you’re too excited about a heavy teal-and-orange look, the whole structure will eventually collapse into digital noise the moment you push the wheels too hard.
Five Hard Truths for the Grading Suite
- Stop chasing the “look” before you’ve fixed the math. If your skin tones are drifting toward orange or your shadows are turning a muddy teal because you’re playing with wheels too early, you aren’t grading; you’re just burying the mistakes. Get your offsets and your balance sorted first.
- Respect the highlights. I’ve seen more footage ruined by a desperate attempt to pull detail out of a blown-out sky than by almost anything else. If the sensor didn’t catch the information, no amount of slider movement in Resolve is going to conjure it back from the void.
- Watch your noise floor in the shadows. When you’re working with log, there’s a temptation to crush the blacks to hide a lack of dynamic range, but that’s how you end up with dancing digital grain that looks like a swarm of bees. Lift your shadows gently, or better yet, don’t lift them at all if the light wasn’t there to begin with.
- Use your scopes like a professional, not like a suggestion. Your eyes will lie to you, especially after four hours of staring at a calibrated monitor in a dark room. If the waveform says you’re clipping, you’re clipping—regardless of how “cinematic” it looks to your tired brain.
- Don’t over-saturate the midtones to compensate for a flat image. Log footage is meant to be desaturated; it’s a canvas, not a finished painting. If you try to force a high-saturation “pop” into every frame, you’ll kill the texture and make the whole thing look like a cheap commercial.
The Bottom Line
Stop looking for a “magic button” in your software; if you didn’t get the exposure or the white balance right on set, you’re just fighting a losing battle against noise and artifacts in post.
Understand that a LUT is a tool, not a destination—use a proper Color Space Transform to get your math right first, then use your eyes to make the artistic decisions.
Respect the limits of your sensor by grading with intention rather than force; a clean, well-exposed image with subtle colors will always beat a heavy-handed grade on a crushed signal.
The Fallacy of the Post-Production Safety Net
Stop treating your log footage like a blank check you can cash in during the grade; if you haven’t respected the light and the exposure on set, no amount of sliding bars in Resolve is going to conjure a professional image out of thin air.
Gethin Moreau
The Long View
At the end of the day, grading log footage isn’t about finding a secret button in Resolve that makes everything look like a Hollywood blockbuster. It’s about respecting the math you did on set. If you handled your exposure correctly, understood your color space transforms, and didn’t try to squeeze blood from a stone in the shadows, the grade will follow. You have to remember that color correction is the foundation—getting the balance and the contrast right—while the grading is where you actually tell the story. Don’t let the technical complexity of the workflow distract you from the reality that you are simply managing the data you captured.
I’ve seen shooters spend thousands on the latest sensors only to ruin the footage by treating the digital file like a magic wand. Don’t fall into that trap. The best images I’ve ever captured didn’t come from a perfect LUT or a complex node tree; they came from knowing exactly where the light was hitting the subject before I even hit record. Use the tools, learn the science, and master the workflow, but never forget that the camera is just a witness. Your job isn’t to fix a bad image in post; it’s to use the flexibility of log to honor the light you had in the room.
