
I remember sitting in a dark edit suite ten years ago, staring at a waveform that looked like a mountain range during a thunderstorm, trying to figure out why a perfectly shot interview sounded like it was recorded inside a tin can. I had just spent three hours researching the “ultimate gear list” for a studio upgrade, convinced that a five-thousand-dollar interface would magically fix the room tone. It didn’t. It turns out that most people looking for a complete guide to audio post are actually just looking for a way to buy their way out of a bad production. They think a plugin can fix a noisy location or that a high-end compressor can manufacture clarity where there was none to begin with.
The truth is, audio post is less about the fancy software you run and more about the discipline of listening. I’m not here to sell you a subscription to some shiny new noise-reduction tool or tell you that you need a treated room before you’ve even learned how to clean up a dialogue track. Instead, I’m going to walk you through the actual workflow—the stuff that matters when the clock is ticking and the client is breathing down your neck. We’ll talk about organization, the hierarchy of fixes, and why patience in the edit is your most valuable piece of equipment.
The Invisible Architecture a Complete Guide to Audio Post
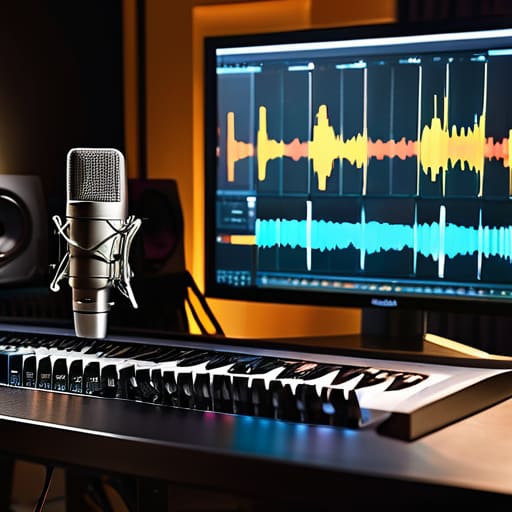
If you think audio post is just about turning a knob until the levels stop hitting the red, you’ve already lost the battle. It’s more like building the foundation of a house while everyone is busy staring at the paint job. Most people treat sound as an afterthought, something to be “fixed” in the final week of a project, but real clarity comes from a disciplined dialogue editing workflow. You have to strip away the garbage first—the hum of an air conditioner or the distant traffic that your boom op couldn’t quite dodge—before you even think about the creative stuff. It’s about cleaning the slate so the story has room to breathe.
Once the voices are solid, you move into the texture of the world. This is where you layer in your sound design techniques and the subtle, tactile details of foley to make a room feel lived-in rather than hollow. It isn’t about making it loud; it’s about making it feel honest. I’ve seen more films ruined by a muddy, cluttered mix than by a mediocre camera sensor, because if the audience can’t hear the subtext, they stop caring about the image.
Dialogue Editing Workflow Solving Problems of Distance and Clarity

You can have the most expensive sensor in the world, but if the dialogue sounds like it was recorded through a wool sock, the audience is going to check out before the first plot point hits. A solid dialogue editing workflow isn’t about layering effects; it’s about the tedious, unglamorous work of cleaning up the mess we made on set. Most of the time, you aren’t fighting the script; you’re fighting the room. I’ve spent more hours than I care to admit using noise reduction software to strip out the hum of an air conditioner or the distant drone of a highway, trying to find the actual human voice buried under the debris of a poorly chosen location.
Once you’ve stabilized the speech, the real work begins: making it feel like it belongs in the space. This is where you stop being a technician and start being a builder. You aren’t just cleaning audio; you are managing the distance between the viewer and the character. If the actor was standing ten feet from the boom, you have to use audio signal processing to bridge that gap without making them sound like they’re talking through a tin can. It’s about consistency—ensuring that when a character moves from a tight hallway to an open courtyard, the sonic texture shifts naturally.
Where Noise Reduction Software Fails and Patience Succeeds

I’ve seen it a dozen times: a junior editor gets a scratchy, wind-swept location track and thinks a subscription to a high-end noise reduction software is a magic wand. They dial the settings up to ten, and suddenly the dialogue doesn’t just lose the hum; it loses the soul. The voice starts sounding like it’s being transmitted through a wet sponge or a tin can. You can scrub away the hiss, but you can’t scrub away the fact that you’ve stripped the life out of the performance. No amount of aggressive audio signal processing can replace a clean take or a well-placed lavalier.
If the noise is baked into the frequency of the voice, stop fighting the software and start looking at your options. Instead of trying to digitally “clean” a disaster, look toward your sound design techniques to mask the flaws. Sometimes, a subtle layer of room tone or a well-timed environmental texture does more to hide a recording error than any plugin ever could. It’s about layering reality rather than trying to manufacture it from a broken signal. If you can’t fix the noise, build a world around it that makes the listener forget it was ever there.
Sound Design Techniques Building Worlds Beyond the Frame

Once you’ve cleaned up the dialogue and stopped the hiss from eating your actors, you’re left with a vacuum. A scene without atmosphere isn’t just quiet; it’s dead. This is where sound design techniques move from mere repair to actual world-building. Most beginners think this means layering a massive cinematic orchestral swell over every transition, but that’s just amateurism. Real texture comes from the small, often ignored details—the low-frequency hum of a refrigerator in a kitchen, or the specific, hollow grit of footsteps on gravel. It’s about creating a sonic space that feels as tangible as the lighting you spent three hours setting up.
If you want to do this right, don’t just rely on library files that everyone else has used a thousand times. I’ve always found that even a rudimentary grasp of foley recording basics—just getting a decent mic close to a pair of boots or a heavy door—gives you a sense of intimacy that a digital sample can’t touch. You aren’t just adding noise; you are defining the physics of your environment. If the room is supposed to feel oppressive, you don’t need a louder soundtrack; you need a heavier, more claustrophobic low-end.
Foley Recording Basics and the Art of Audio Signal Processing
Most people think Foley is about making things sound loud, but it’s actually about making them sound real. If you’re watching a character walk across a hardwood floor and it sounds like a studio recording of a person stepping on a plank, you’ve failed. True foley recording basics require you to listen to the weight of the movement, not just the sound itself. I’ve spent more time in quiet rooms with a pair of old boots and a bag of gravel than I have staring at a waveform, because a well-placed footstep provides the texture that your location audio simply cannot. It’s about the subtlety of contact, not the volume of the impact.
Once you have those raw tracks, you move into audio signal processing, which is where the temptation to “fix it in the mix” becomes dangerous. I see too many editors over-compressing their layers, trying to force every rustle and scrape to the front of the mix. You aren’t trying to make a sonic assault; you’re trying to build a layer of reality that sits just behind the dialogue. Use your EQ to carve out space, not to build walls. Control the frequency, not just the amplitude, and you might actually create a sense of space rather than a cluttered mess.
Mastering for Streaming Platforms the Final Decisive Layer
You’ve spent weeks obsessing over the dialogue editing workflow and layering in foley recording basics to make the world feel lived-in. You finally have a mix that sounds massive in your studio headphones. Then, you upload it, and it sounds like a tinny mess on a smartphone or a flat, lifeless drone on a smart TV. This is where most people lose their minds, blaming the platform, when they should be looking at their loudness standards.
Mastering for streaming platforms isn’t about making your audio “louder” than everyone else’s; it’s about controlled consistency. If you push your peaks into the red to compete, the platform’s built-in limiters will simply crush your dynamic range into a pancake. You want the listener to feel the breath in the room, not a constant wall of compression.
Before you call it finished, check your LUFS levels against the specific requirements of your delivery spec. It’s a tedious bit of math, but it’s better to spend twenty minutes adjusting your final output than to spend the next month explaining why your film sounds broken on Netflix.
Five ways to stop fighting your audio and start hearing it
- Stop looking for a magic plugin to fix a bad recording; if the dialogue is thin or drowning in room tone, no amount of EQ is going to make it sound like it was shot in a studio. You can try to polish a stone, but you’d have been better off finding a quieter corner during production.
- Respect the silence between the lines. Beginners often try to “fill” every gap with music or ambient layers, but a well-placed moment of actual nothingness gives the audience room to breathe and makes the eventual sound design feel earned rather than forced.
- Build your layers from the ground up, not from the top down. Start with the cleanest dialogue you have, then layer in your room tone, then your foley, and only then touch the music. If you try to mix the music into a mess of noisy dialogue, you’re just turning a headache into a symphony.
- Watch your headroom like your life depends on it. I’ve seen enough projects ruined by digital clipping to last a lifetime. It is much easier to bring a quiet signal up in the mix than it is to try and recover a waveform that’s been smashed against the ceiling.
- Mix for the environment, not the studio. Your mix might sound perfect on your expensive monitors in a treated room, but if it sounds like a tin can on a smartphone or a laptop, you’ve failed. Check your levels on the worst speakers you can find; that’s where the real work happens.
The short list: What actually makes the difference
Stop looking for a magic plugin to fix a bad recording; if the dialogue is buried in room tone or wind noise, no amount of software will give you the clarity that a better mic placement or a quieter set would have provided.
Sound design isn’t about stacking layers of cinematic booms until the mix is a mess; it’s about using silence and specific, purposeful textures to guide the viewer’s ear to what actually matters in the frame.
Technical specs like LUFS and loudness standards are just the final hurdle, not the goal—you can follow every streaming platform’s rulebook to the letter, but if your mix lacks dynamic breathing room, it’ll still sound flat and lifeless.
The myth of the magic plugin
You can spend six months chasing the perfect noise-reduction plugin or a high-end preamp, but if you didn’t respect the mic placement on set or the silence in the room, you’re just spending money to polish a mistake. Good audio isn’t about what you add in post; it’s about having the patience to fix what you didn’t capture in the first place.
Gethin Moreau
The final mix
At the end of the day, audio post isn’t about stacking plugins or finding the most expensive de-noiser on the market. It’s a process of reclamation. You’re reclaiming the dialogue from a noisy room, reclaiming the sense of space through careful sound design, and finally, reclaiming the rhythm of the story through the edit. We’ve talked about everything from the granular work of Foley to the technical constraints of streaming masters, but the thread that connects them all is the same: audio is the glue that holds your visual intentions together. If the dialogue is buried or the atmosphere feels hollow, it doesn’t matter how much 8K resolution you’re throwing at the screen; the audience will feel the disconnect.
If you take anything away from this, let it be that the ear is a much more unforgiving critic than the eye. You can get away with a slightly soft focus or a bit of grain, but you can never get away from bad sound. Don’t get caught up in the gear chase or the latest software updates. Instead, focus on the fundamentals of placement, the patience required to clean a track, and the discipline to know when a sound is doing too much. Build your world from the ground up, one layer at a time, and remember that the best sound work is often the kind that nobody even notices.
