I spent a decade watching kids walk into rental houses with a shopping list of glass that cost more than my first car, all because some YouTuber told them a certain focal length would “give them the look.” They’d walk onto a set with three thousand dollars of prime glass and still produce images that looked flat, lifeless, and fundamentally broken. They were so obsessed with the sharpness numbers on a spec sheet that they completely forgot to ask if the glass actually served the story. If you’re currently staring at a dozen different tabs of gear reviews, trying to figure out how to choose a lens based on MTF charts and sensor compatibility, you’re already fighting a losing battle against the marketing.
I’m not here to help you pick the most expensive kit on the shelf. My goal is to teach you how to look at a room, see where the light is falling, and understand what kind of perspective you actually need to capture the moment. We’re going to talk about distance, compression, and coverage—the stuff that actually matters when the sun is going down and the client is breathing down your neck. I’ll give you the honest truth about which pieces of glass actually change the work and which ones are just expensive distractions.
Beyond the Spec Sheet How to Choose a Lens
You can spend an afternoon reading about MTF charts and resolving power, but those numbers won’t tell you how a lens feels when you’re trying to capture a performance in a cramped living room. Most people get caught up in the technicalities of lens sharpness and distortion, treating them like a checklist to be completed before they even step onto a set. In reality, you aren’t just buying glass; you’re buying a specific way of seeing. If you’re working with a tight budget, you’ll find yourself debating prime vs zoom lenses more often than you’d like. A zoom offers convenience, sure, but a prime forces you to move your feet, and moving your feet usually leads to better blocking.
The real question isn’t about the highest resolution, but about the relationship between the glass and the light. You need to know if the lens will play nice with your sensor—because sensor size and crop factor can turn a wide-angle lens into a portrait lens before you’ve even finished your first setup. Don’t buy a lens because the reviewer said it’s “sharp.” Buy it because it handles the light the way you want your story to feel.
The Prime vs Zoom Debate Convenience vs Character
I’ve spent half my career watching people sweat over the prime vs zoom lenses argument, usually while standing in a cramped room with a lighting setup that’s already falling apart. If you’re shooting a run-and-gun documentary where you don’t have the luxury of a crew to swap glass every ten minutes, a zoom is a lifeline. It’s about survival. You trade away a bit of the clinical perfection you find in a fixed focal length for the ability to react before the moment vanishes.
But there is a cost to that convenience. Zooms are often a compromise of physics; you’re asking a piece of glass to do too much heavy lifting, which can lead to issues with lens sharpness and distortion once you push the limits. Primes, on the other hand, force you to move your feet. They demand you understand the geometry of the space before you even think about hitting record. I’ve always found that the discipline of a prime—having to physically walk to find your shot—tends to result in a more intentional image. You aren’t just zooming in on a subject; you are composing with intent.
Sensor Size and Crop Factor the Geometry of the Frame
Before you even look at a piece of glass, you need to know what’s sitting behind it. I’ve seen too many people buy a beautiful piece of prime glass only to realize it’s practically a microscope once they mount it on a Micro Four Thirds or an APS-C body. It isn’t just about magnification; it’s about how you’re forced to move. When you factor in sensor size and crop factor, that wide-angle lens you thought would capture the whole room suddenly feels like a tight medium shot. You aren’t just changing the view; you’re changing the physical geometry of your set and how much space you need to work with.
If you’re working with a smaller sensor, you’re going to have to fight harder for that shallow, cinematic look. While a smaller sensor can make depth of field explained in textbooks seem easier to manage, it also means you’ll be backing up into a corner just to get a decent framing. You have to decide if you’re willing to compensate for that crop by choosing wider focal lengths, or if you’re going to let the sensor dictate your blocking. Don’t let the math surprise you on the day of the shoot.
Mastering Depth of Field Explained Through Light
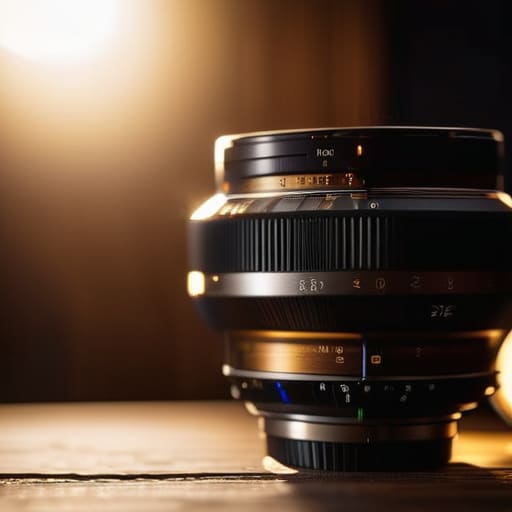
You’ll hear people talk about aperture like it’s a magic dial that creates “cinematic” blur, but they’re missing the physics of the room. Depth of field isn’t just a setting; it’s a relationship between your distance to the subject and the amount of light you’re willing to let in. If you’re standing ten feet away from a subject in a dim corner, you’re going to be fighting for every stop of light just to keep your ISO from climbing into the stratosphere. I’ve seen beginners try to force a shallow look by opening up the iris to its limit, only to realize they’ve turned their subject into a floating head with no sense of place.
The real trick is understanding that depth of field explained through light is about managing your environment. If you want that creamy, separated look, you shouldn’t just be looking at your lens’s f-stop; you should be looking at where your key light is sitting. You can have the most expensive glass in the world, but if you don’t have the light to support a wide aperture, you’re just making a noisy, muddy image. Don’t chase the blur; chase the light that allows the blur to exist naturally.
Lens Mount Compatibility and the Cost of Connection
Before you fall in love with a specific glass, you need to look at the metal ring that connects it to your body. I’ve seen plenty of beginners spend months eyeing a beautiful vintage set, only to realize they’re staring at a mountain of adapters and flimsy mounts that turn a professional setup into a game of Jenga. Lens mount compatibility isn’t just a technical checkbox; it’s a decision about how much you trust your gear when the sun starts to go down and you’re moving fast.
If you’re running an adapter to bridge a gap between a cinema body and old stills glass, you’re introducing more points of failure. You might get the look you want, but you’ll likely lose autofocus, electronic communication, or—worst of all—the structural integrity required for a long shoot. It’s easy to get caught up in the hunt for a specific aesthetic, but don’t ignore the physical reality of how that lens sits on your sensor. If the connection is loose or the adapter is cheap, your expensive sensor won’t be able to do anything to save a frame that’s slightly out of plane.
Sharpness and Distortion What a Colorist Cant Fix
We spend a lot of time talking about dynamic range and bit depth, as if a better sensor is a magic wand. It isn’t. You can have a sensor that captures every nuance of a shadow, but if you’re shooting through glass that smears the edges of your subject or bows the horizon line, you’re just capturing a high-resolution mistake. I’ve seen people spend months saving for a flagship body, only to pair it with cheap glass that introduces uncontrolled chromatic aberration or weird, geometric warping at the edges of the frame.
A colorist can fix a heavy tint or a crushed shadow, but they cannot fix lens sharpness and distortion once the data is baked into the file. If your lens has a soft, milky fall-off that makes your textures look like they’ve been rubbed with Vaseline, no amount of sharpening in post-production is going to bring that grit back without creating a digital mess. When you’re looking at gear, stop asking if it’s “sharp enough” on a spec sheet and start asking how it handles light at the edges. You want glass that stays honest, because distorted geometry is a much harder problem to solve than a bad exposure.
Five Ways to Stop Buying Glass and Start Making Images
- Stop looking at the MTF charts and start looking at your floor plan. Before you click ‘buy’ on a lens, ask yourself if you have the physical space to move the camera back or if you’re going to be trapped in a corner with a wide angle. A lens is a tool for managing distance, not just a way to zoom in on a face.
- Buy for the light you have, not the light you wish you had. If you’re shooting mostly in controlled environments with a grip truck full of lights, you can get away with a slower, tighter lens. If you’re a solo operator chasing run-and-gun documentary work, that f/1.2 aperture isn’t a luxury; it’s your only way to keep the exposure from falling into the mud.
- Think about the edit, not just the shot. A lens isn’t just about what it sees; it’s about how it helps you bridge a scene. If you choose a lens that’s too specialized, you might find yourself with beautiful shots that are impossible to cut together because the perspective shifts too violently between them.
- Respect the “character” of the glass. There is a difference between a lens being “sharp” and a lens being “useful.” Sometimes, a lens that’s a little soft at the edges or has a bit of flare can actually do more work for your storytelling than a clinical, perfect piece of modern glass that makes everything look like a medical textbook.
- Test the weight before you commit to the kit. I’ve seen too many young shooters buy a beautiful set of heavy primes only to realize they can’t hold them steady for a long interview or carry them through a mountain pass. If the gear makes you want to quit halfway through the day, it’s the wrong gear, no matter how good the bokeh is.
The Bottom Line
Stop looking for the “perfect” lens on a spreadsheet; look for the one that forces you to think about where the light is coming from and how much space you actually have to move.
A more expensive piece of glass won’t fix a lack of coverage or a poorly lit scene, but the right focal length can turn a mediocre setup into something that actually tells a story.
Buy for the character of the image rather than the resolution, because a sensor can be upgraded, but the way a lens renders light is something you can’t just patch in post.
The Trap of the Perfect Spec
Stop looking at the MTF charts and start looking at the room you’re standing in. A lens isn’t a mathematical equation of sharpness; it’s a way of deciding how much light you’re willing to let in and how much of the world you’re willing to leave out. If you buy a lens just because it’s the sharpest thing on the market, you’ll eventually find yourself with a beautiful image of absolutely nothing.
Gethin Moreau
The Final Frame
At the end of the day, choosing a lens isn’t about finding the one with the highest resolution or the most expensive coatings. It’s about understanding the relationship between the light hitting your sensor and the story you’re trying to tell. We’ve talked about the math of crop factors, the practical trade-offs between primes and zooms, and the reality that no amount of post-production can fix a lens that was fundamentally wrong for the space you’re working in. If you focus on the geometry of the scene and how the glass interacts with your light source, you’ll find that the gear becomes a tool rather than a hurdle. Don’t let a spec sheet dictate your creativity; let the physical reality of the room do that.
I’ve spent twenty-three years watching people chase the “perfect” glass, only to realize the best shots came from a lens they didn’t even particularly like, simply because they knew how to use it. A lens is just a way to shape light and distance, and no piece of kit will ever compensate for a lack of intent. Stop worrying about whether you have the latest magnesium-alloy masterpiece and start asking yourself if you have the patience to see the light before you ever touch the focus ring. The best lens in your bag isn’t the one that costs the most—it’s the one that gets out of your way so you can actually see the world.
