I spent three hours last Tuesday watching a junior editor try to “fix” a keyed shot using a magic plugin that cost more than my first car. He was staring at a subject whose hair looked like it had been dipped in radioactive lime juice, convinced that a better sensor or a smarter algorithm would save him. It’s the same old story: people treat chroma keying like a software problem when it’s actually a physics problem. If you’re sitting in a dark room wondering how to avoid green spill by downloading a new LUT or buying a more expensive camera, you’re looking in the wrong direction. You don’t need more processing power; you need to understand how light bounces off a piece of cheap fabric and onto your actor’s skin.
I’m not here to sell you on a subscription service or a piece of gear that promises to automate your creativity. I’m going to tell you how to handle the light, the distance, and the blocking so that your key actually works the first time you hit the button. We’ll talk about why moving your subject six inches can be more effective than any colorist in the world, and I’ll show you exactly where to place your lamps to keep that nasty green glow away from the edges. This isn’t about high-tech wizardry; it’s about doing the work on set so you don’t have to suffer in post.
The Distance Problem Why Light and Space Dictate Your Key
The biggest mistake I see is people treating the green screen like a backdrop in a living room. They pull the subject right up against the fabric, thinking it saves space, but all they’re doing is inviting a disaster. When your subject is inches from that screen, the light bouncing off the green surface is going to hit them like a physical wave. You can try every keying technique for video editors in the book, but once that green light has soaked into the actor’s skin and hair, you’ve already lost the battle.
It’s a physics problem, not a software one. You need to create a buffer zone. I always tell my assistants to treat the screen as a light source itself—because that’s exactly what it becomes. By increasing the physical gap between the subject and the background, you’re essentially letting the inverse square law do the heavy lifting for you. If you give them enough room, the light fall-off will naturally dim the reflected glow, making preventing color bleed in video a matter of simple geometry rather than a desperate scramble for despill filters in post-production.
Mastering Your Chroma Key Lighting Setup to Kill the Glow
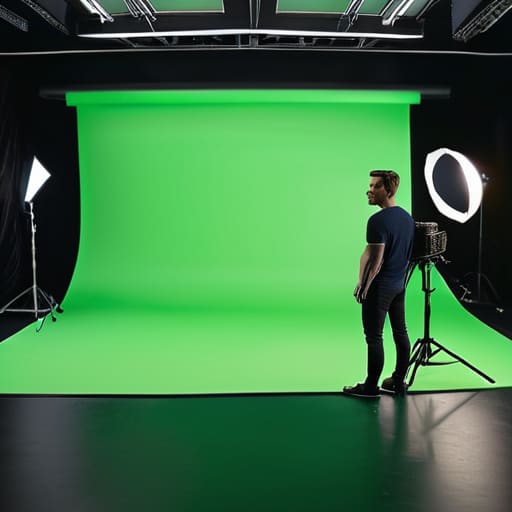
If you’ve already given your subject enough breathing room, the next step is to stop treating your green screen like a background and start treating it like a separate light source. Most people make the mistake of lighting the screen and the talent with the same intensity, which is a recipe for disaster. You need to decouple them. I always aim for a chroma key lighting setup where the screen is evenly illuminated, but significantly dimmer than the key light on the subject. If the green is hitting your actor with the same punch as your main light, you’ve already lost the battle.
Once you have the light levels separated, pay attention to the direction. I tend to flag my lights to ensure nothing is bouncing off that green surface and back onto the subject’s skin. Even with the best keying techniques for video editors, trying to scrub out a glowing green chin is a nightmare that eats up hours of grading time. It’s much easier to prevent the bounce at the source than it is to rely on despill filters in post-production to save a messy capture. Move the lights, control the bounce, and stop expecting the software to do your job for you.
The Real Secret to How to Avoid Green Spill Permanently

Look, if you’re searching for a magic plugin or a specific despill filter in post-production that will suddenly make your footage look professional, you’re chasing a ghost. I’ve seen editors spend hours trying to scrub out a neon glow from a subject’s hair, only to end up with a person who looks like they’re made of grey plastic. The real secret isn’t in the software; it’s in the discipline of your physical setup. You have to treat the green screen not as a backdrop, but as a light source that is actively trying to sabotage your image.
The only way to truly stop the bleeding is to decouple your subject from that light entirely. This means obsessive control over your studio lighting for green screen. You need to ensure your key lights are hitting your subject with enough punch to overpower any ambient bounce coming off the fabric. If you can’t see a clear distinction between the edge of your subject and the background in your monitor, you’ve already lost the battle. Stop looking for better keying techniques for video editors and start looking at your light meter.
Preventing Color Bleed in Video Before the Sensor Sees It

If you’ve already handled the distance and the light, you’re halfway there, but you’re still at the mercy of the physics of reflection. You can have the most expensive LED panels in the world, but if you’re shooting a subject with reflective skin or wearing a silk shirt, you’re going to have a bad time. Preventing color bleed in video starts with understanding that the green isn’t just coming from the screen; it’s bouncing off the subject and back into the lens.
I’ve seen too many people rely on despill filters in post-production to do the heavy lifting, treating the grade like a magic wand. It isn’t. Once that green light has baked into the highlights of a cheekbone or the fine strands of hair, you’re just digging a hole in your image quality to fix a mistake that happened on set. If you can’t control the bounce, you’re just making the editor’s life harder. Use flags, use negative fill, and for heaven’s sake, watch how much light is hitting that background versus how much is hitting your talent. If the screen is brighter than the person, you’ve already lost the battle.
Studio Lighting for Green Screen What Gear Actually Matters
Look, you don’t need a specialized lighting rig that costs more than my first car to get a clean key. Most of the time, you just need consistency. If you’re looking at a spreadsheet of LED panels and asking which one will magically solve your problems, you’re looking in the wrong place. What matters for studio lighting for green screen isn’t the brand name or the app integration; it’s the ability to control the falloff. You want lights that can dim precisely and, more importantly, lights that don’t throw a messy, uneven wash across the fabric. If your background is a patchwork of bright spots and dark shadows, no amount of despill filters in post-production is going to save your skin.
I’ve seen guys walk into a room with a bag full of high-end gear and still walk out with a mess because they didn’t understand light distribution. You need enough power to keep your subject separated from the background, but enough control to ensure that light isn’t bouncing off the green and onto their shoulders. Focus on getting a few solid, dimmable sources and perhaps some flags to shape the beam. If you can control where the light stops, you’ve already won half the battle.
When Despill Filters in Post Production Fail to Save the Shot
I’ve seen plenty of editors try to perform miracles with a handful of keying techniques for video editors, hoping a software plugin will act as a magic wand. They think they can just slap on some despill filters in post-production and call it a day. But here is the reality: a filter can only do so much when the light has already physically wrapped around your subject. If that green glow has saturated the fine details—the stray hairs, the edges of a translucent shirt, or the subtle shadows under a chin—the software doesn’t know what is “subject” and what is “spill.” It just sees a mess of pixels.
When you push a despill tool too hard to compensate for a poor chroma key lighting setup, you don’t get a clean image; you get a dead image. The skin tones turn ashen, the saturation drops, and the subject looks like they’ve been carved out of gray wax. You aren’t fixing the shot; you’re just masking the evidence of a failure. If you find yourself reaching for those heavy-duty correction tools, it’s usually a sign that you should have spent more time with the flags and the distance in the studio, rather than counting on the colorist to save your skin.
Five Hard Truths for a Cleaner Key
- Stop treating the green screen like a backdrop and start treating it like a light source. If you can see a green tint on your subject’s skin, it’s because that screen is essentially a giant, glowing green lamp. Dim the screen lights or move the talent further away; don’t expect a plugin to do the heavy lifting.
- Watch your hair and edges. Fine textures—the kind that make a DP’s life miserable—are where the spill hides. If you’re shooting someone with flyaway hair or a fuzzy sweater, you’ve already lost half the battle. Use a backlight to create a crisp rim that separates them from the green, but keep that light neutral, not green.
- Mind your subject’s wardrobe. I’ve seen enough “pro” setups ruined because someone thought a teal shirt looked “close enough” to the background. If it’s even remotely in the same color family as your screen, you’re asking for a key that looks like a digital mess. Keep the colors distinct and the contrast high.
- Control your spill with physical barriers, not just software. If you have a particularly bright screen, use some black flags or negative fill on the sides of your subject. It’s much easier to block the green light from hitting the talent physically than it is to try and scrub it out of the pixels later.
- Check your exposure before you commit. A common mistake is overexposing the green screen to get a “clean” signal, but all you’re doing is flooding the room with green light that will bounce onto everything in the frame. Aim for a consistent, even tone, but don’t blast it. A slightly darker, even screen is a better friend to your key than a bright, uneven one.
The Bottom Line on Clean Keys
Stop looking for a magic plugin to fix a bad setup; if your subject is standing too close to the screen or your backlight is hitting the green fabric, you’ve already lost the battle before you even hit record.
Light the screen and light the person as two entirely separate problems, and remember that a little extra distance between the talent and the background is worth more than any high-end sensor or expensive software.
Prioritize physical control over digital correction—it is always faster, cheaper, and more professional to move a lamp or a light stand than it is to spend four hours trying to despill a mess in the grade.
The Expensive Mistake
You can spend three hours trying to find a magic plugin to scrub the green out of a subject’s hair, or you can spend ten minutes moving your lights and your talent. One costs you your sanity in the grade; the other just costs you a little bit of floor space. Stop treating the sensor like a miracle worker and start treating the light like it actually matters.
Gethin Moreau
The Bottom Line on Spill
At the end of the day, avoiding green spill isn’t about finding a magic plugin or a more expensive sensor; it’s about the discipline of the setup. You have to manage the distance between your talent and that screen, control the light hitting the background so it doesn’t bounce back into your subject’s hair, and understand that once the light hits the sensor, you’re playing a losing game of damage control. If you’ve spent your time obsessing over the physics of the room rather than the specs of your software, you’ve already won half the battle. Stop looking for a fix in the edit and start looking for it in the placement of your key light.
I’ve seen incredible work shot on cameras that should have been in a museum, and I’ve seen high-end cinema rigs produce garbage because the operator didn’t respect the light. Don’t let a shiny new piece of gear convince you that you can skip the fundamentals of blocking and illumination. The goal isn’t just to get a clean key; the goal is to create an image that feels integrated and intentional. Put the work in on the floor, during the setup, and I promise you’ll spend much less time fighting your computer and much more time actually making something worth watching.
