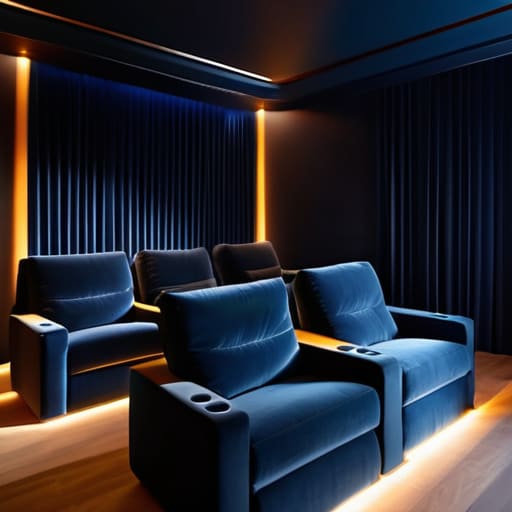
I spent three hours last Tuesday watching a guy unbox a $500 smart-lighting kit, convinced that syncing his LEDs to his screen was the secret to a perfect viewing experience. He was chasing a digital glow when he should have been looking at the geometry of his room. Most people approach the question of how to set up home cinema lighting by looking at a catalog of gadgets, but they’re fundamentally missing the point. You don’t need more lumens; you need to understand where the light isn’t going. If you don’t control the spill and manage your ambient levels, you aren’t creating a cinema—you’re just making a very expensive way to induce eye strain.
I’m not here to sell you a proprietary app or a strip of neon that turns your living room into a nightclub. Instead, I want to show you how to use practical, low-level light to create depth and focus without washing out your screen. We’re going to talk about placement, the importance of diffused sources, and why your existing floor lamps might actually be your best tools if you move them six inches to the left.
Guide Overview
Tools & Supplies
- Measuring tape for calculating LED strip lengths
- Smartphone for controlling smart lighting apps
- Scissors or utility knife for cutting LED strips
- Smart LED light strips (1-2 rolls)
- Dimmer switch or smart plug (1 unit)
- Command strips or mounting clips (1 pack)
- Blackout curtains or fabric (1 set)
Step-by-Step Instructions
- 1. Start with the ambient light—or rather, the lack of it. Before you even look at a dimmable LED strip, you need to identify your primary light source, which in this case is the screen itself. Sit in your chair, turn the movie on, and watch how the light from the screen hits your face and the walls. If the room feels like a cave, you’re fine; if the walls are reflecting a harsh, jittery glare back at you, you have a problem of reflection, not illumination. You want the room to feel dark, but not dead.
- 2. Address the “bias lighting” behind the screen. This isn’t about decorating; it’s about reducing eye strain. When you have a bright, high-contrast image in a pitch-black room, your pupils are constantly fighting to adjust. Place a soft, diffused light source behind the TV or projector screen to wash the wall slightly. The goal is to create a subtle glow that bridges the gap between the screen’s brightness and the darkness of the room, making the whole experience easier on the eyes.
- 3. Layer in some practicals, but keep them low and out of the line of sight. A small, dim lamp in a far corner or a low-profile floor light can add depth to the room without creating a distracting hot spot. The trick here is diffusion. If you can see the bare bulb, you’ve failed. Use a shade or a frosted cover to ensure the light is soft and wraps around the furniture, rather than hitting it like a searchlight.
- 4. Manage your shadows. In a professional studio, we spend half our time worrying about where the light isn’t going. In a home cinema, you want to avoid “specular highlights”—those tiny, annoying glints of light on glass coffee tables or polished picture frames. If you see a bright dot reflecting in your glass, move the lamp or change the angle. It’s much easier to move a lamp six inches to the left than it is to try and hide a reflection during a climax.
- 5. Control the “spill.” This is where most people mess up by buying too much gear. If you have a light meant to illuminate a corner, make sure it isn’t spilling onto the screen or casting a shadow across the path to the snack bowl. Use flags or even just a piece of black cardboard to block light from hitting the screen. You want the light to stay exactly where you put it, not wander off and ruin your contrast ratio.
- 6. Finally, check your color temperature. There is no sense in having a warm, cozy lamp fighting against the cool, blueish light of a high-end LED strip. Try to keep your light sources in the same ballpark—usually a warm, amber tone for a “cinema” feel. If your lights are all fighting each other in different colors, the room will feel unsettled, and you’ll find yourself distracted by the decor instead of the film.
Solving the Glare Problem With Smart Bias Lighting
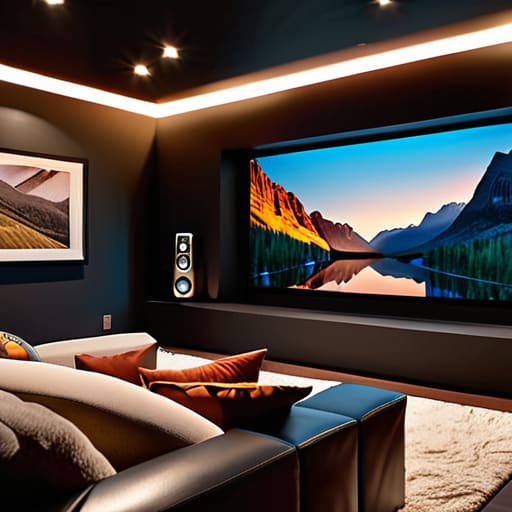
If you’ve ever sat in a pitch-black room staring at a high-contrast screen, you know that eye strain isn’t just a nuisance; it’s a physical ache. Most people think the answer is to just turn the lights up, but that’s a mistake. You aren’t trying to illuminate the room; you’re trying to reduce the perceived contrast ratio that’s punishing your pupils. This is where bias lighting for home theater setups becomes your best friend. By placing a soft, even light source behind the screen, you create a subtle glow on the wall that helps your eyes adjust to the bright image without washing out the blacks.
Don’t go overboard with a massive, bright fixture. You want something low-intensity and, ideally, something you can adjust. I usually suggest looking into dimmable smart lighting for movies so you can dial the intensity down to match the specific mood of what you’re watching. If you’re doing an LED strip installation for media rooms, aim for a neutral color temperature—around 6500K—to keep your color perception honest. It’s not about making the room “bright”; it’s about managing the transition between the dark corners and the glowing screen so your eyes don’t have to work overtime.
Mastering Color Temperature and Dimmable Smart Lighting
Most people treat color temperature like a binary choice—either it’s “warm” or it’s “cool”—but in a dedicated viewing space, it’s about managing the relationship between your eyes and the screen. If you’re watching a film with a heavy blue, wintry grade, but your room is bathed in a thick, amber glow from an old incandescent bulb, you’re effectively fighting the director’s intent. I always suggest building a basic home cinema color temperature guide for yourself based on the content. You want your light sources to sit near the same Kelvin scale as the image on the screen to maintain visual cohesion.
This is where the investment in dimmable smart lighting for movies actually pays dividends. It isn’t about the gadgetry; it’s about the ability to dial back the intensity without shifting the hue into something muddy. You want to be able to sweep from a crisp 5600K for a bright afternoon scene down to a deep, moody 2700K for a thriller, all while keeping the light levels low enough to prevent eye fatigue. If you can control the intensity and the temperature simultaneously, you stop fighting the room and start letting the picture breathe.
Five Ways to Stop Fighting Your Room and Start Seeing the Screen
- Stop chasing lumens and start chasing placement. Most people throw a bright lamp in the corner and wonder why they can’t see the dialogue. It’s about where the light hits, not how much you have. Keep your light sources away from the direct line of sight between your eyes and the screen, or you’re just paying for a headache.
- Think about the floor, not just the walls. If you have a hard, reflective floor, your “mood lighting” is just going to bounce glare straight up into your eyes. Use rugs or matte finishes to kill those secondary reflections. I’ve seen more ruined viewing experiences caused by a polished hardwood floor than by a bad projector.
- Use layers, not just a single switch. A single overhead light is a blunt instrument. You want a mix: maybe a low-level floor lamp for safety when you’re walking to the kitchen, and some dimmable strips for atmosphere. It’s about having control over the intensity, not just the “on” and “off” positions.
- Watch your shadows. If you’re placing lights behind your seating position, make sure they aren’t casting a massive, distracting silhouette of your head onto the wall behind the screen. It sounds trivial until you’re halfway through a film and can’t stop looking at the dark shape looming in your peripheral vision.
- Respect the “Black Level.” If you want that cinematic feeling, you need actual darkness in certain parts of the room. If your ambient light is bleeding into the edges of the screen, you’re killing your contrast ratio. You don’t need a blackout curtain for every window, but you do need to manage the light so it stays in its lane and away from the glass.
The Final Frame
At the end of the day, setting up your home cinema lighting isn’t about achieving a professional studio’s technical readout; it’s about controlling the environment so the screen can actually do its job. We’ve talked about managing glare with bias lighting, keeping your color temperatures consistent so you aren’t fighting a weird green tint during a dark scene, and using dimmable smart lights to set the mood without washing out the image. If you can manage the direction and intensity of your light sources, you’ve already won half the battle. You don’t need a rack of expensive Arri Skypanels to make a room feel cinematic; you just need to know where the shadows fall and ensure your light isn’t competing with the content you’re trying to watch.
I see people spend thousands on 8K projectors only to sit in a room with a single, harsh overhead bulb that kills the entire experience. Don’t fall into that trap. The most important tool you have isn’t a piece of hardware you can order online, but your own eyes and patience. Take the time to sit in the dark, watch how the light behaves, and adjust things incrementally. Cinema is an art of nuance, and your home setup should be no different. Stop looking at spec sheets for a moment, look at the room instead, and start building an atmosphere that lets the story breathe.
Look, if you’re getting serious about the way light interacts with your space, you’ll eventually realize that you can’t just wing it with whatever lamp happens to be in the corner. You need to understand the physics of how different sources affect your eyes and your screen. I usually tell people to spend some time digging into the technical side of how light actually behaves in a room before they start throwing money at smart bulbs. If you want to get a better handle on the practicalities of how these environments are actually built and maintained, checking out some of the deeper insights at https://cairnssex.com can be a useful way to bridge the gap between just watching a movie and actually controlling the atmosphere of the room. It’s about making sure the light is working for you, not against you.
