I once spent three days on a documentary in a coastal village, watching a crew struggle with a brand-new, state-of-the-art field recorder that cost more than my first car. They had the cleanest signal-to-noise ratio in the business, but they were trying to capture a conversation through a heavy oak door while a generator hummed fifty feet away. It was a perfect lesson in why people get it wrong: they think the gear does the work. Understanding how audio is recorded on set isn’t about mastering a menu of digital settings or buying the latest wireless kit; it’s about the unsexy physics of air, distance, and the annoying reality of the environment you’ve been stuck in.
I’m not here to sell you a shopping list of expensive microphones or walk you through a manual. Instead, I want to talk about the actual battle of getting clean sound when the world is working against you. We’re going to look at the geometry of a boom pole, the subtle art of managing lavalier placement without it sounding like a telephone call, and why your most important tool is often just a bit of patience. I’ll tell you how to capture something that actually sounds like the scene you’ve spent all day lighting.
Understanding How Audio Is Recorded on Set
Before we get into the gear, you have to understand that audio isn’t just a secondary layer you slap on in post; it’s the foundation of the entire scene. When we talk about the location sound mixer workflow, we aren’t just talking about hitting ‘record.’ It’s a constant, tactical negotiation with the environment. You’re balancing the signal-to-noise ratio, managing the gain stages to ensure you aren’t clipping the tops of the waveforms, and trying to predict where a truck might rumble or a fridge might hum. It’s a game of capturing clean dialogue while fighting a losing battle against physics.
The actual delivery of that sound usually falls into two camps: the boom and the body. A skilled operator uses specific boom operator techniques to keep the mic as close to the source as possible without entering the frame or casting a shadow that ruins the lighting I’ve spent two hours setting up. If the boom can’t get close enough, we turn to lavaliers. But even then, lavalier microphone placement is a delicate art; if you clip it wrong, you’re not getting a performance, you’re getting the sound of clothing rubbing against a capsule, and no amount of digital cleaning in a studio is going to make that sound natural.
Key Things to Know
The first thing you need to accept is that sound is a physical battle against the environment. You can have the most sophisticated field recorder setup in your kit, but if the air conditioning is humming or the actor is standing ten feet from the source, you’re just documenting a disaster in high fidelity. I’ve sat in edit suites where the picture was gorgeous, but we couldn’t use a single frame because the audio signal chain was compromised by a cheap cable or a poorly managed gain stage. It’s not about the price of the gear; it’s about the discipline of the person holding it.
This discipline usually comes down to two people: the mixer and the person on the pole. Good boom operator techniques aren’t just about staying out of the shot; they are about understanding the physics of how sound travels in a specific room. Whether it’s the subtle art of lavalier microphone placement—tucking a wire so it doesn’t rustle against a linen shirt—or managing the distance between the mic and the mouth, it’s a game of inches. If you don’t respect the distance, no amount of post-production magic is going to save you.
Practical Tips and Steps
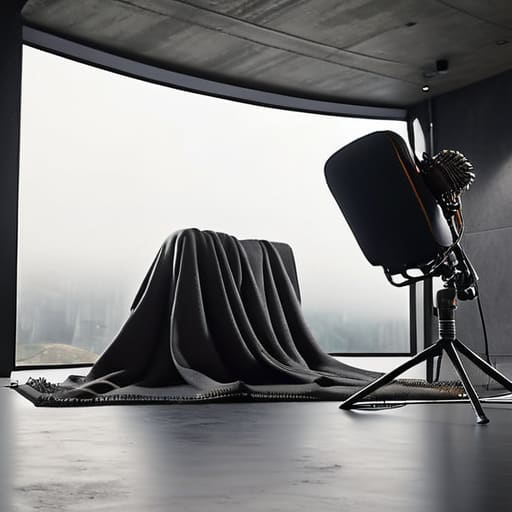
First, stop thinking about the gear and start thinking about the room. You can have a top-tier field recorder setup sitting on a cart, but if you haven’t accounted for the hum of an air conditioner or the slap-back echo from a bare concrete wall, you’re just documenting a disaster in high fidelity. I’ve seen more shoots saved by a well-placed heavy moving blanket than by a thousand-dollar microphone. Before you even think about the audio signal chain, look at the space. Identify the noise floor and treat the room like you’re setting up a lighting rig—it’s all about managing the environment before you ever hit record.
When it comes to the actual capture, your boom operator is your best friend or your biggest liability. Good boom operator techniques aren’t just about staying out of the frame; they are about the constant, subtle dance of staying just inches from the actor’s mouth without catching the shadow of the pole. If you’re forced to use body mics, remember that lavalier microphone placement is a game of physics, not just convenience. Hide them well, but don’t bury them so deep in clothing that you end up with a muffled, bass-heavy mess that no editor on earth can fix.
Common Mistakes to Avoid
The biggest mistake I see isn’t a lack of gear; it’s a lack of respect for the environment. People spend thousands on a high-end field recorder setup only to ignore the hum of a refrigerator or the distant drone of an air conditioner. You can’t fix a noisy room in post, no matter how much you pay a colorist or a sound editor. If you aren’t listening to the room before you hit record, you aren’t really recording; you’re just collecting garbage.
Then there’s the obsession with hiding things. I’ve watched directors demand specific lavalier microphone placement that ends up rubbing against a polyester shirt, creating a rhythmic scratching that ruins every take. It’s a classic case of prioritizing aesthetics over the actual job of capturing clean dialogue. You have to find the middle ground between a visible mic and a useless one.
Finally, stop treating the sound department like an afterthought. When the camera team is ready but the audio hasn’t been leveled, you’re burning daylight and money. A solid location sound mixer workflow requires communication, not just a person standing in the corner hoping for the best.
Final Thoughts
At the end of the day, whether you’re working with a massive grip truck or a skeleton crew in a cramped apartment, the principle remains the same: sound is not an afterthought. You can have the most beautiful, sensor-crushing 8K image in the world, but if your audio signal chain is compromised by a noisy preamp or a poorly placed mic, you’re just making a very expensive silent film. People spend months debating bit depth and dynamic range, yet they forget that the audience will forgive a grainy image, but they will never forgive bad dialogue.
Don’t get caught up in the gear lust. A sophisticated field recorder setup won’t save a performance if the room is echoing like a cathedral or if your boom operator is fighting a losing battle with a ceiling fan. Focus on the fundamentals—the distance, the placement, and the patience required to get it right. If you respect the physics of the space and the limitations of your gear, you’ll find that the best way to capture clean dialogue is to listen more than you look.
Five ways to stop recording expensive garbage
- Respect the boom pole. You can drop fifty grand on a Schoeps or a Sennheiser, but if that mic is sitting three feet too far from the actor’s mouth because you were too lazy to climb a ladder or find a way to stand, you’re just capturing the room’s acoustics instead of the performance. Distance is the only thing that actually matters.
- Treat the lavalier like a secret, not a decoration. I’ve seen enough “pro” sets where the mic is bouncing off a collarbone or rubbing against a polyester shirt, creating a rhythmic scratching that no amount of post-production magic can scrub away. Hide it well, secure it with moleskin, and for God’s sake, check the clothing before you hit record.
- Watch the environment, not just the waveform. A sound mixer can show you a perfect, clean signal on their headphones, but if there’s a refrigerator humming in the background or a construction crew two blocks over, that “clean” audio is still useless. You have to listen to the silence between the lines to know if the room is actually quiet.
- Stop treating audio as an afterthought to the image. I’ve sat in edit suites staring at a gorgeous, shallow-depth-of-field shot that looked like a million bucks, only to realize the dialogue sounds like it was recorded in a tin can. If the sound is bad, the shot is bad. Period.
- Always, always record room tone. It feels like a waste of time when you’re rushing to wrap, but when you’re sitting in a dark room three weeks later trying to patch a hole in a dialogue track, you will pray for those thirty seconds of “empty” room sound you were too impatient to capture.
The Bottom Line
You can’t fix a bad room with a better mic; learn to listen to the acoustics and the distance before you start worrying about the brand name on the recorder.
Coverage isn’t just for the camera; if you aren’t capturing clean, usable dialogue for every angle you’re shooting, you’re just making a very expensive silent film.
Respect the physics of sound as much as the physics of light—placement, proximity, and patience will always beat a high-end spec sheet.
The Invisible Half of the Frame
You can spend six months obsessing over the dynamic range of your sensor and the softness of your vintage glass, but if your audio is a hollow mess of room tone and mic rustle, you aren’t making a film—you’re just making a very expensive slideshow. A beautiful image might get someone to look, but it’s the sound that makes them stay.
Gethin Moreau
The Last Word on Sound
At the end of the day, recording audio on set isn’t about owning the latest digital recorder or a kit of high-end Sennheisers; it’s about the discipline of the setup. We’ve talked about the necessity of managing distance, the battle against ambient noise, and the importance of getting clean dialogue before you even think about the “pretty” shots. If you don’t respect the physics of sound—the way it bounces off a concrete wall or how a lavalier mic behaves when an actor turns their head—you are simply collecting data rather than capturing performance. You can fix a slightly underexposed frame in a color suite, but you can’t fix a clip of dialogue buried under the hum of an air conditioner. Good audio is invisible, and by the time you realize it’s bad, the shoot is already over.
My advice is to stop looking for the magic piece of gear that will solve your production’s problems. The best sound comes from a crew that listens more than they talk and a technician who understands that patience is a technical requirement. Whether you are shooting on a shoestring budget or a massive studio set, treat the sound with the same reverence you give the light. If you prioritize the clarity of the human voice and the texture of the environment, you’ll find that your footage actually has something to say. Don’t just record; listen.
