I spent three weeks on a documentary in the Highlands last autumn, fighting mist and failing light, only to watch a junior editor try to “fix” a crushed shadow profile by slapping a heavy creative LUT onto the timeline. It was painful. There is this pervasive, expensive myth circulating in every gear forum that a Look Up Table is some kind of digital alchemy—a way to turn flat, grey Log footage into something cinematic with the click of a button. But if you want to understand how LUTs should and should not be used, you have to stop treating them like a filter and start treating them like a mathematical map.
I’m not here to sell you a pack of fifty “Cinematic Teal and Orange” presets or tell you which software to buy. My goal is to strip away the hype and talk about the actual mechanics of the image. I’m going to show you where the math breaks, why your exposure is more important than your grade, and how to use these tools to enhance a deliberate look rather than trying to manufacture one out of thin air.
The Great Misconception How Luts Should and Should Not Be Used
The biggest mistake I see—and I’ve seen it from kids with REDs to guys with high-end mirrorless rigs—is treating a LUT like a filter on Instagram that magically “fixes” the look. People grab a heavy-handed, stylized LUT and slap it directly onto their raw files, wondering why the skin tones look like burnt orange or why the shadows are falling apart. You have to understand the distinction between technical vs creative LUTs. A technical LUT is there to do the heavy lifting of converting your flat, grey log footage into a standard color space so you can actually see what you’re doing. It’s a bridge, not a destination.
If you try to skip the foundation, you’re building a house on sand. You cannot simply apply a look and call it a day; you must be correcting exposure before LUT application. If your highlights are clipped or your shadows are crushed, the math inside that LUT is going to multiply those errors, turning a minor mistake into a digital disaster. A LUT is an intent, not a cure for a poorly lit scene. If the light wasn’t there when you hit record, no amount of color math is going to bring it back.
Technical vs Creative Luts Knowing the Difference Between Math and Mood
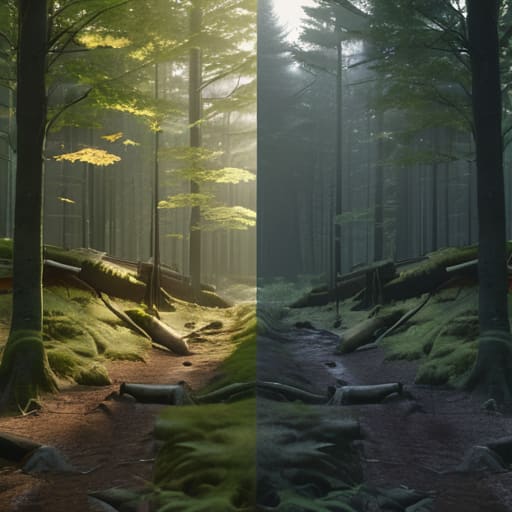
You need to understand that not all LUTs are born equal. There is a fundamental divide between the math used to make a signal readable and the math used to make a scene feel like a memory. When we talk about technical vs creative LUTs, we’re talking about two entirely different jobs. A technical LUT—usually a conversion LUT—is a utility. Its only purpose is to take that flat, muddy Log footage and map it into a standard color space like Rec.709 so your eyes can actually make sense of what’s happening on the monitor. It’s a bridge, not a destination.
The moment you start applying a creative LUT—the kind that promises a “Teal and Orange” look or a “Vintage Film” aesthetic—you’re entering the realm of intent. This is where people usually trip up. If you slap a heavy creative LUT directly onto your Log file without a proper transformation, you’re asking for trouble. You have to prioritize correcting exposure before LUT application; if your highlights are clipped or your shadows are crushed, the LUT will only serve to bake those mistakes into the image, making them impossible to recover later. Treat the technical LUT as your foundation, and the creative LUT as the paint. One builds the house, the other makes it look like home.
The Golden Rule of Correcting Exposure Before Lut Application

You can’t fix a mistake that happened in the field with a math equation in post. I’ve seen enough junior editors try to pull detail out of a crushed black point or a blown-out sky using a heavy-handed look, and it always ends the same way: with digital noise and a broken image. If you are correcting exposure before LUT application, you are working with the data you actually have, rather than asking a piece of software to hallucinate detail that isn’t there.
Think of it this way: a LUT is a multiplier. If you feed it a signal that is already clipping or sitting in the mud, it’s just going to multiply that error. When you’re applying LUTs to log footage, the first thing you should be doing isn’t slapping on a “film look,” but ensuring your exposure levels are sitting where they belong. Get your highlights under control and your shadows breathing first. Once the exposure is solid, the LUT will actually behave like a tool instead of a bandage, and you won’t spend your entire afternoon fighting color banding or artifacts that shouldn’t exist in the first place.
Applying Luts to Log Footage Without Breaking the Image

When you’re sitting there staring at a flat, gray Log image, the temptation to slap a heavy-handed conversion LUT on it and call it a day is immense. But if you’re applying LUTs to log footage directly onto your raw sensor data without a plan, you’re likely just compressing your dynamic range into a corner. I’ve seen too many juniors treat the LUT like the final destination rather than a waypoint. If you want to maintain the integrity of your shadows and highlights, you need to treat the LUT as a mathematical transform, not a stylistic hammer.
The real trick is in the order of operations. You shouldn’t be fighting the LUT; you should be preparing the footage to receive it. This means handling your primary corrections—exposure, white balance, and contrast—before the LUT touches the signal. If you find the look is too aggressive, don’t just reach for a different file; use your LUT intensity and opacity control to dial the strength back. It’s much easier to blend a look into your image than it is to try and claw back detail once you’ve already crushed your blacks or clipped your highlights.
Mastering Color Grading Workflow Best Practices for Consistent Results
If you want a finished product that doesn’t look like a collection of disparate clips glued together, you need to stop treating every shot as an isolated event. Consistency isn’t about finding one “perfect” LUT and slapping it on everything; it’s about establishing a repeatable color grading workflow best practices framework. I’ve seen too many editors try to force a look onto a scene where the lighting was fundamentally different from the previous shot. You can’t math your way out of a lighting mismatch. Start with your primary corrections—exposure, white balance, and contrast—before you even think about the stylistic layer.
Once you have a stable baseline, that’s when you introduce your creative intent. This is where most people stumble by cranking the settings to 100%. I always tell my assistants to treat LUT intensity and opacity control as their most important tools. If a LUT feels too heavy or makes your shadows look like plastic, back it off. Dial it down to 30% or 50% and then build the look from there. It’s much easier to layer subtle adjustments than it is to try and fix an image that you’ve already crushed into a corner.
Saving the Image Lut Intensity and Avoiding Color Banding
Once you’ve finally managed to get your exposure right and you’ve slapped a LUT onto your timeline, don’t just assume the job is done. The biggest mistake I see—usually from people who have spent more time watching YouTube reviews than looking at a waveform—is treating a LUT like an on/off switch. If you apply a creative look and the skin tones suddenly look like they’ve been dipped in orange marmalade, don’t go hunting for a new LUT. Just dial back the LUT intensity and opacity control. Most professional software lets you treat the LUT as a layer with its own opacity; if the look is too aggressive, back it off to 50% or 60%. It’s much easier to blend a look into your footage than it is to try and undo the damage of a look that’s fighting your actual image.
You also need to watch out for the digital equivalent of a bad haircut: color banding. When you’re applying LUTs to log footage that hasn’t been handled with care, or when you push a heavy look too far, those smooth gradients in a sky or a dark shadow will start to break apart into ugly, stepped lines. This usually happens because you’re stretching a limited amount of data too thin. If you start seeing those bands, it’s a sign you’ve overcooked the image. You can’t fix broken math with more math; if the banding is there, you’ve likely pushed the grade past the point of no return.
Five Hard Truths About Using LUTs Without Ruining Your Footage
- Stop using a LUT as a way to “fix” a shot that was poorly exposed. If your highlights are clipped or your shadows are crushed into a muddy mess, a LUT is just going to bake those mistakes into the file. Fix the exposure in the grade first; the LUT comes second.
- Treat your technical conversion LUT as a transparent window, not a heavy coat of paint. It should get your Log footage into a workable color space so you can see what you’re doing, but it shouldn’t be the final look. If you’re making creative decisions based on a heavy-handed creative LUT, you’re flying blind.
- Always keep your LUT intensity under control. Most of the “looks” you find online are cranked to 100% for the thumbnail, but in a real sequence, that’s usually too much. Back it off to 50% or 70% and see if the image breathes better. You can always add more, but you can’t take it back once it’s baked in.
- Don’t expect a LUT to solve a lack of lighting direction. I’ve seen people try to slap a “cinematic teal and orange” LUT on a flat, fluorescent-lit interview to try and add depth. It doesn’t work. A LUT changes the color math, but it won’t create the shadows or the separation that a well-placed key light would have provided.
- Test your LUT against a real scene, not just a single still. A LUT might look great on one beautiful sunset shot, but it might turn your skin tones into orange plastic the moment a character walks into a different light. If it doesn’t hold up across a variety of lighting conditions in your scene, it’s not a tool—it’s a trap.
The Bottom Line
A LUT is a starting point, not a destination; if you’re using it to “fix” a scene rather than to steer its mood, you’ve already lost the battle.
Get your exposure and white balance right in the camera first, because no amount of clever math in post can manufacture data that wasn’t captured in the first place.
Stop chasing the “look” and start focusing on the light; a well-lit shot on a cheap sensor will always outclass a broken, over-processed image from a cinema camera.
The Hard Truth About the "Look"
A LUT is a map, not a destination. If you try to use a heavy creative LUT to mask a scene that was shot with flat, muddy lighting, you aren’t “grading”—you’re just making your mistakes more expensive to look at. Fix your exposure and your light first; the LUT is just there to help you tell the story you’ve already captured.
Gethin Moreau
The Bottom Line
At the end of the day, a LUT is just a mathematical shortcut, not a substitute for a functioning workflow. We’ve covered the ground: use them for intent, not for fixing a broken exposure; understand the distinction between a technical transform and a creative look; and for heaven’s sake, don’t let a heavy-handed application crush your shadows or turn your highlights into digital mush. If you find yourself fighting a LUT to make an image look “normal,” you haven’t found a creative solution—you’ve just found a way to hide a mistake that should have been handled on set with a better light or a more careful exposure.
If you want my honest advice, stop looking for the “perfect” LUT that will do the heavy lifting for you. The best images I’ve ever seen weren’t born from a fancy preset; they were born from knowing exactly where the light was hitting the subject and how that light would behave once it hit the sensor. Use your tools to enhance the work you’ve already done, not to perform a miracle on work that wasn’t done right in the first place. Put the LUT aside for a moment, look at your raw footage, and ask yourself if the soul of the scene is actually there. If it is, the color will follow.
